iOS SDK
1. 前置准备
Section titled “1. 前置准备”- 在 FlareLane 控制台注册并创建一个项目。
2. 配置凭据
Section titled “2. 配置凭据”请按照以下指南,填写 FlareLane 发送推送通知所需的凭据。
3. Xcode 设置
Section titled “3. Xcode 设置”3-1. 添加 Capabilities
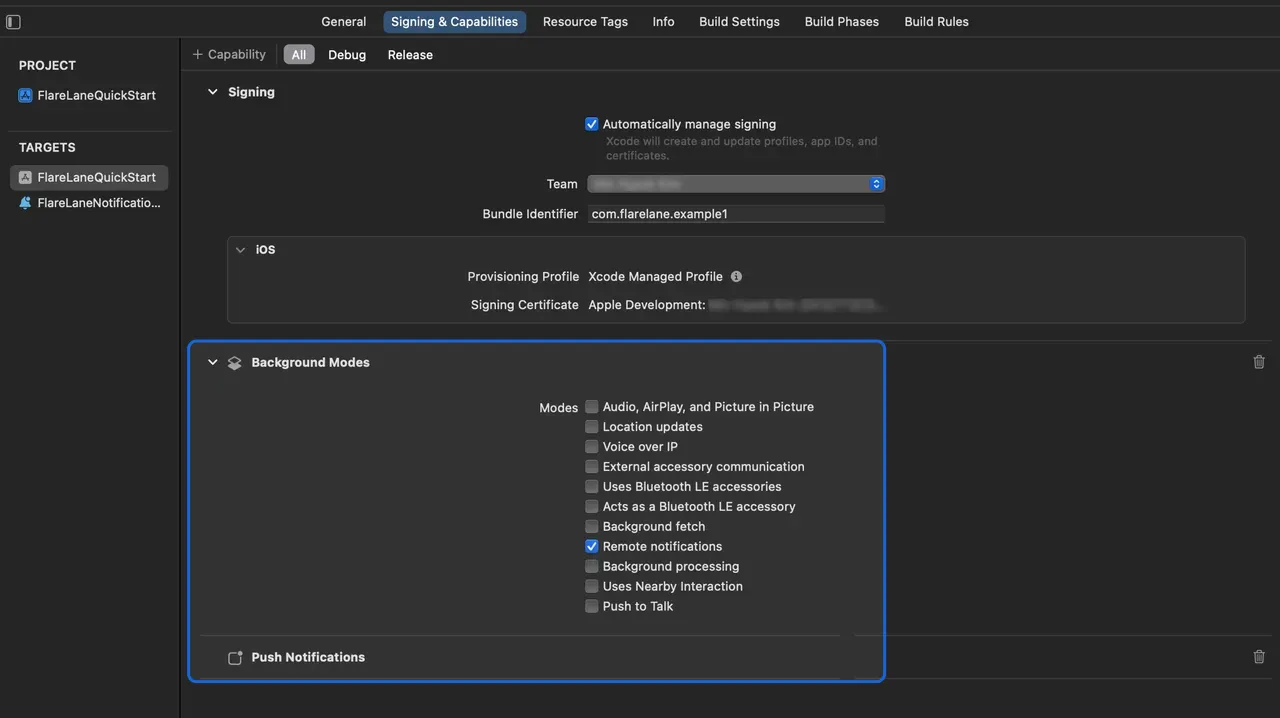
Section titled “3-1. 添加 Capabilities”进入目标的 Signing & Capabilities,点击左上角的 + Capability,添加 Push Notifications。
然后添加 Background Modes,并启用 Remote notifications。
3-2. 设置 Service Extension
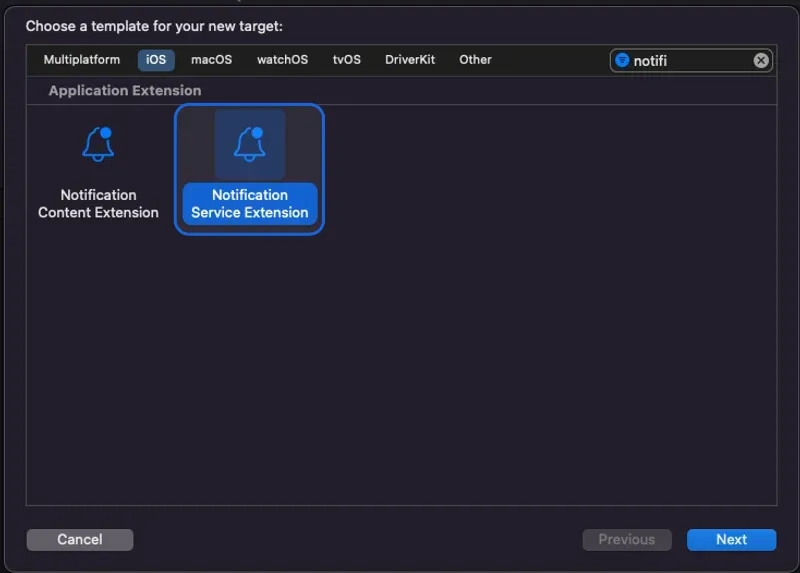
Section titled “3-2. 设置 Service Extension”在 iOS 上,需要 Notification Service Extension 才能附加图片等媒体内容。
在 Xcode 中,依次进入 File > New > Target,选择 Notification Service Extension。
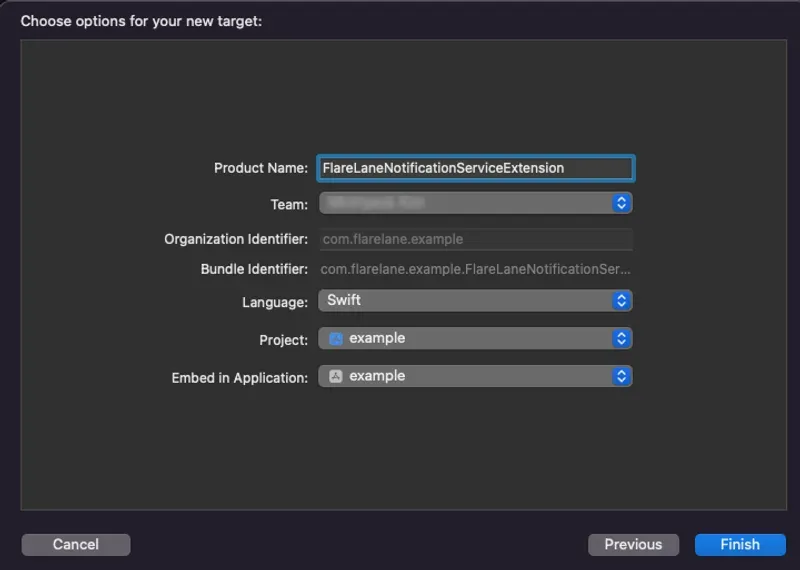
在 Product Name 中填写一个合适的名称。在本指南中,我们使用 FlareLaneNotificationServiceExtension。
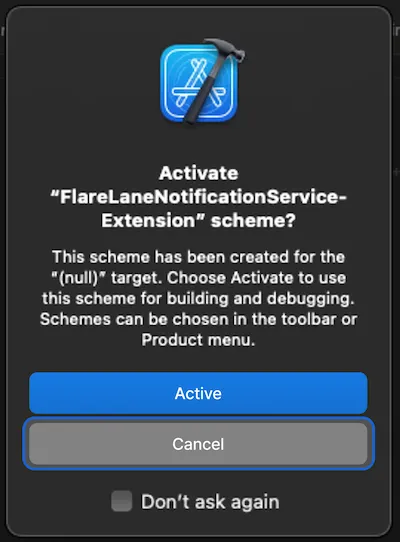
点击 Cancel,以免激活一个单独的 Scheme。
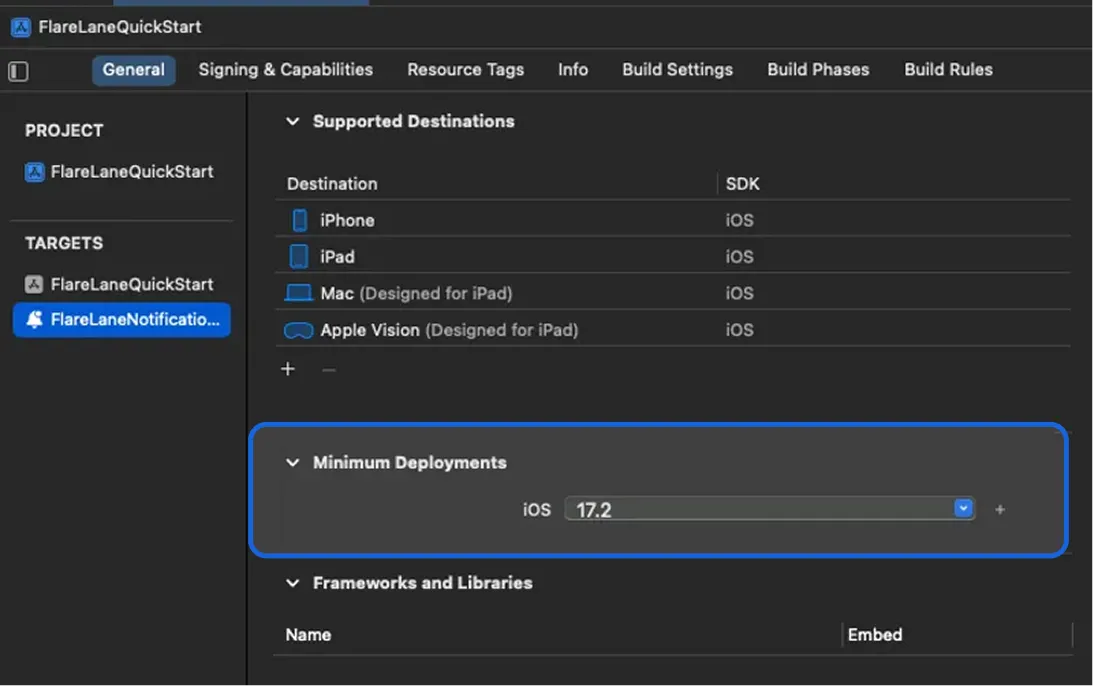
接下来,将刚创建的 Notification Service Extension Target 的 Minimum Deployments 版本设置为与主应用目标的版本一致。
3-3. 设置 App Group
Section titled “3-3. 设置 App Group”需要 App Group 才能在主应用与扩展之间同步数据。
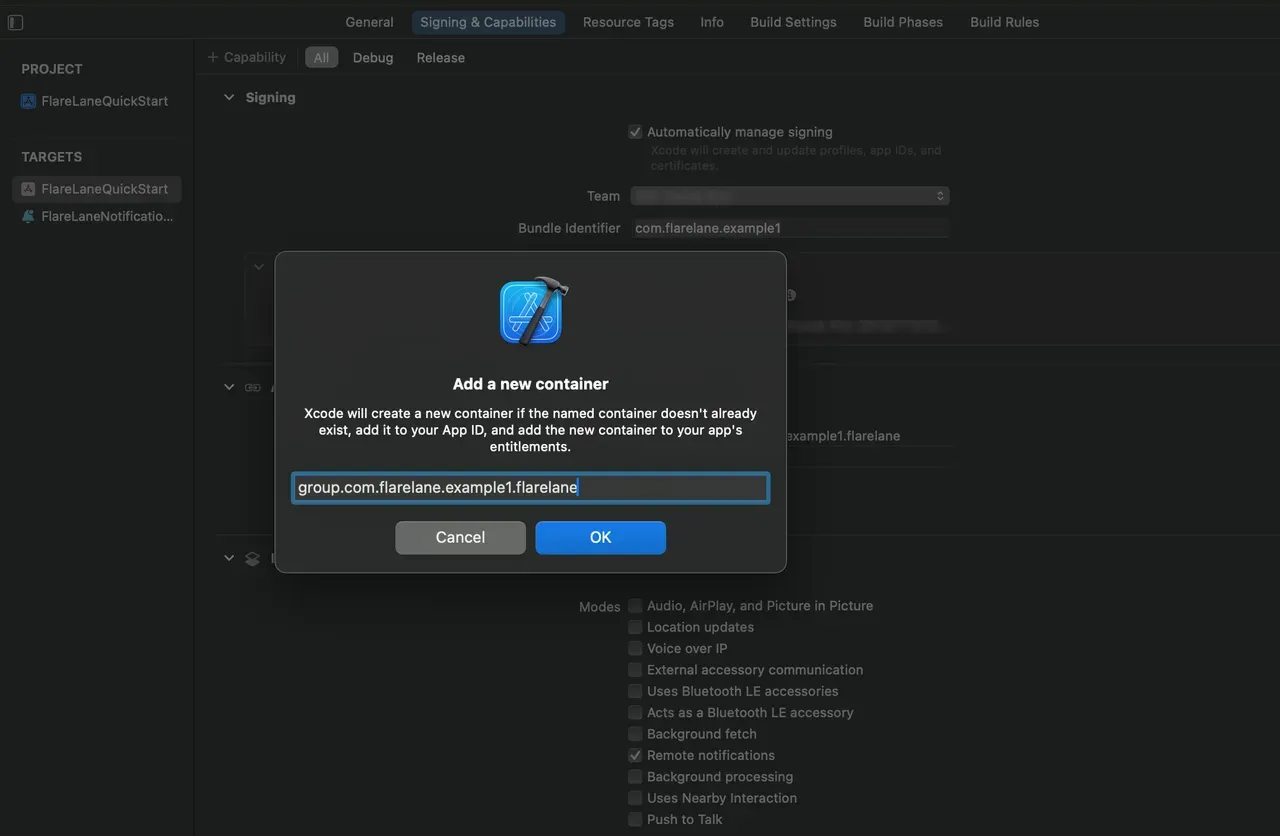
进入目标的 Signing & Capabilities,点击左上角的 + Capability,添加 App Groups。
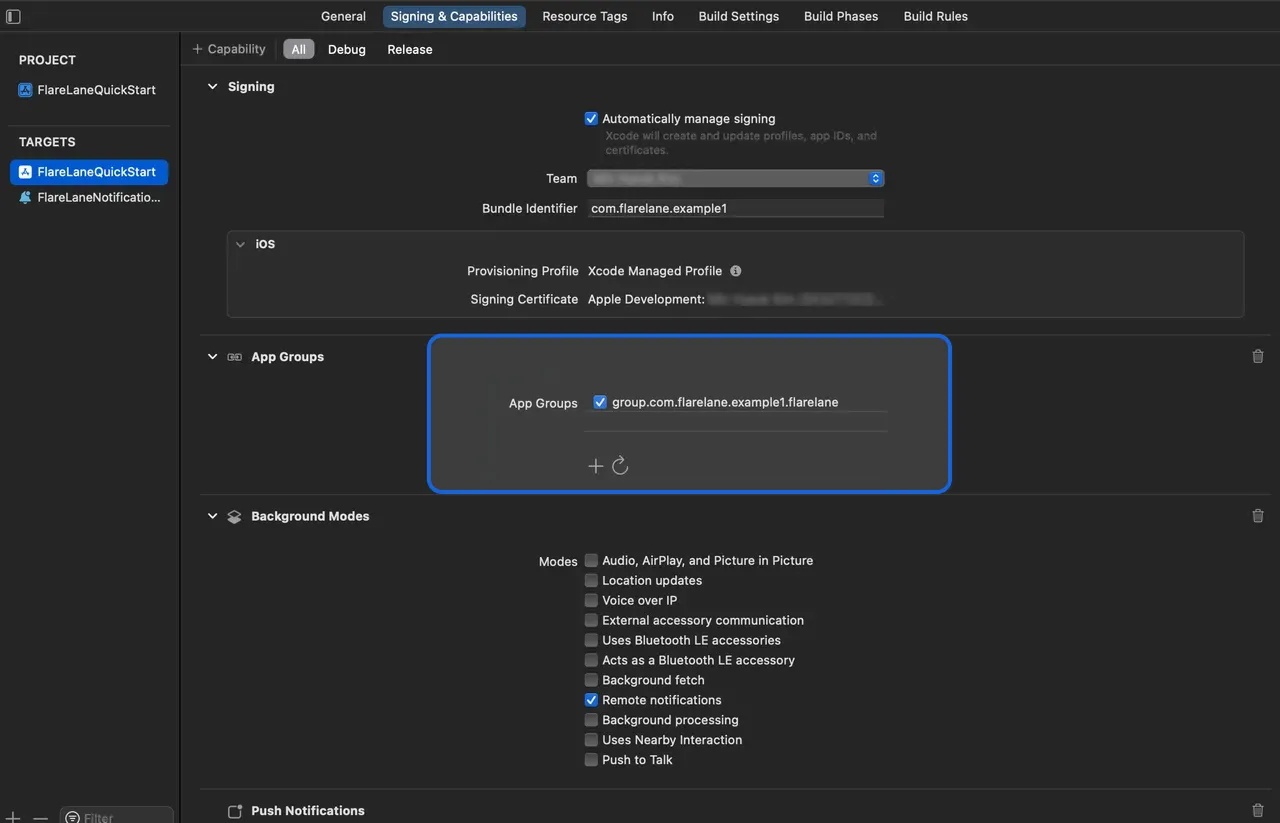
添加一个名为 group.bundleID.flarelane 的组**,其中 bundleID 必须与您主应用的 Bundle Identifier 一致。**
添加成功后,启用该 App Group。
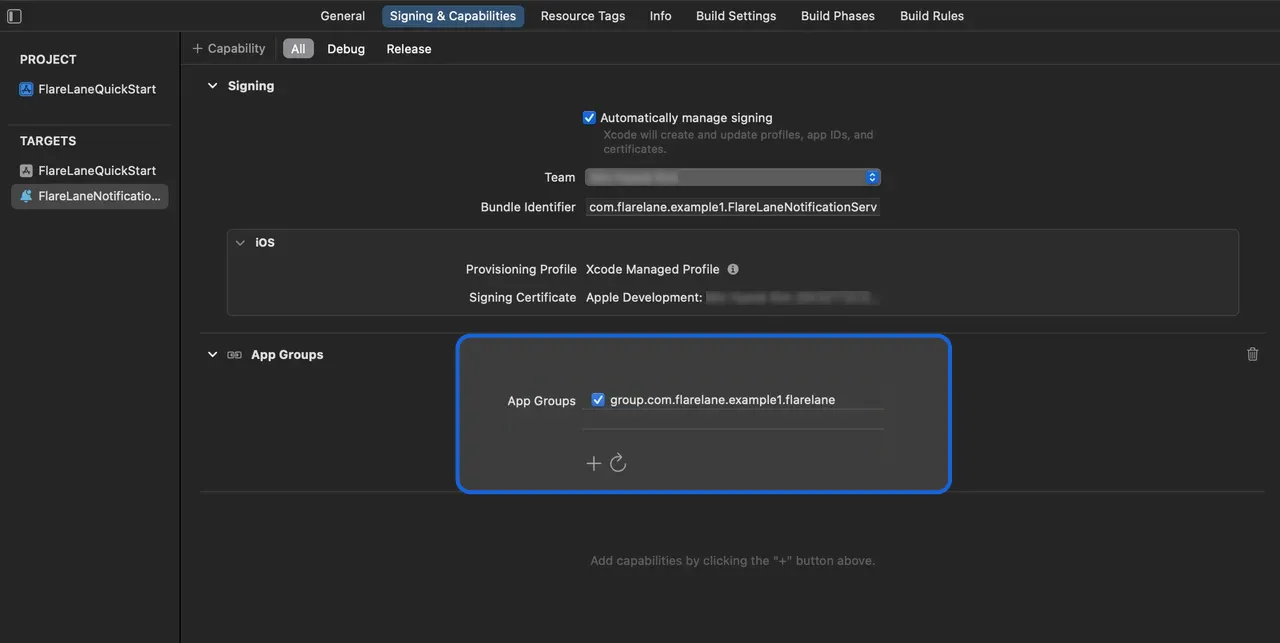
同样地,在您先前创建的扩展中添加并启用同名的 App Group。
4. 集成 SDK
Section titled “4. 集成 SDK”请从下面两种集成方式中,选择最适合您项目的一种。
CocoaPods
Section titled “CocoaPods”打开您的 Podfile,添加以下内容。
// Add the line below at the top of the file to enable Dynamic Frameworks.use_frameworks!
target 'YOUR_PROJECT_NAME' do  // Add the line below  pod 'FlareLane', '1.10.0'end
// Add the line below at the bottom of the file.// Set the target name to the Product Name of the extension you entered earlier.target 'FlareLaneNotificationServiceExtension' do  pod 'FlareLane', '1.10.0'end
运行 pod install 即可完成 SDK 的安装。
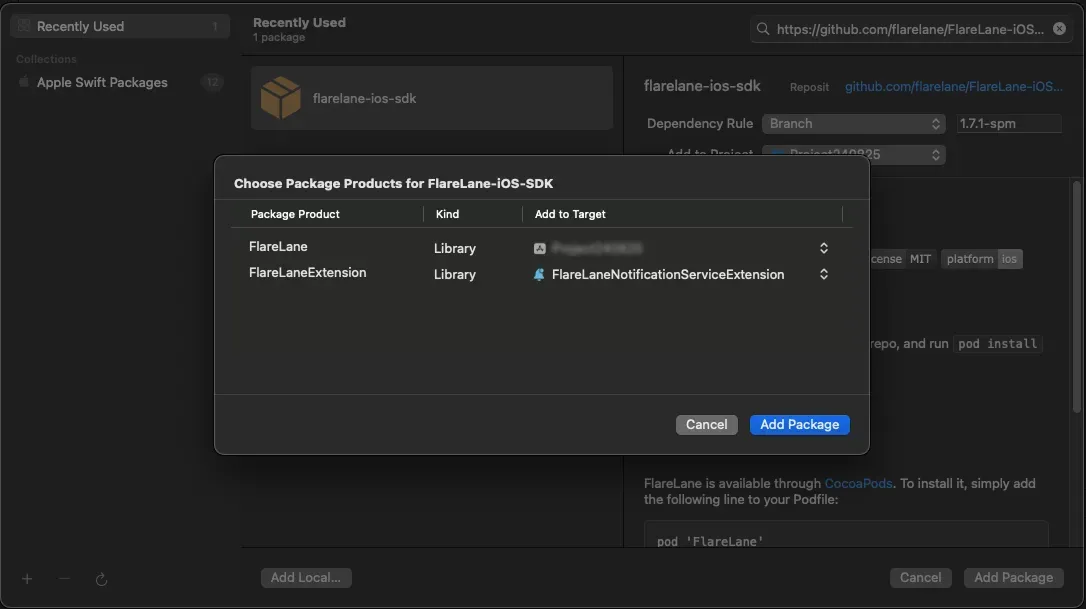
SPM(Swift Package Manager)
Section titled “SPM(Swift Package Manager)”将 https://github.com/flarelane/FlareLane-iOS-SDK 作为 package URL 填入,并将 Exact Version 设置为 1.9.3。
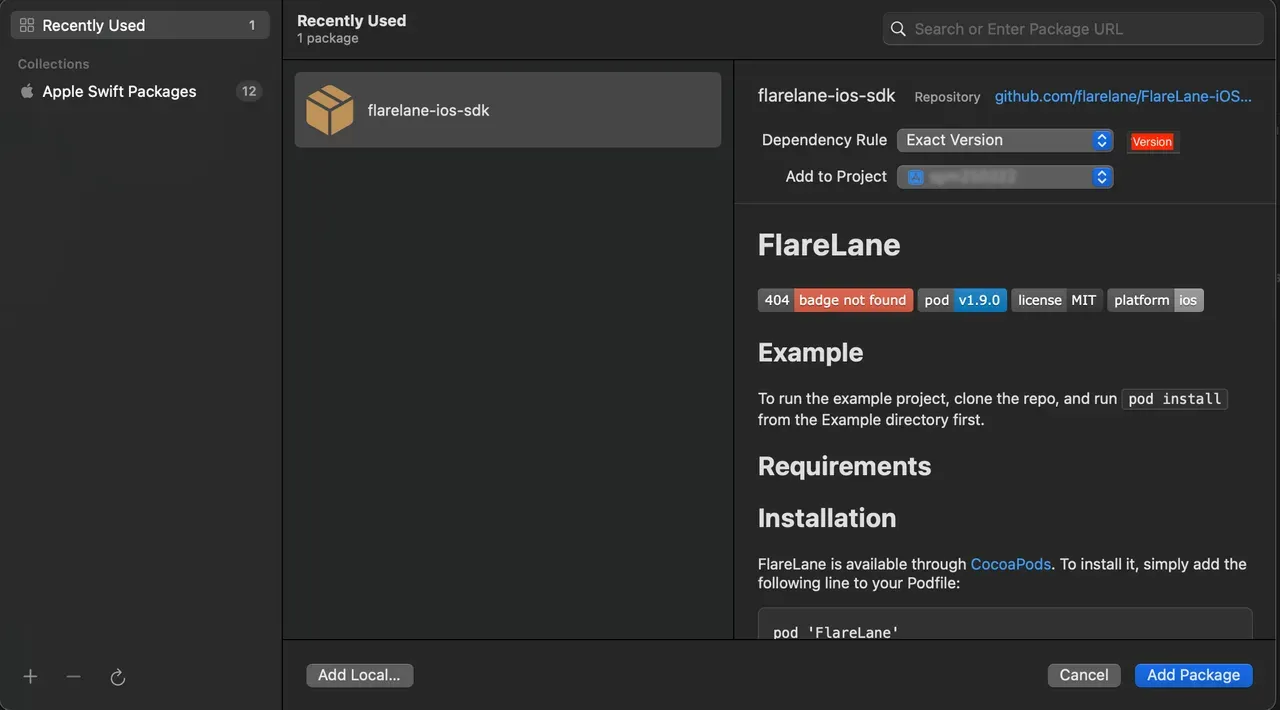
为主目标选择 FlareLane,为扩展目标选择 FlareLaneExtension。
5. 添加代码
Section titled “5. 添加代码”5-1.(仅 SwiftUI)创建 AppDelegate.swift
Section titled “5-1.(仅 SwiftUI)创建 AppDelegate.swift”SwiftUI 项目不包含 AppDelegate.swift 文件,因此您需要先创建一个。
新建一个 AppDelegate.swift 文件,并对现有的 <YOUR_PROJECT_NAME>App.swift 文件做少量改动。
import UIKit
class AppDelegate: NSObject, UIApplicationDelegate {  func application(_ application: UIApplication, didFinishLaunchingWithOptions launchOptions: [UIApplication.LaunchOptionsKey : Any]? = nil) -> Bool {    return true  }}
struct <YOUR_PROJECT_NAME>App: App { // Add the code below @UIApplicationDelegateAdaptor(AppDelegate.self) var appDelegate}5-2. 添加 AppDelegate 方法
Section titled “5-2. 添加 AppDelegate 方法”- 添加
application(:didFinishLaunchingWithOptions:)方法 - 添加
application(:didRegisterForRemoteNotificationsWithDeviceToken:)方法
import FlareLane
class AppDelegate: UIResponder, UIApplicationDelegate {  func application(_ application: UIApplication, didFinishLaunchingWithOptions launchOptions: [UIApplication.LaunchOptionsKey: Any]?) -> Bool {    // 1    // To control when the notification permission prompt appears, set the third parameter to false and call .subscribe() at the appropriate time.    FlareLane.initWithLaunchOptions(launchOptions, projectId: "PROJECT_ID", requestPermissionOnLaunch: true)  }
  func application(_ application: UIApplication, didRegisterForRemoteNotificationsWithDeviceToken deviceToken: Data) {    // 2    FlareLaneAppDelegate.shared.application(application, didRegisterForRemoteNotificationsWithDeviceToken: deviceToken)  }}
@import FlareLane;
@implementation AppDelegate- (BOOL)application:(UIApplication *)application didFinishLaunchingWithOptions:(NSDictionary *)launchOptions { // 1 // To control when the notification permission prompt appears, set the third parameter to false and call .subscribe() at the appropriate time. [FlareLane initWithLaunchOptions:launchOptions projectId:@"PROJECT_ID" requestPermissionOnLaunch:true];}
- (void)application:(UIApplication *)application didRegisterForRemoteNotificationsWithDeviceToken:(NSData *)deviceToken { // 2 [[FlareLaneAppDelegate shared] application:application didRegisterForRemoteNotificationsWithDeviceToken:deviceToken];}5-3. 添加 UNUserNotificationCenterDelegate 方法
Section titled “5-3. 添加 UNUserNotificationCenterDelegate 方法”- 将 AppDelegate 设置为 UNUserNotificationCenterDelegate
- 添加
userNotificationCenter(:willPresent:withCompletionHandler:)方法 - 添加对应的方法
import FlareLane
@mainclass AppDelegate: UIResponder, UIApplicationDelegate {  func application(_ application: UIApplication, didFinishLaunchingWithOptions launchOptions: [UIApplication.LaunchOptionsKey: Any]?) -> Bool {    // 1    UNUserNotificationCenter.current().delegate = self  }}
extension AppDelegate: UNUserNotificationCenterDelegate { // 2 func userNotificationCenter(_ center: UNUserNotificationCenter, willPresent notification: UNNotification, withCompletionHandler completionHandler: @escaping (UNNotificationPresentationOptions) -> Void) { FlareLaneNotificationCenter.shared.userNotificationCenter(center, willPresent: notification, withCompletionHandler: completionHandler) } // 3 func userNotificationCenter(_ center: UNUserNotificationCenter, didReceive response: UNNotificationResponse, withCompletionHandler completionHandler: @escaping () -> Void) { FlareLaneNotificationCenter.shared.userNotificationCenter(center, didReceive: response, withCompletionHandler: completionHandler) }}#import <UserNotifications/UserNotifications.h>
@interface AppDelegate : UIResponder <..., UNUserNotificationCenterDelegate>@end
// AppDelegate.m@implementation AppDelegate- (BOOL)application:(UIApplication *)application didFinishLaunchingWithOptions:(NSDictionary *)launchOptions{ // 1 [[UNUserNotificationCenter currentNotificationCenter] setDelegate: self];}
// 2- (void)userNotificationCenter:(UNUserNotificationCenter *)center willPresentNotification:(UNNotification *)notification withCompletionHandler:(void (^)(UNNotificationPresentationOptions))completionHandler{ [[FlareLaneNotificationCenter shared] userNotificationCenter:center willPresentNotification:notification withCompletionHandler:completionHandler];}// 3- (void)userNotificationCenter:(UNUserNotificationCenter *)center didReceiveNotificationResponse:(UNNotificationResponse *)response withCompletionHandler:(void (^)())completionHandler{ [[FlareLaneNotificationCenter shared] userNotificationCenter:center didReceiveNotificationResponse:response withCompletionHandler:completionHandler];}@end5-4. 添加 UNNotificationServiceExtension 方法
Section titled “5-4. 添加 UNNotificationServiceExtension 方法”- 添加
didReceive(:withContentHandler:)方法 - 添加
serviceExtensionTimeWillExpire()方法
import UserNotificationsimport FlareLane
class NotificationService: UNNotificationServiceExtension {  override func didReceive(_ request: UNNotificationRequest, withContentHandler contentHandler: @escaping (UNNotificationContent) -> Void) {    // 1    // Branch the logic so that only FlareLane's methods run for push notifications sent by FlareLane.    if FlareLaneNotificationServiceExtensionHelper.shared.isFlareLaneNotification(request) {      FlareLaneNotificationServiceExtensionHelper.shared.didReceive(request, withContentHandler: contentHandler)    } else {      // ...    }  }
  override func serviceExtensionTimeWillExpire() {    // 2    FlareLaneNotificationServiceExtensionHelper.shared.serviceExtensionTimeWillExpire()  }}
@import FlareLane;
@implementation NotificationService
- (void)didReceiveNotificationRequest:(UNNotificationRequest *)request withContentHandler:(void (^)(UNNotificationContent * _Nonnull))contentHandler { // 1 // Branch the logic so that only FlareLane's methods run for push notifications sent by FlareLane. if ([[FlareLaneNotificationServiceExtensionHelper shared] isFlareLaneNotification:request]) { [[FlareLaneNotificationServiceExtensionHelper shared] didReceive:request withContentHandler:contentHandler]; } else { // ... }}
- (void)serviceExtensionTimeWillExpire { // 2 [[FlareLaneNotificationServiceExtensionHelper shared] serviceExtensionTimeWillExpire];}6. 关联用户 ID
Section titled “6. 关联用户 ID”应用安装后,FlareLane 中创建的设备是一个「匿名设备」。通过关联您单独管理的唯一用户 ID,您可以将 FlareLane 的设备与您自己的用户 ID 进行匹配。
**关联用户 ID 有诸多好处。**它能让您区分会员和非会员,并随时按用户 ID 发送推送通知,因此我们建议在集成早期就完成此设置。
通常,您会在用户注册或登录成功时,通过 setUserId 函数关联用户 ID。
FlareLane.setUserId(userId: "USER_ID")[FlareLane setUserIdWithUserId: @"USER_ID"];7. 更多集成指南
Section titled “7. 更多集成指南”基于 WebView 的应用的桥接集成
Section titled “基于 WebView 的应用的桥接集成”- FlareLane 为基于 WebView 的应用提供了多种便利功能,使网站上的操作也能被应用识别。请参阅基于 WebView 的移动应用桥接指南。
自动 URL 处理
Section titled “自动 URL 处理”- 默认情况下,FlareLane 会**在点击推送通知时自动处理 https 链接和深度链接等 URL。**如果您需要实现自己的点击处理逻辑,请参阅禁用自动 URL 处理。
显示应用内消息(弹窗)
Section titled “显示应用内消息(弹窗)”- 请参阅应用内消息(弹窗),并在您希望弹窗出现的位置添加一行代码(displayInApp)。
| 指南 |
|---|
| 移动 SDK 参考 |
| iOS SDK 版本说明 |