Flutter SDK
1. 前置准备
Section titled “1. 前置准备”- 在 FlareLane 控制台注册并创建一个项目。
2. 配置认证凭据
Section titled “2. 配置认证凭据”请按照以下指南,填写 FlareLane 发送推送通知所需的认证凭据。
3. 安装 SDK
Section titled “3. 安装 SDK”在终端中进入项目的根目录,运行以下命令:
$ flutter pub add flarelane_flutter:1.9.24. Android 13 支持
Section titled “4. Android 13 支持”为了获得顺畅的推送通知授权体验,请将 compileSdkVersion 设置为至少 33。
// ...android { compileSdkVersion 33 // ...}// ...5. iOS 项目设置
Section titled “5. iOS 项目设置”5-1. 配置 Capabilities
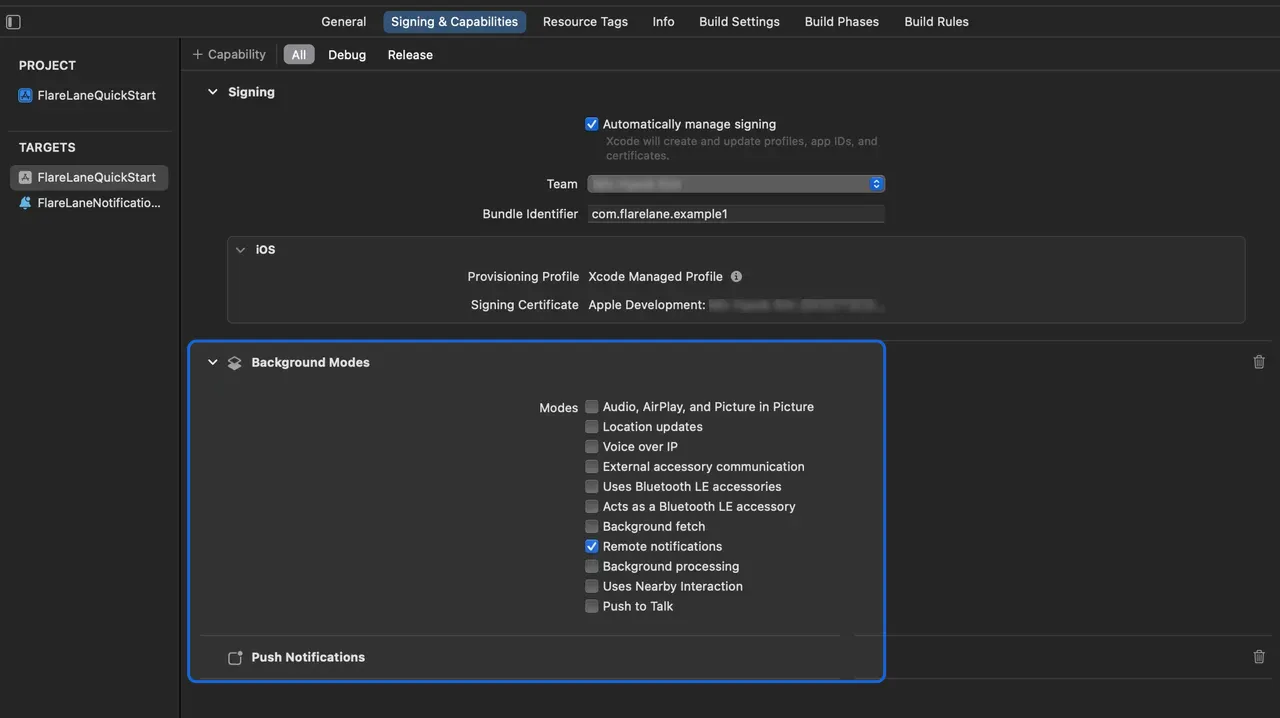
Section titled “5-1. 配置 Capabilities”进入目标的 Signing & Capabilities,点击左上角的 + Capability,选择 Push Notifications 添加。
同时选择 Background Modes,并启用 Remote notifications。
5-2. 设置 Service Extension
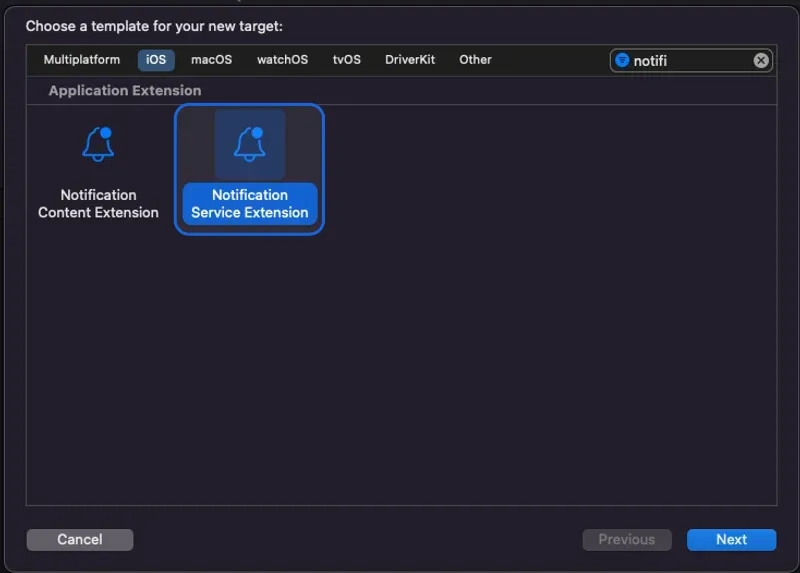
Section titled “5-2. 设置 Service Extension”在 iOS 上,需要创建 Notification Service Extension 才能附加图片等媒体内容。
在 Xcode 中,依次进入 File > New > Target,选择 Notification Service Extension。
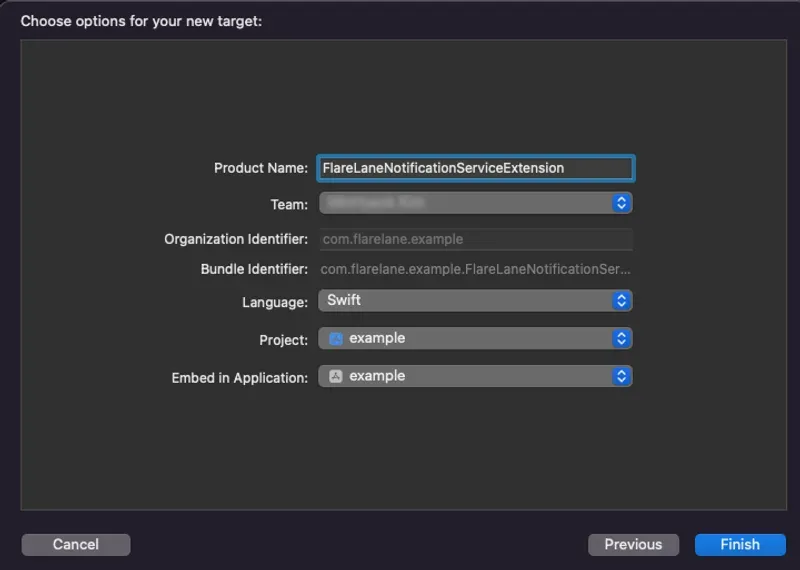
为 Product Name 填写一个合适的名称。在本指南中,我们使用 FlareLaneNotificationServiceExtension。
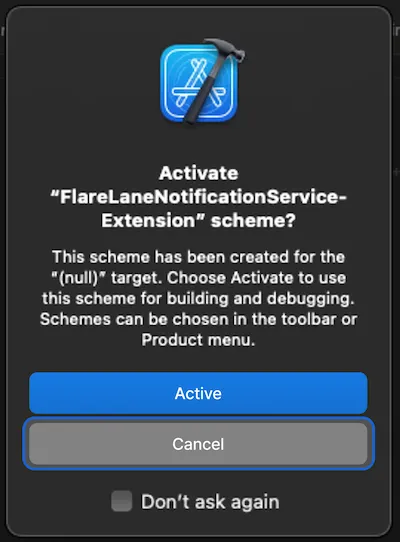
点击 Cancel,以免激活一个单独的 scheme。
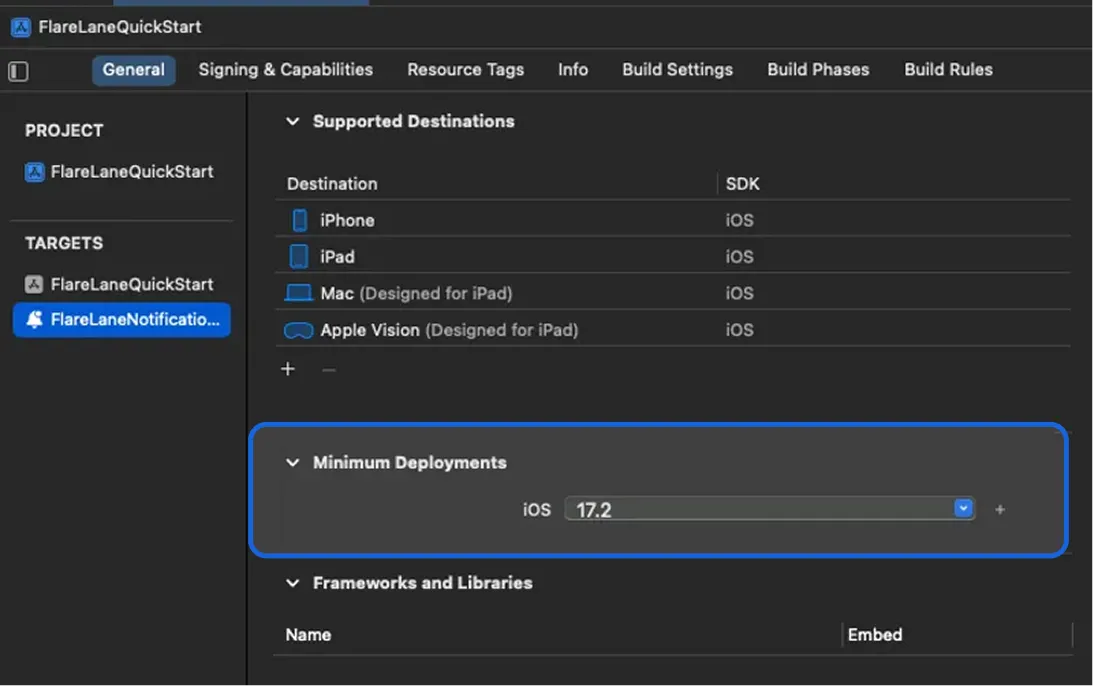
接下来,将刚创建的 Notification Service Extension Target 的 Minimum Deployments 版本设置为与主应用目标的版本一致。
5-3. 配置 App Group
Section titled “5-3. 配置 App Group”为了在应用与扩展之间同步数据,您需要配置一个 App Group。
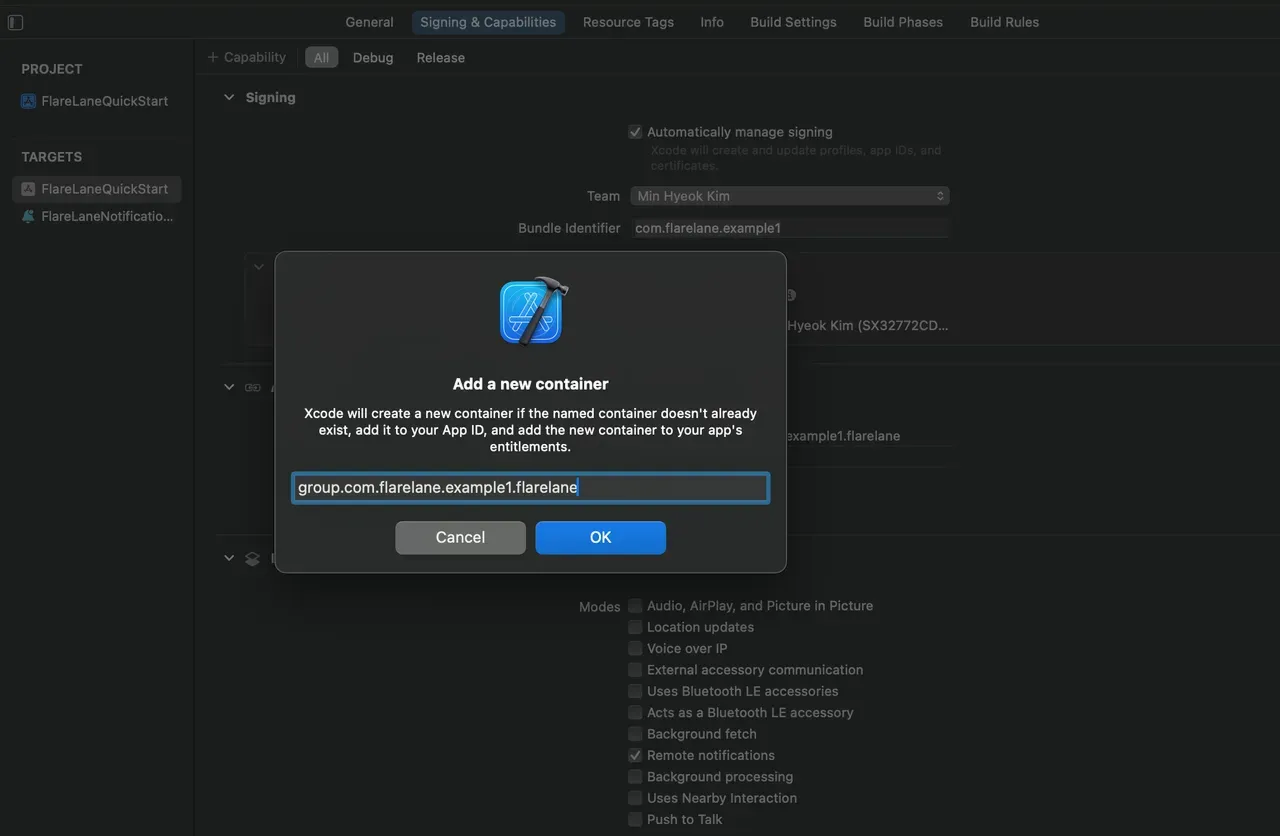
进入目标的 Signing & Capabilities,点击左上角的 + Capability,选择 App Groups 添加。
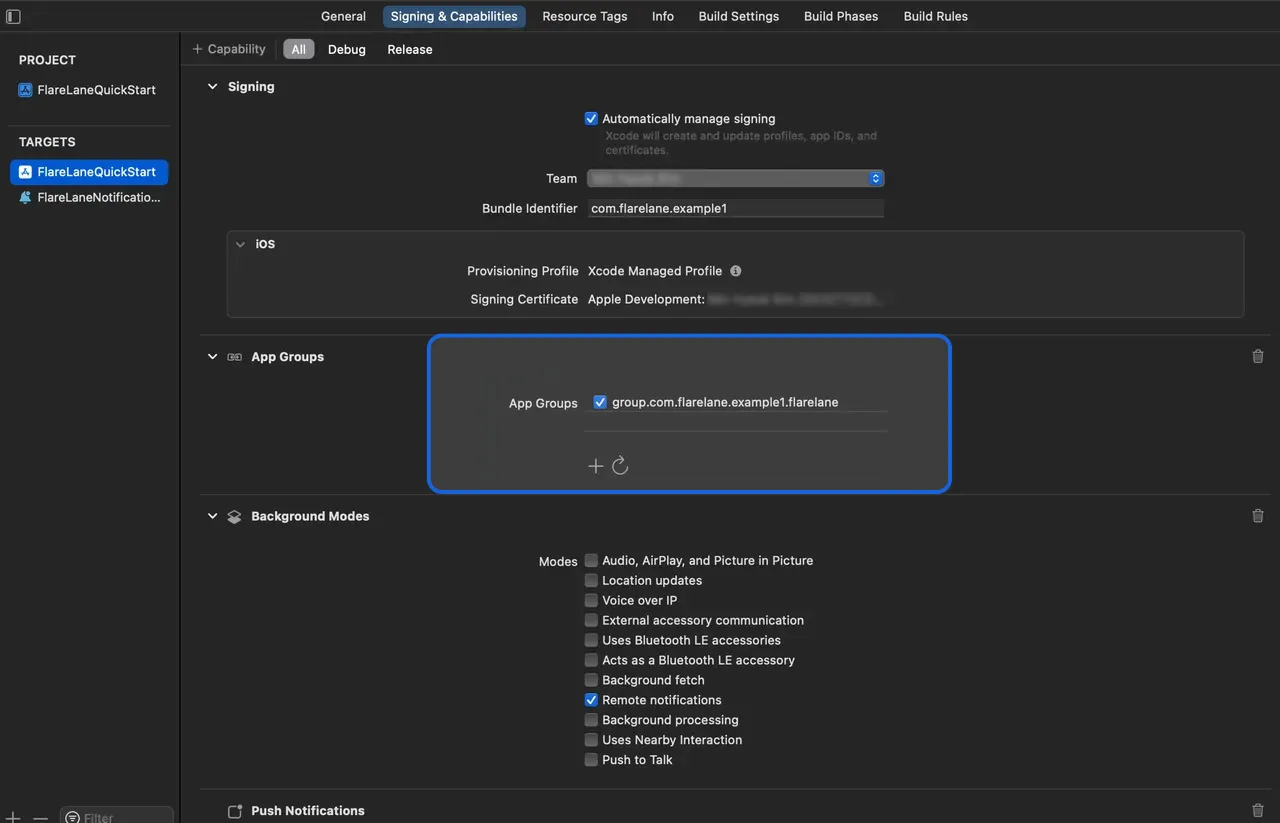
添加一个名为 group.bundleID.flarelane 的组**,其中 bundleID 必须与您应用的 Bundle Identifier 一致。**
添加成功后,启用该 App Group。
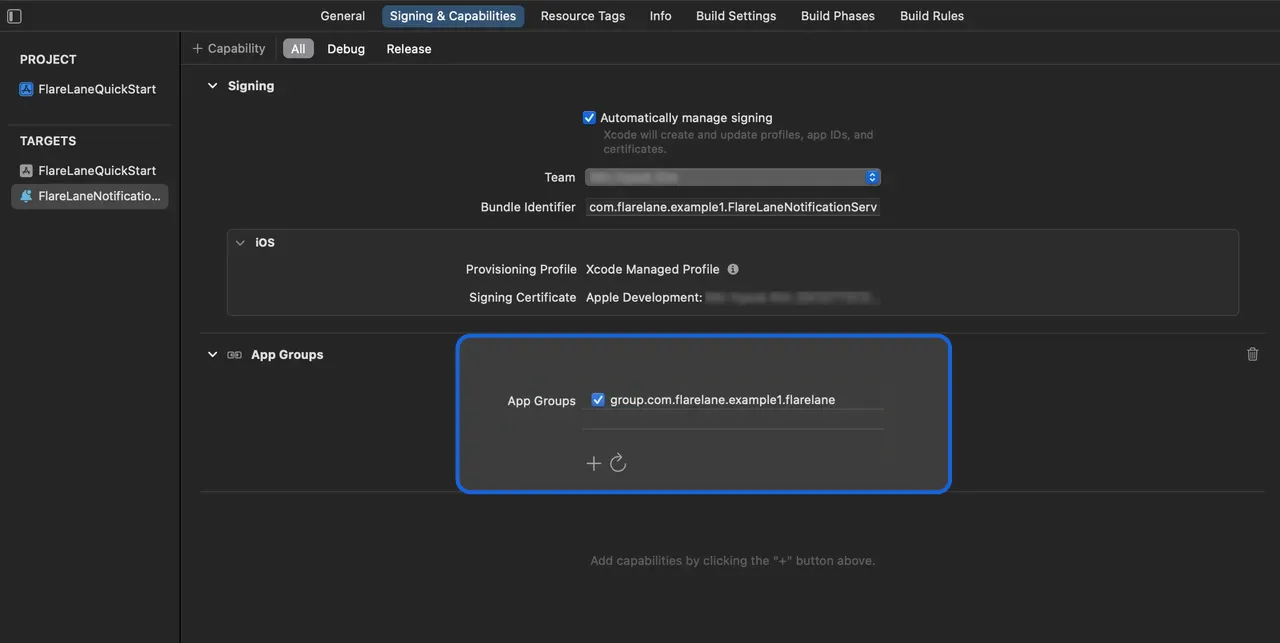
同样地,在您先前创建的扩展中添加并启用同名的 App Group。
接下来,打开 ios 目录下的 Podfile,添加以下内容:
// Add the lines below at the bottom of the file.// Set the target name to the Product Name of the extension you entered earlier.target 'FlareLaneNotificationServiceExtension' do pod 'FlareLane', '1.9.2'end运行 pod install 即可完成 SDK 的安装。
5-4. 添加 AppDelegate 方法
Section titled “5-4. 添加 AppDelegate 方法”- 添加
application(:didRegisterForRemoteNotificationsWithDeviceToken:)的处理方法
import FlareLane
class AppDelegate: FlutterAppDelegate {  override func application(_ application: UIApplication, didRegisterForRemoteNotificationsWithDeviceToken deviceToken: Data) {    // 2    FlareLaneAppDelegate.shared.application(application, didRegisterForRemoteNotificationsWithDeviceToken: deviceToken)  }}
@import FlareLane;
@implementation AppDelegate- (void)application:(UIApplication *)application didRegisterForRemoteNotificationsWithDeviceToken:(NSData *)deviceToken { // 2 [[FlareLaneAppDelegate shared] application:application didRegisterForRemoteNotificationsWithDeviceToken:deviceToken];}5-5. 添加 UNUserNotificationCenterDelegate 方法
Section titled “5-5. 添加 UNUserNotificationCenterDelegate 方法”- 将 UNUserNotificationCenterDelegate 指定给 AppDelegate
- 添加
userNotificationCenter(:willPresent:withCompletionHandler:)的处理方法 - 添加一个处理方法
import FlareLane
@main@objc class AppDelegate: FlutterAppDelegate {  override func application(_ application: UIApplication, didFinishLaunchingWithOptions launchOptions: [UIApplication.LaunchOptionsKey: Any]?) -> Bool {    // 1    UNUserNotificationCenter.current().delegate = self  }
  override func userNotificationCenter(_ center: UNUserNotificationCenter, willPresent notification: UNNotification, withCompletionHandler completionHandler: @escaping (UNNotificationPresentationOptions) -> Void) {    // 2    FlareLaneNotificationCenter.shared.userNotificationCenter(center, willPresent: notification, withCompletionHandler: completionHandler)  }
override func userNotificationCenter(_ center: UNUserNotificationCenter, didReceive response: UNNotificationResponse, withCompletionHandler completionHandler: @escaping () -> Void) { // 3 FlareLaneNotificationCenter.shared.userNotificationCenter(center, didReceive: response, withCompletionHandler: completionHandler) }}#import <UserNotifications/UserNotifications.h>
@interface AppDelegate : UIResponder <..., UNUserNotificationCenterDelegate>@end
// AppDelegate.m@implementation AppDelegate- (BOOL)application:(UIApplication *)application didFinishLaunchingWithOptions:(NSDictionary *)launchOptions{ // 1 [[UNUserNotificationCenter currentNotificationCenter] setDelegate: self];}
// 2- (void)userNotificationCenter:(UNUserNotificationCenter *)center willPresentNotification:(UNNotification *)notification withCompletionHandler:(void (^)(UNNotificationPresentationOptions))completionHandler{ [[FlareLaneNotificationCenter shared] userNotificationCenter:center willPresentNotification:notification withCompletionHandler:completionHandler];}// 3- (void)userNotificationCenter:(UNUserNotificationCenter *)center didReceiveNotificationResponse:(UNNotificationResponse *)response withCompletionHandler:(void (^)())completionHandler{ [[FlareLaneNotificationCenter shared] userNotificationCenter:center didReceiveNotificationResponse:response withCompletionHandler:completionHandler];}@end5-6. 添加 UNNotificationServiceExtension 方法
Section titled “5-6. 添加 UNNotificationServiceExtension 方法”- 添加
didReceive(:withContentHandler:)的处理方法 - 添加
serviceExtensionTimeWillExpire()的处理方法
import UserNotificationsimport FlareLane
class NotificationService: UNNotificationServiceExtension {  override func didReceive(_ request: UNNotificationRequest, withContentHandler contentHandler: @escaping (UNNotificationContent) -> Void) {    // 1    // Branch so that only FlareLane's methods run for push notifications sent by FlareLane.    if FlareLaneNotificationServiceExtensionHelper.shared.isFlareLaneNotification(request) {      FlareLaneNotificationServiceExtensionHelper.shared.didReceive(request, withContentHandler: contentHandler)    } else {      // ...    }  }
  override func serviceExtensionTimeWillExpire() {    // 2    FlareLaneNotificationServiceExtensionHelper.shared.serviceExtensionTimeWillExpire()  }}
@import FlareLane;
@implementation NotificationService
- (void)didReceiveNotificationRequest:(UNNotificationRequest *)request withContentHandler:(void (^)(UNNotificationContent * _Nonnull))contentHandler { // 1 // Branch so that only FlareLane's methods run for push notifications sent by FlareLane. if ([[FlareLaneNotificationServiceExtensionHelper shared] isFlareLaneNotification:request]) { [[FlareLaneNotificationServiceExtensionHelper shared] didReceive:request withContentHandler:contentHandler]; } else { // ... }}
- (void)serviceExtensionTimeWillExpire { // 2 [[FlareLaneNotificationServiceExtensionHelper shared] serviceExtensionTimeWillExpire];}6. 编写初始化代码
Section titled “6. 编写初始化代码”在您的 main.dart 文件中添加以下初始化代码。您可以在控制台的 [Project] 页面找到您的项目 ID。
import 'package:flarelane_flutter/flarelane_flutter.dart';
void main() {  // Make sure the initialization code runs after ensureInitialized().  WidgetsFlutterBinding.ensureInitialized();
  // Add the initialization code below.  // To control when the notification permission prompt appears, set the second parameter to false and call .subscribe() at the appropriate time.  FlareLane.shared.initialize("PROJECT_ID", requestPermissionOnLaunch: true);
  runApp(...);}
7. 关联用户 ID
Section titled “7. 关联用户 ID”应用安装后,FlareLane 中创建的设备是一个「匿名设备」。通过关联您单独管理的唯一用户 ID,您可以将 FlareLane 的设备与您自己的用户 ID 进行匹配。
**关联用户 ID 有诸多好处。**它能让您区分已注册和未注册用户,并随时按用户 ID 发送推送通知,因此我们建议在初次集成时就完成此设置。
通常,您会在用户注册或登录成功时,通过 setUserId 函数关联用户 ID。
FlareLane.shared.setUserId("USER_ID");8. 更多集成指南
Section titled “8. 更多集成指南”自动 URL 处理
Section titled “自动 URL 处理”- 默认情况下,FlareLane 会在点击推送通知时自动处理 https 链接和深度链接等 URL。如果您需要实现自定义的点击处理逻辑,请参阅禁用自动 URL 处理。
显示应用内消息(弹窗)
Section titled “显示应用内消息(弹窗)”- 请参阅应用内消息(弹窗),并在您希望弹窗出现的位置添加一行代码(displayInApp)。
Android
Section titled “Android”设置通知颜色
Section titled “设置通知颜色”<resources> <!-- Change the notification color --> <string name="flarelane_notification_accent_color">#BC0000</string></resources>设置通知渠道
Section titled “设置通知渠道”- 请参阅 Android:设置通知渠道,配置适合您服务的 Android 通知渠道。
设置通知图标
Section titled “设置通知图标”- 请参阅 Android:设置通知图标,配置您的图标资源。
| 指南 |
|---|
| 移动 SDK 参考 |
| Flutter SDK 版本说明 |