iOS SDK
1. 사전 준비
Section titled “1. 사전 준비”- 플레어레인 관리자 에서 회원가입 후 프로젝트 생성
2. 인증 값 설정
Section titled “2. 인증 값 설정”아래 가이드를 참고하여 플레어레인에 푸시 발송에 필요한 인증 값을 입력합니다.
3. Xcode 설정
Section titled “3. Xcode 설정”3-1. Capability 설정
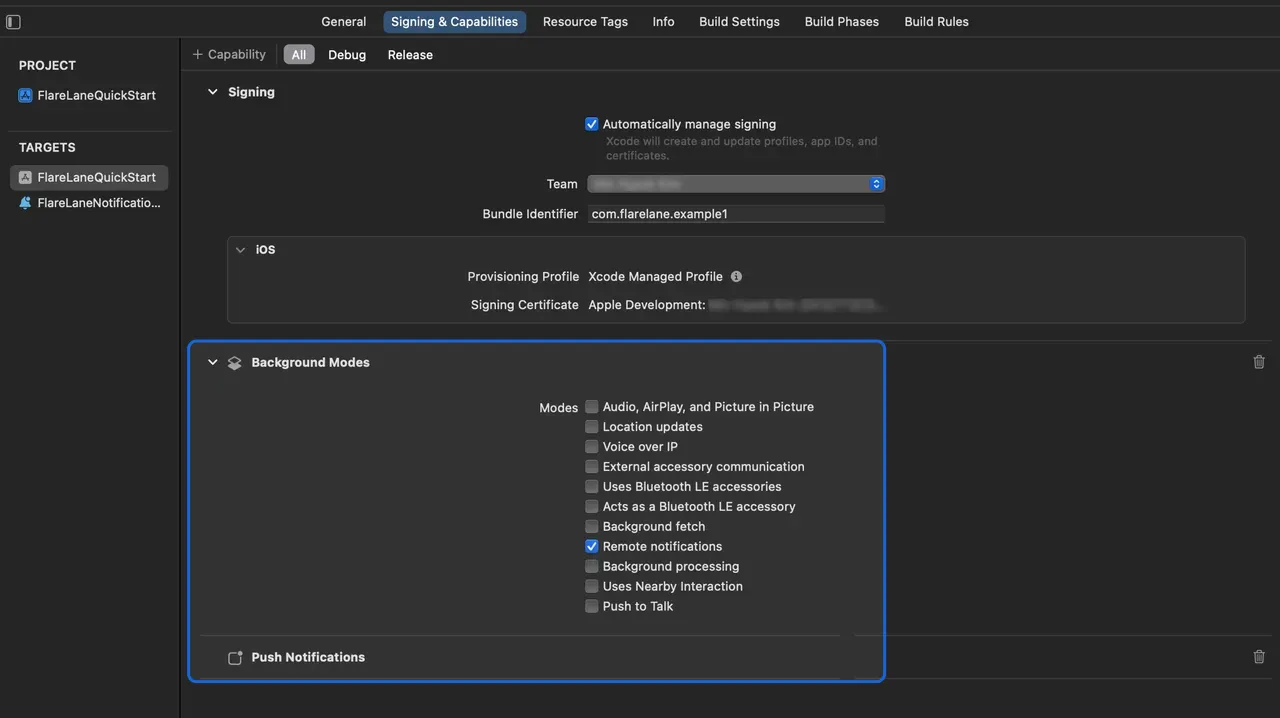
Section titled “3-1. Capability 설정”Target 의 Signing & Capabilites으로 들어와 좌상단의 + Capability > Push Notifications 를 선택하여 추가합니다.
또한 Background Modes 를 선택한 뒤 Remote notifications 를 추가합니다.
3-2. Service Extension 설정
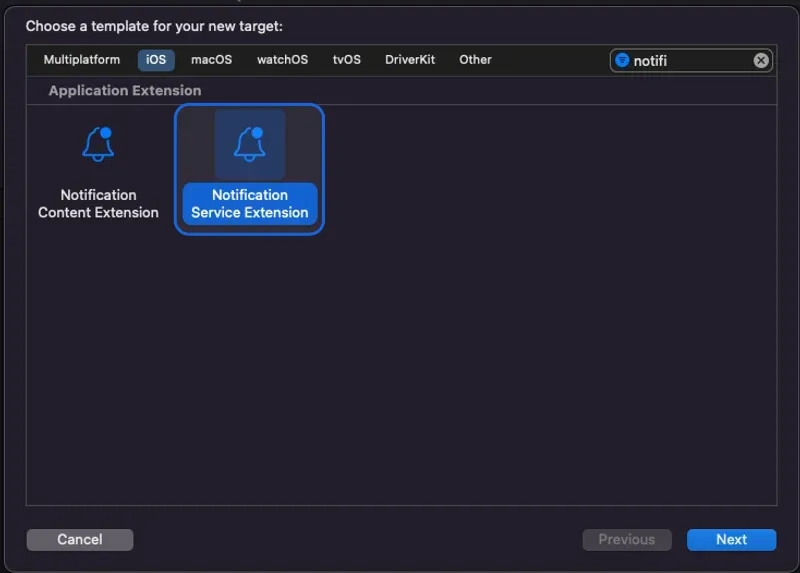
Section titled “3-2. Service Extension 설정”iOS에서는 이미지 등 미디어 첨부를 위해 Notification Service Extension 생성이 필요합니다.
Xcode 에서 File > New > Target 에서 Notification Service Extension 을 선택합니다.
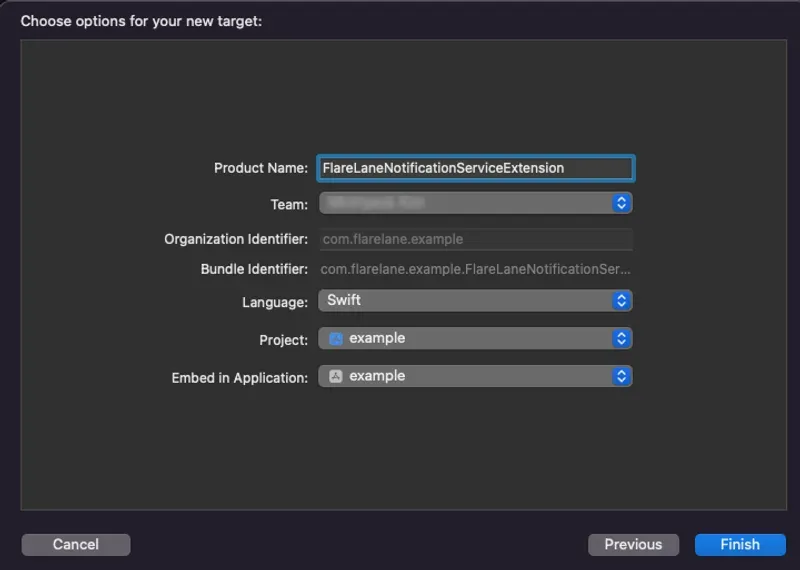
Product Name에 적절한 이름을 입력합니다. 본 가이드에서는 FlareLaneNotificationServiceExtension 으로 정의하겠습니다.
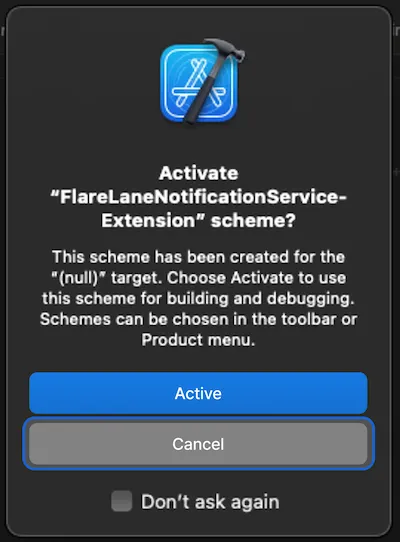
Cancel을 클릭하여 별도의 Scheme은 활성화하지 않도록 합니다.
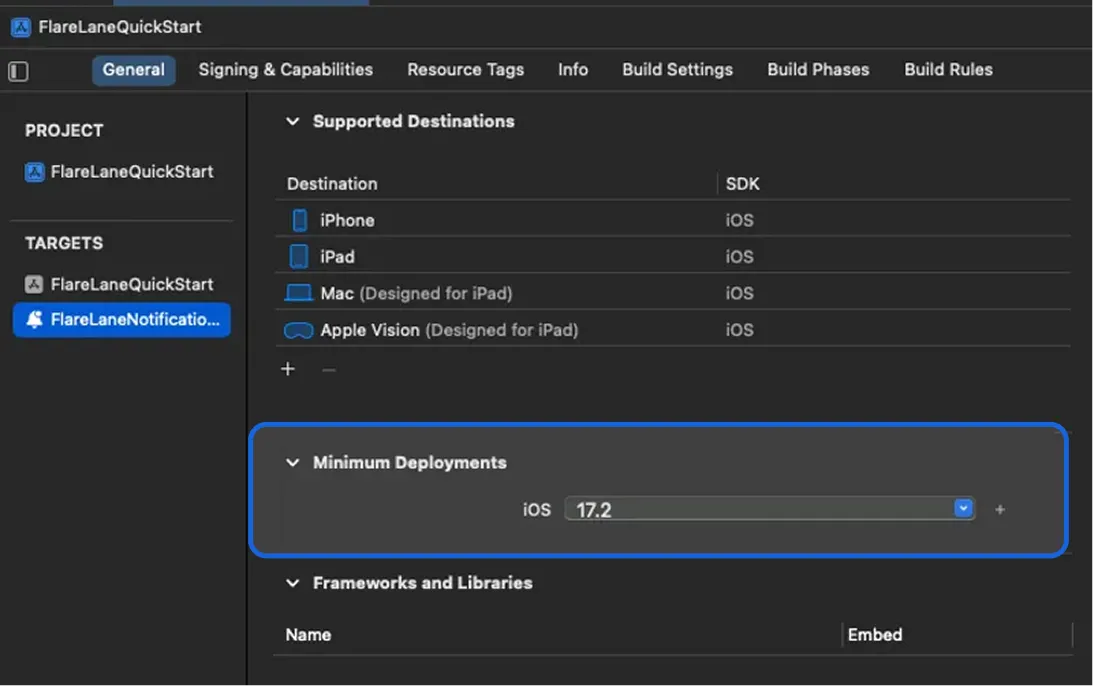
이후 이번에 만든 Notification Service Extension Target의 Minimum Deployments 버전을 현재 사용 중인 메인 앱 Target의 버전과 동일하게 설정합니다.
3-3. App Group 설정
Section titled “3-3. App Group 설정”본 앱과 Extension 간 데이터 동기화를 위해서는 App Group 설정이 필요합니다.
Target 의 Signing & Capabilites으로 들어와 좌상단의 + Capability > App Groups 를 선택하여 추가합니다.
group.번들ID.flarelane이라는 이름의 그룹을 추가합니다. 여기서 번들ID는 본 앱의 Bundle Identifier와 일치해야 합니다.
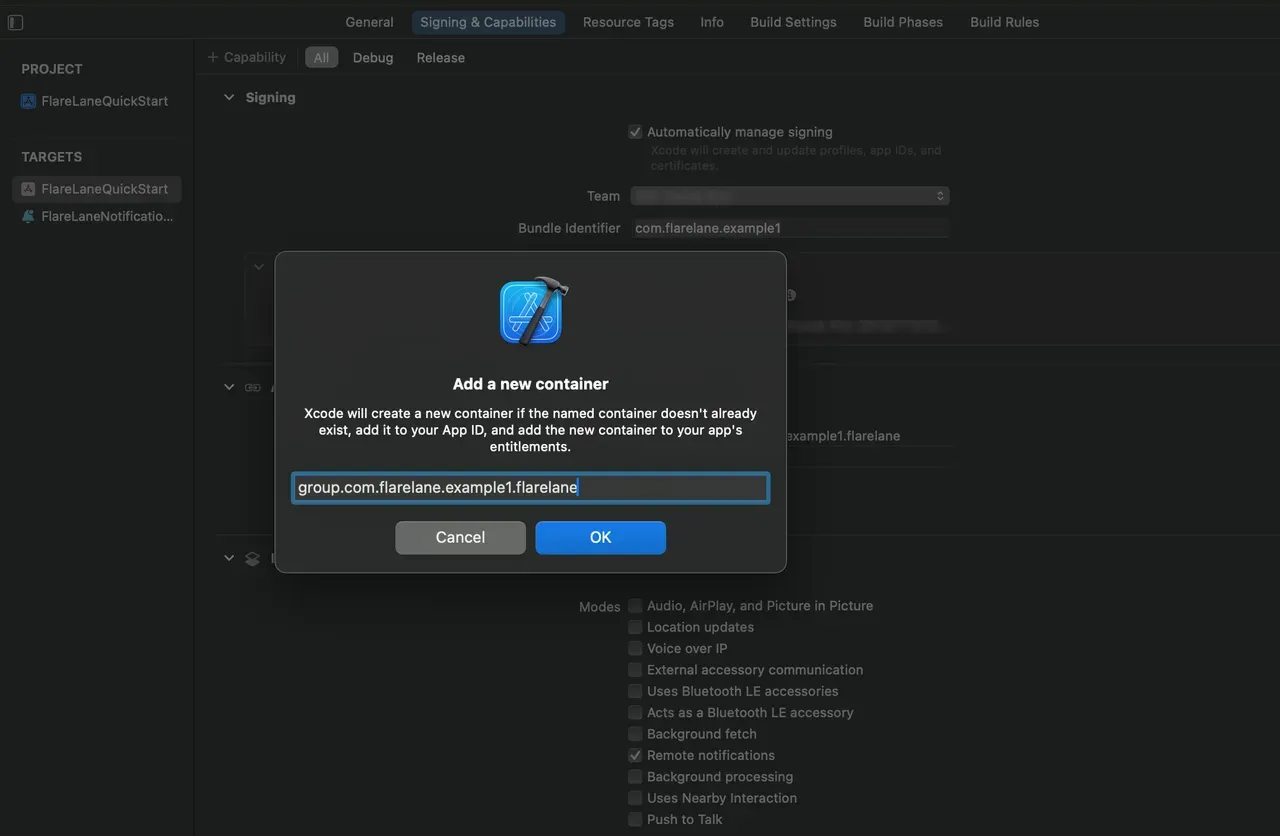
정상적으로 추가 후 해당 App Group을 활성화합니다.
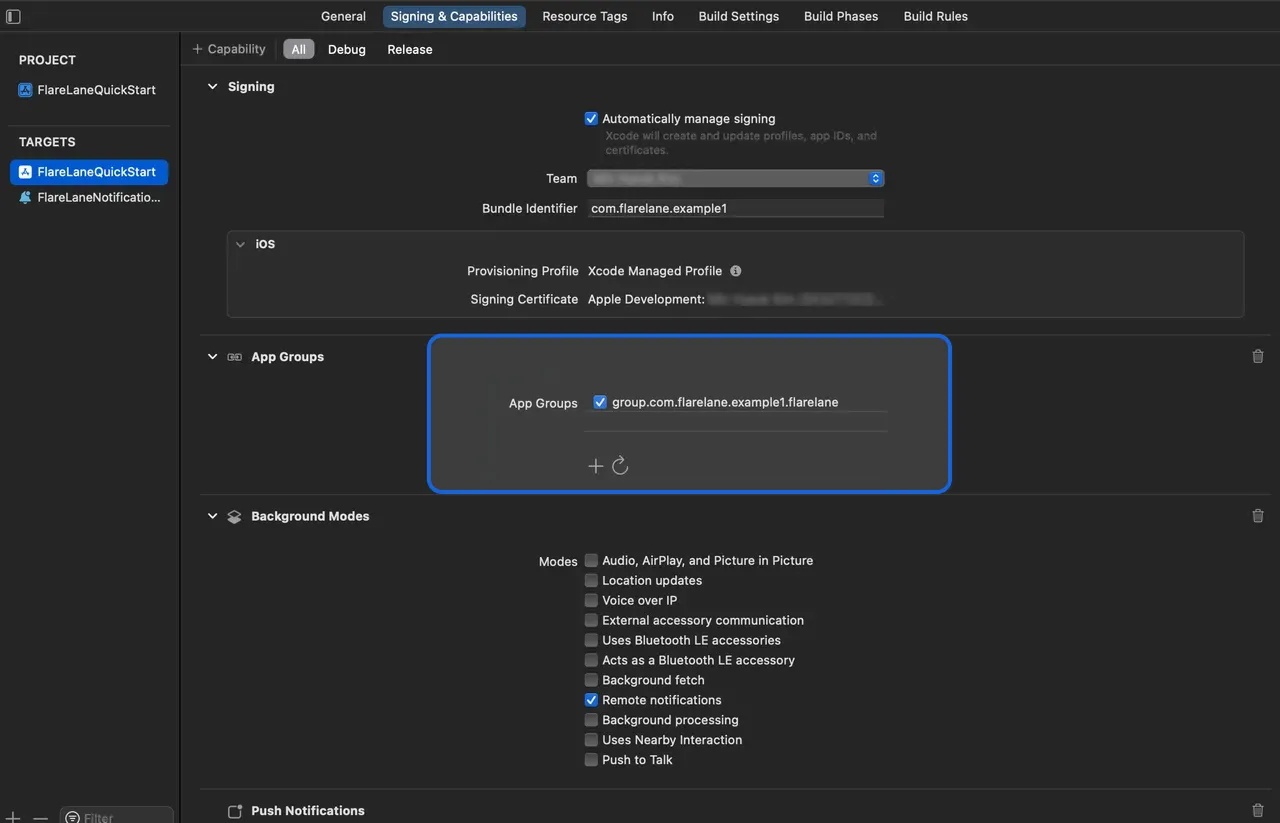
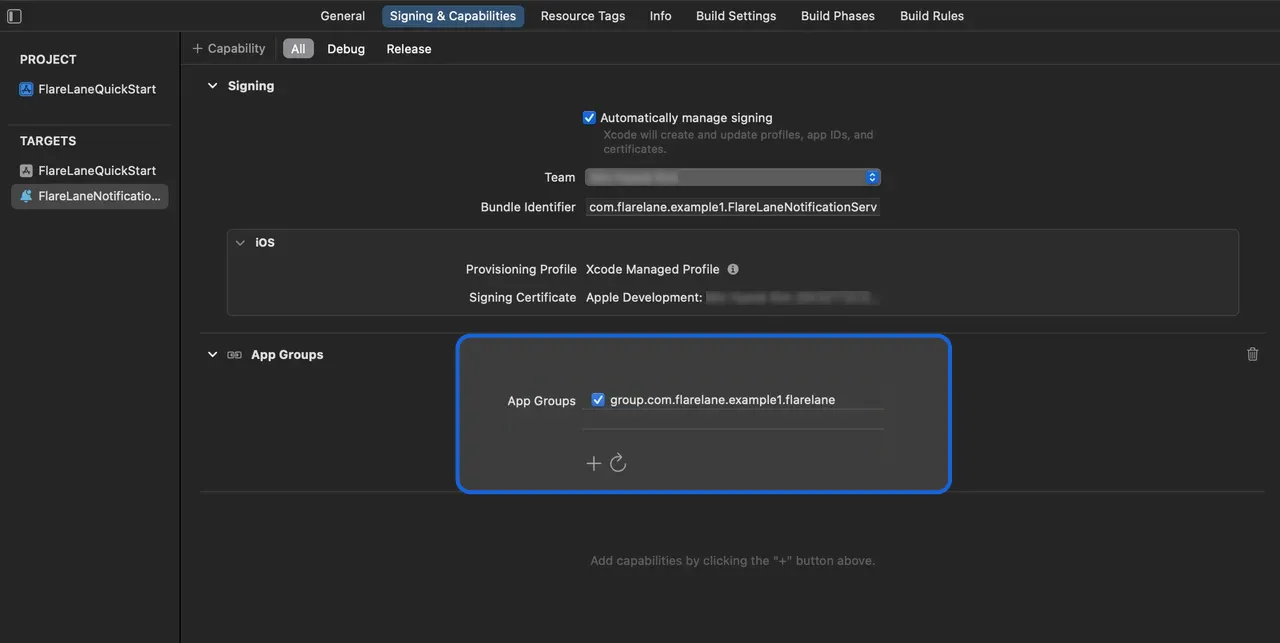
마찬가지로 이전에 만든 Extension 에서도 동일한 이름의 App Group을 추가하고 활성화합니다.
4. SDK 연동
Section titled “4. SDK 연동”다음 두 가지 연동 방법 중 우리 프로젝트에 적합한 하나의 방법을 선택하여 연동합니다.
CocoaPods
Section titled “CocoaPods”Podfile을 열고 다음과 같이 추가합니다.
// 파일 최상단에 아래 줄을 추가하여 Dynamic Framework를 활성화합니다.use_frameworks!
target 'YOUR_PROJECT_NAME' do  // 아래 줄 추가  pod 'FlareLane', '1.10.0'end
// 파일 최하단의 아래 줄 추가// 앞서 입력한 Extension의 Product Name을 target 이름으로 설정합니다.target 'FlareLaneNotificationServiceExtension' do  pod 'FlareLane', '1.10.0'end
pod install 를 실행하여 SDK 설치를 완료합니다.
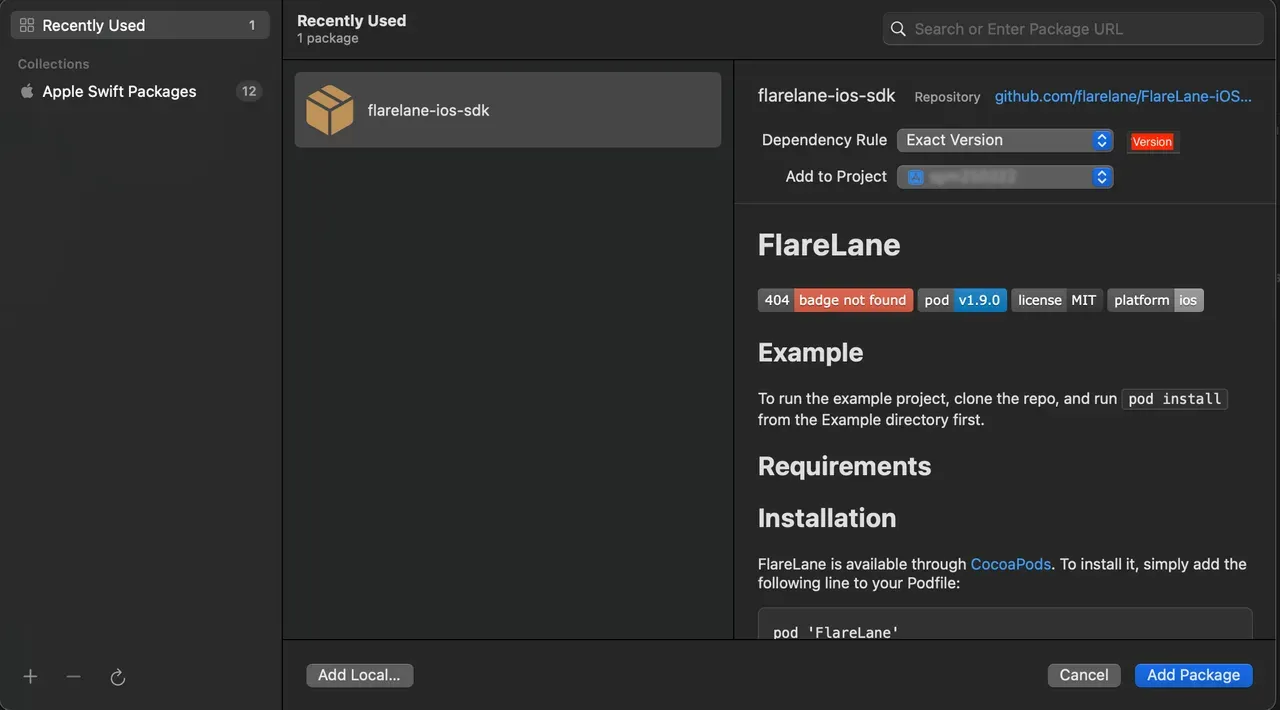
SPM (Swift Package Manager)
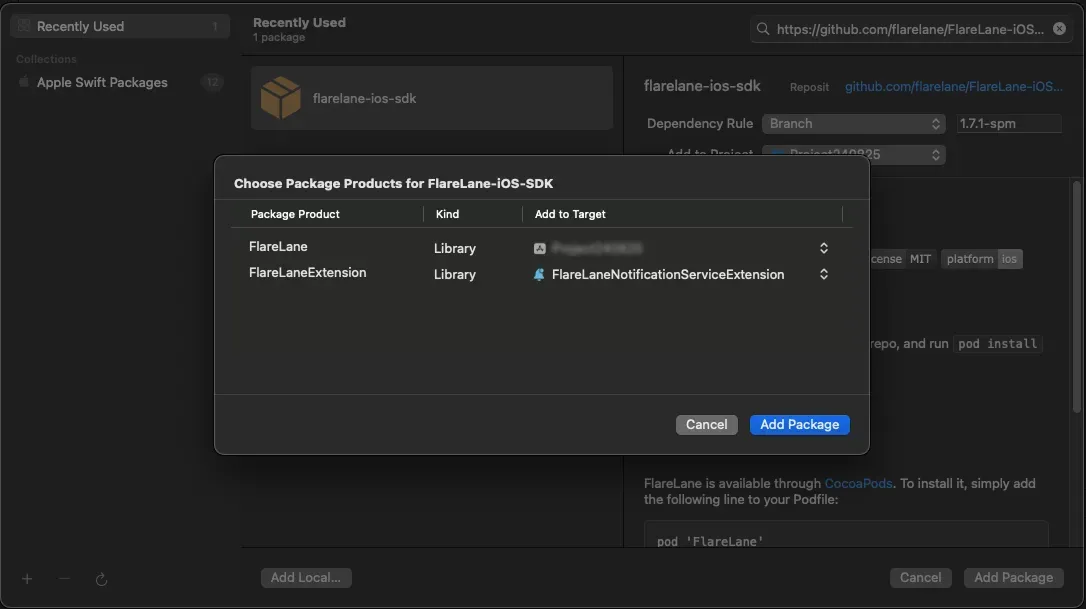
Section titled “SPM (Swift Package Manager)”패키지 URL에 https://github.com/flarelane/FlareLane-iOS-SDK을 입력하고, Exact Version 1.9.3을 입력합니다.
메인 타겟에는 FlareLane을, Extension 타겟에는 FlareLaneExtension 을 각각 선택합니다.
5. 코드 작성
Section titled “5. 코드 작성”5-1. (SwiftUI만) AppDelegate.swift 생성
Section titled “5-1. (SwiftUI만) AppDelegate.swift 생성”SwiftUI 프로젝트는 AppDelegate.swift가 생성되어 있지 않기 때문에 먼저 파일 생성이 필요합니다.
AppDelegate.swift파일을 새로 만들고 기존 <YOUR_PROJECT_NAME>App.swift 파일을 일부 수정합니다.
import UIKit
class AppDelegate: NSObject, UIApplicationDelegate {  func application(_ application: UIApplication, didFinishLaunchingWithOptions launchOptions: [UIApplication.LaunchOptionsKey : Any]? = nil) -> Bool {    return true  }}
struct <YOUR_PROJECT_NAME>App: App { // 아래 코드 추가 @UIApplicationDelegateAdaptor(AppDelegate.self) var appDelegate}5-2. AppDelegate 메소드 추가
Section titled “5-2. AppDelegate 메소드 추가”application(:didFinishLaunchingWithOptions:)대응 메소드 추가application(:didRegisterForRemoteNotificationsWithDeviceToken:)대응 메소드 추가
import FlareLane
class AppDelegate: UIResponder, UIApplicationDelegate {  func application(_ application: UIApplication, didFinishLaunchingWithOptions launchOptions: [UIApplication.LaunchOptionsKey: Any]?) -> Bool {    // 1    // 알림 권한 팝업 타이밍을 제어하려면 세 번째 파라미터를 false로 설정 후 적절한 시점에 .subscribe() 함수 실행    FlareLane.initWithLaunchOptions(launchOptions, projectId: "PROJECT_ID", requestPermissionOnLaunch: true)  }
  func application(_ application: UIApplication, didRegisterForRemoteNotificationsWithDeviceToken deviceToken: Data) {    // 2    FlareLaneAppDelegate.shared.application(application, didRegisterForRemoteNotificationsWithDeviceToken: deviceToken)  }}
@import FlareLane;
@implementation AppDelegate- (BOOL)application:(UIApplication *)application didFinishLaunchingWithOptions:(NSDictionary *)launchOptions { // 1 // 알림 권한 팝업 타이밍을 제어하려면 세 번째 파라미터를 false로 설정 후 적절한 시점에 .subscribe() 함수 실행 [FlareLane initWithLaunchOptions:launchOptions projectId:@"PROJECT_ID" requestPermissionOnLaunch:true];}
- (void)application:(UIApplication *)application didRegisterForRemoteNotificationsWithDeviceToken:(NSData *)deviceToken { // 2 [[FlareLaneAppDelegate shared] application:application didRegisterForRemoteNotificationsWithDeviceToken:deviceToken];}5-3. UNUserNotificationCenterDelegate 메소드 추가
Section titled “5-3. UNUserNotificationCenterDelegate 메소드 추가”- AppDelegate에 UNUserNotificationCenterDelegate 지정
userNotificationCenter(:willPresent:withCompletionHandler:)대응 메소드 추가- 대응 메소드 추가
import FlareLane
@mainclass AppDelegate: UIResponder, UIApplicationDelegate {  func application(_ application: UIApplication, didFinishLaunchingWithOptions launchOptions: [UIApplication.LaunchOptionsKey: Any]?) -> Bool {    // 1    UNUserNotificationCenter.current().delegate = self  }}
extension AppDelegate: UNUserNotificationCenterDelegate { // 2 func userNotificationCenter(_ center: UNUserNotificationCenter, willPresent notification: UNNotification, withCompletionHandler completionHandler: @escaping (UNNotificationPresentationOptions) -> Void) { FlareLaneNotificationCenter.shared.userNotificationCenter(center, willPresent: notification, withCompletionHandler: completionHandler) } // 3 func userNotificationCenter(_ center: UNUserNotificationCenter, didReceive response: UNNotificationResponse, withCompletionHandler completionHandler: @escaping () -> Void) { FlareLaneNotificationCenter.shared.userNotificationCenter(center, didReceive: response, withCompletionHandler: completionHandler) }}#import <UserNotifications/UserNotifications.h>
@interface AppDelegate : UIResponder <..., UNUserNotificationCenterDelegate>@end
// AppDelegate.m@implementation AppDelegate- (BOOL)application:(UIApplication *)application didFinishLaunchingWithOptions:(NSDictionary *)launchOptions{ // 1 [[UNUserNotificationCenter currentNotificationCenter] setDelegate: self];}
// 2- (void)userNotificationCenter:(UNUserNotificationCenter *)center willPresentNotification:(UNNotification *)notification withCompletionHandler:(void (^)(UNNotificationPresentationOptions))completionHandler{ [[FlareLaneNotificationCenter shared] userNotificationCenter:center willPresentNotification:notification withCompletionHandler:completionHandler];}// 3- (void)userNotificationCenter:(UNUserNotificationCenter *)center didReceiveNotificationResponse:(UNNotificationResponse *)response withCompletionHandler:(void (^)())completionHandler{ [[FlareLaneNotificationCenter shared] userNotificationCenter:center didReceiveNotificationResponse:response withCompletionHandler:completionHandler];}@end5-4. UNNotificationServiceExtension 메소드 추가
Section titled “5-4. UNNotificationServiceExtension 메소드 추가”didReceive(:withContentHandler:)대응 메소드 추가serviceExtensionTimeWillExpire()대응 메소드 추가
import UserNotificationsimport FlareLane
class NotificationService: UNNotificationServiceExtension {  override func didReceive(_ request: UNNotificationRequest, withContentHandler contentHandler: @escaping (UNNotificationContent) -> Void) {    // 1    // 플레어레인에서 발송한 푸시는 플레어레인의 메소드만 동작하도록 분기 처리합니다.    if FlareLaneNotificationServiceExtensionHelper.shared.isFlareLaneNotification(request) {      FlareLaneNotificationServiceExtensionHelper.shared.didReceive(request, withContentHandler: contentHandler)    } else {      // ...    }  }
  override func serviceExtensionTimeWillExpire() {    // 2    FlareLaneNotificationServiceExtensionHelper.shared.serviceExtensionTimeWillExpire()  }}
@import FlareLane;
@implementation NotificationService
- (void)didReceiveNotificationRequest:(UNNotificationRequest *)request withContentHandler:(void (^)(UNNotificationContent * _Nonnull))contentHandler { // 1 // 플레어레인에서 발송한 푸시는 플레어레인의 메소드만 동작하도록 분기 처리합니다. if ([[FlareLaneNotificationServiceExtensionHelper shared] isFlareLaneNotification:request]) { [[FlareLaneNotificationServiceExtensionHelper shared] didReceive:request withContentHandler:contentHandler]; } else { // ... }}
- (void)serviceExtensionTimeWillExpire { // 2 [[FlareLaneNotificationServiceExtensionHelper shared] serviceExtensionTimeWillExpire];}6. 유저ID 연동
Section titled “6. 유저ID 연동”앱 설치 시 플레어레인에 생성된 기기는 '익명의 기기'이며 고객사가 별도로 관리하는 고유한 유저 ID를 연동함으로써 플레어레인의 기기와 고객사의 유저ID를 매칭할 수 있습니다.
유저ID가 연동되어있으면 많은 이점이 있습니다. 회원과 비회원을 구분할 수 있고, 고객사는 언제든지 유저ID를 기준으로 푸시 알림 발송이 가능하기 때문에 초기 연동시 권장드리고 있습니다.
보통 유저가 회원가입이나 로그인 성공 시, setUserId 함수를 통해 유저ID를 연동합니다.
FlareLane.setUserId(userId: "USER_ID")[FlareLane setUserIdWithUserId: @"USER_ID"];7. 추가 연동 가이드
Section titled “7. 추가 연동 가이드”웹뷰 기반 앱을 위한 브릿지 연동
Section titled “웹뷰 기반 앱을 위한 브릿지 연동”- 플레어레인은 웹사이트에서 일어나는 행동을 앱에서도 인식할 수 있도록 웹뷰 기반 앱을 위한 다양한 편의 기능을 제공하고 있습니다. 웹뷰 기반 모바일 앱 브릿지 연동 가이드를 참고합니다.
자동 URL 처리
Section titled “자동 URL 처리”- 플레어레인은 기본적으로 푸시 알림 클릭 시 https, 딥링크 등 URL에 대해 자동 처리를 지원하고 있습니다. 만약 별도의 클릭 핸들러 구현이 필요한 경우 URL 자동 처리 비활성화를 참고하세요.
인앱메시지(팝업) 노출
Section titled “인앱메시지(팝업) 노출”- 인앱메시지(팝업) 를 참고하여 개발자가 직접 팝업이 노출될 타이밍에 코드 1줄(displayInApp)을 추가합니다.
기타 리소스
Section titled “기타 리소스”| 가이드 |
|---|
| Mobile SDK Reference |
| iOS SDK Release Notes |