Flutter SDK
1. 事前準備
Section titled “1. 事前準備”- FlareLane コンソールにサインアップし、プロジェクトを作成します。
2. 認証情報の設定
Section titled “2. 認証情報の設定”以下のガイドに沿って、FlareLane がプッシュ通知を送信するために必要な認証情報を入力します。
3. SDK のインストール
Section titled “3. SDK のインストール”ターミナルでプロジェクトのルートディレクトリに移動し、以下のコマンドを実行します。
$ flutter pub add flarelane_flutter:1.9.24. Android 13 への対応
Section titled “4. Android 13 への対応”ユーザーからプッシュ通知の購読をスムーズに取得するため、compileSdkVersion を 33 以上に設定してください。
// ...android { compileSdkVersion 33 // ...}// ...5. iOS プロジェクトの設定
Section titled “5. iOS プロジェクトの設定”5-1. Capability の設定
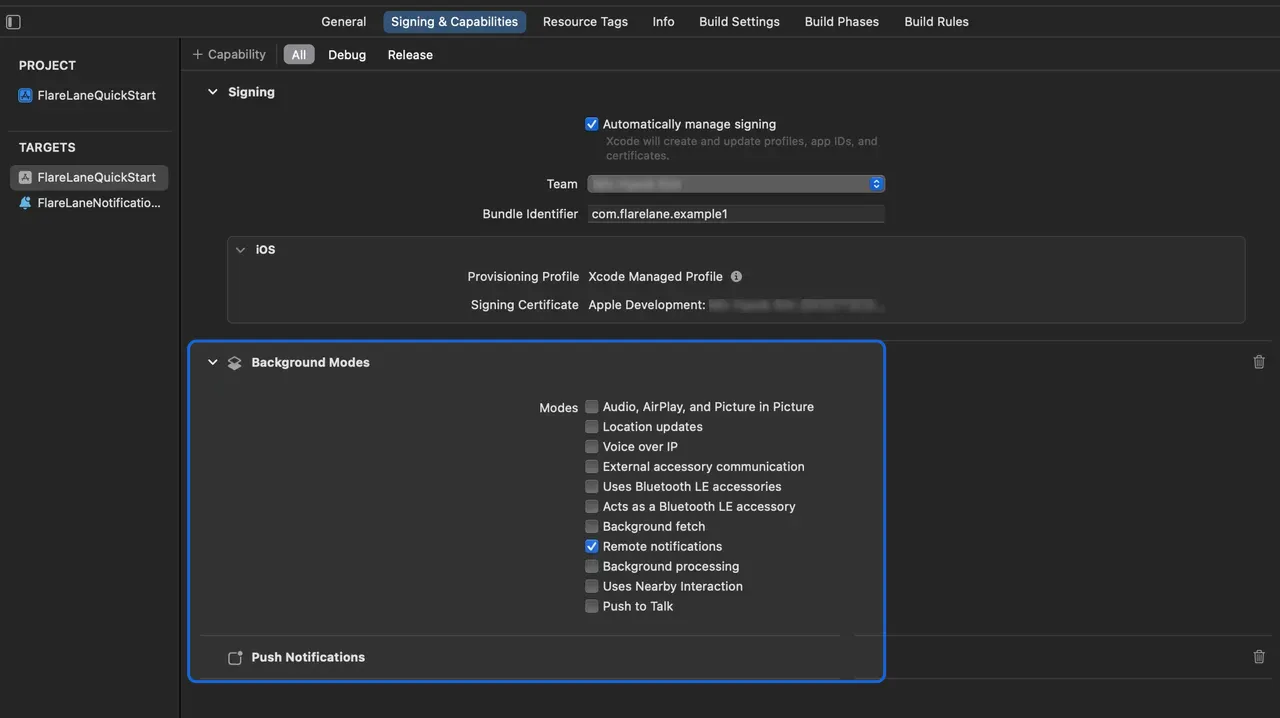
Section titled “5-1. Capability の設定”対象ターゲットの Signing & Capabilities を開き、左上の + Capability をクリックして Push Notifications を選択し、追加します。
続いて Background Modes を選択し、Remote notifications を有効にします。
5-2. Service Extension の設定
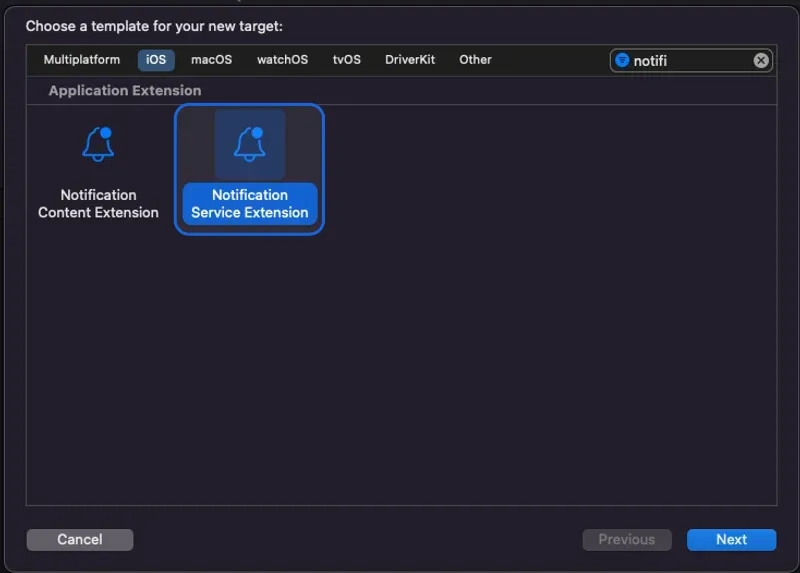
Section titled “5-2. Service Extension の設定”iOS では、画像などのメディアを添付するために Notification Service Extension を作成する必要があります。
Xcode で File > New > Target を開き、Notification Service Extension を選択します。
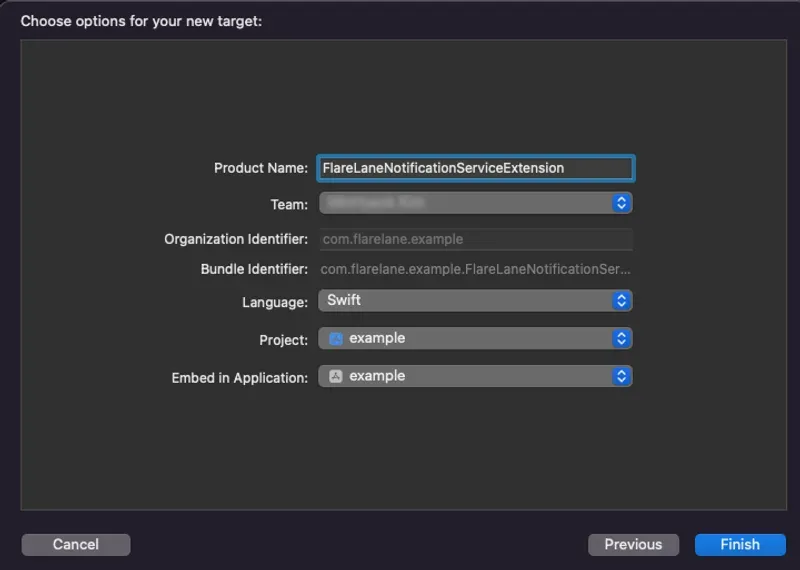
Product Name に適切な名前を入力します。本ガイドでは FlareLaneNotificationServiceExtension を使用します。
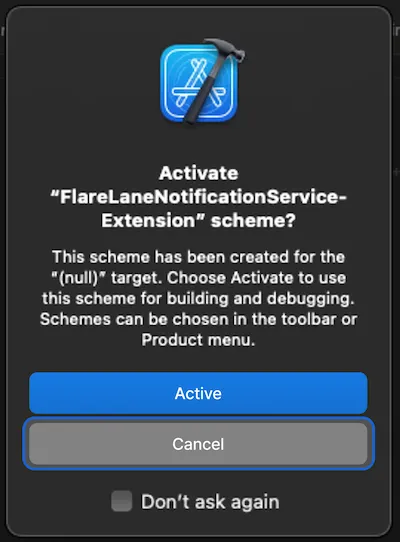
別の Scheme が有効化されないように、Cancel をクリックします。
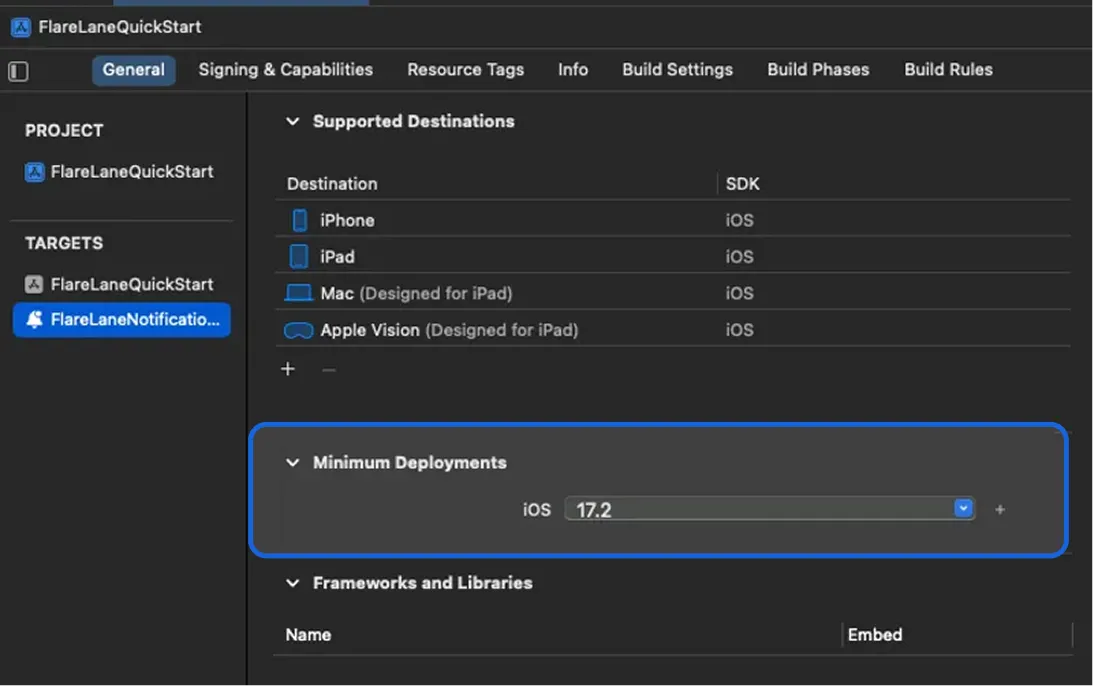
次に、作成した Notification Service Extension ターゲットの Minimum Deployments バージョンを、メインアプリのターゲットのバージョンに合わせて設定します。
5-3. App Group の設定
Section titled “5-3. App Group の設定”アプリと Extension の間でデータを同期するために、App Group を設定する必要があります。
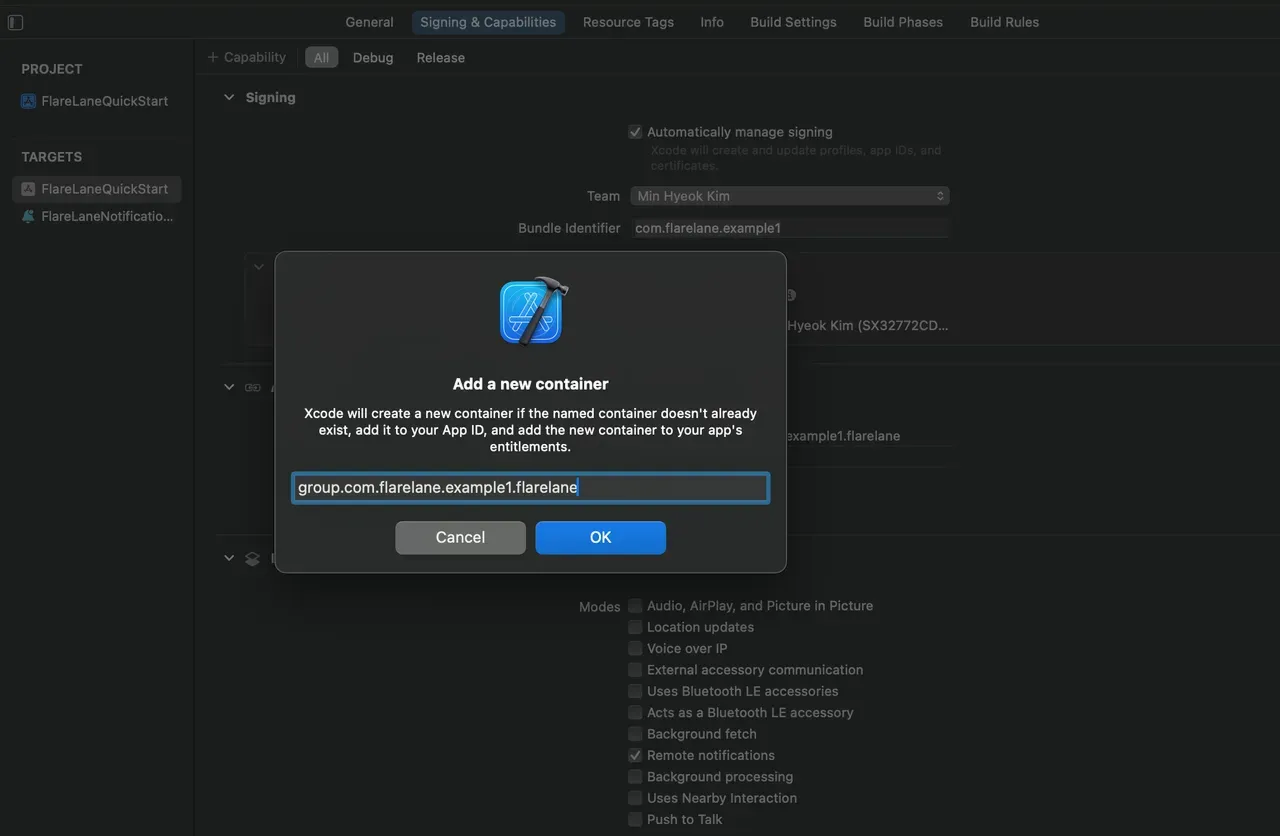
対象ターゲットの Signing & Capabilities を開き、左上の + Capability をクリックして App Groups を選択し、追加します。
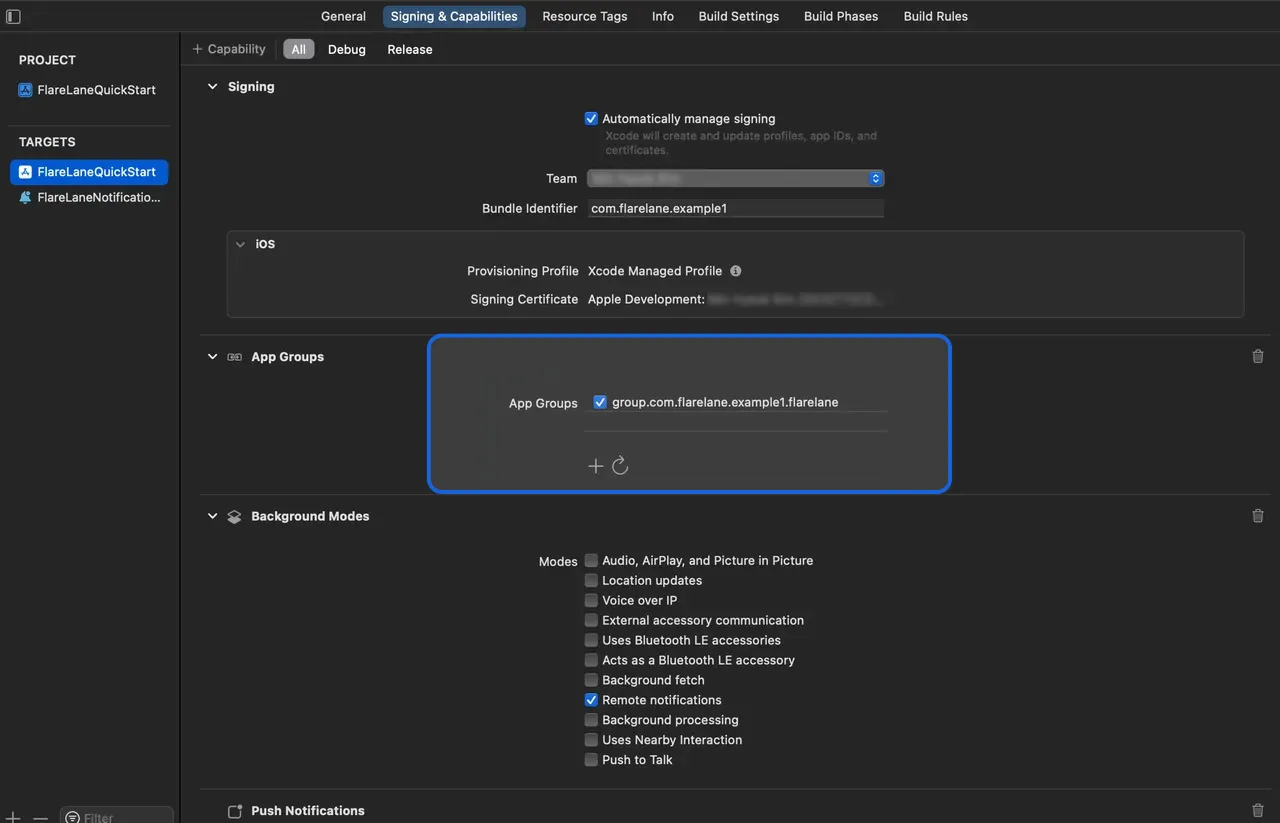
group.bundleID.flarelane という名前のグループを追加します**。ここで bundleID の部分は、アプリの Bundle Identifier と一致させる必要があります。**
正常に追加できたら、その App Group を有効にします。
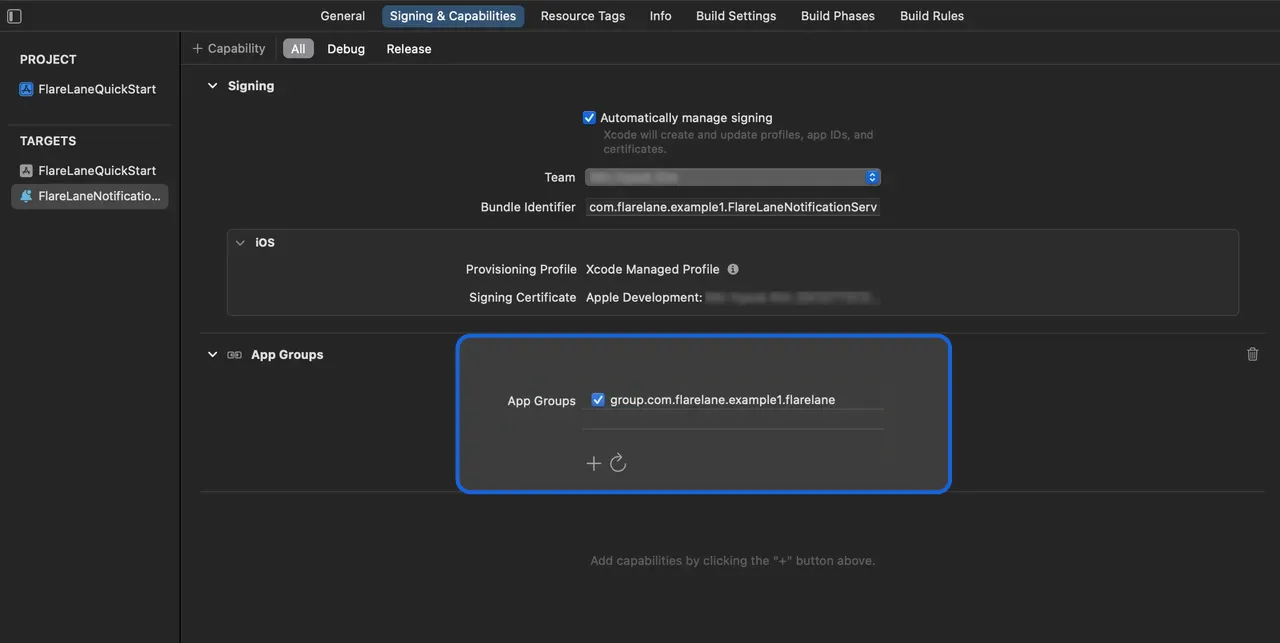
同様に、先ほど作成した Extension にも同じ名前の App Group を追加して有効にします。
次に、ios ディレクトリ内の Podfile を開いて以下を追加します。
// ファイルの末尾に以下の行を追加します。// ターゲット名には、先ほど入力した Extension の Product Name を指定してください。target 'FlareLaneNotificationServiceExtension' do pod 'FlareLane', '1.9.2'endpod install を実行して SDK のインストールを完了します。
5-4. AppDelegate メソッドの追加
Section titled “5-4. AppDelegate メソッドの追加”application(:didRegisterForRemoteNotificationsWithDeviceToken:)のハンドラーメソッドを追加します
import FlareLane
class AppDelegate: FlutterAppDelegate {  override func application(_ application: UIApplication, didRegisterForRemoteNotificationsWithDeviceToken deviceToken: Data) {    // 2    FlareLaneAppDelegate.shared.application(application, didRegisterForRemoteNotificationsWithDeviceToken: deviceToken)  }}
@import FlareLane;
@implementation AppDelegate- (void)application:(UIApplication *)application didRegisterForRemoteNotificationsWithDeviceToken:(NSData *)deviceToken { // 2 [[FlareLaneAppDelegate shared] application:application didRegisterForRemoteNotificationsWithDeviceToken:deviceToken];}5-5. UNUserNotificationCenterDelegate メソッドの追加
Section titled “5-5. UNUserNotificationCenterDelegate メソッドの追加”- AppDelegate に UNUserNotificationCenterDelegate を割り当てます
userNotificationCenter(:willPresent:withCompletionHandler:)のハンドラーメソッドを追加します- ハンドラーメソッドを追加します
import FlareLane
@main@objc class AppDelegate: FlutterAppDelegate {  override func application(_ application: UIApplication, didFinishLaunchingWithOptions launchOptions: [UIApplication.LaunchOptionsKey: Any]?) -> Bool {    // 1    UNUserNotificationCenter.current().delegate = self  }
  override func userNotificationCenter(_ center: UNUserNotificationCenter, willPresent notification: UNNotification, withCompletionHandler completionHandler: @escaping (UNNotificationPresentationOptions) -> Void) {    // 2    FlareLaneNotificationCenter.shared.userNotificationCenter(center, willPresent: notification, withCompletionHandler: completionHandler)  }
override func userNotificationCenter(_ center: UNUserNotificationCenter, didReceive response: UNNotificationResponse, withCompletionHandler completionHandler: @escaping () -> Void) { // 3 FlareLaneNotificationCenter.shared.userNotificationCenter(center, didReceive: response, withCompletionHandler: completionHandler) }}#import <UserNotifications/UserNotifications.h>
@interface AppDelegate : UIResponder <..., UNUserNotificationCenterDelegate>@end
// AppDelegate.m@implementation AppDelegate- (BOOL)application:(UIApplication *)application didFinishLaunchingWithOptions:(NSDictionary *)launchOptions{ // 1 [[UNUserNotificationCenter currentNotificationCenter] setDelegate: self];}
// 2- (void)userNotificationCenter:(UNUserNotificationCenter *)center willPresentNotification:(UNNotification *)notification withCompletionHandler:(void (^)(UNNotificationPresentationOptions))completionHandler{ [[FlareLaneNotificationCenter shared] userNotificationCenter:center willPresentNotification:notification withCompletionHandler:completionHandler];}// 3- (void)userNotificationCenter:(UNUserNotificationCenter *)center didReceiveNotificationResponse:(UNNotificationResponse *)response withCompletionHandler:(void (^)())completionHandler{ [[FlareLaneNotificationCenter shared] userNotificationCenter:center didReceiveNotificationResponse:response withCompletionHandler:completionHandler];}@end5-6. UNNotificationServiceExtension メソッドの追加
Section titled “5-6. UNNotificationServiceExtension メソッドの追加”didReceive(:withContentHandler:)のハンドラーメソッドを追加しますserviceExtensionTimeWillExpire()のハンドラーメソッドを追加します
import UserNotificationsimport FlareLane
class NotificationService: UNNotificationServiceExtension {  override func didReceive(_ request: UNNotificationRequest, withContentHandler contentHandler: @escaping (UNNotificationContent) -> Void) {    // 1    // FlareLane から送信されたプッシュ通知に対してのみ FlareLane のメソッドが実行されるよう、ロジックを分岐させます。    if FlareLaneNotificationServiceExtensionHelper.shared.isFlareLaneNotification(request) {      FlareLaneNotificationServiceExtensionHelper.shared.didReceive(request, withContentHandler: contentHandler)    } else {      // ...    }  }
  override func serviceExtensionTimeWillExpire() {    // 2    FlareLaneNotificationServiceExtensionHelper.shared.serviceExtensionTimeWillExpire()  }}
@import FlareLane;
@implementation NotificationService
- (void)didReceiveNotificationRequest:(UNNotificationRequest *)request withContentHandler:(void (^)(UNNotificationContent * _Nonnull))contentHandler { // 1 // FlareLane から送信されたプッシュ通知に対してのみ FlareLane のメソッドが実行されるよう、ロジックを分岐させます。 if ([[FlareLaneNotificationServiceExtensionHelper shared] isFlareLaneNotification:request]) { [[FlareLaneNotificationServiceExtensionHelper shared] didReceive:request withContentHandler:contentHandler]; } else { // ... }}
- (void)serviceExtensionTimeWillExpire { // 2 [[FlareLaneNotificationServiceExtensionHelper shared] serviceExtensionTimeWillExpire];}6. 初期化コードの記述
Section titled “6. 初期化コードの記述”main.dart ファイルに以下の初期化コードを追加します。プロジェクト ID はコンソールの [プロジェクト] ページで確認できます。
import 'package:flarelane_flutter/flarelane_flutter.dart';
void main() {  // 初期化コードは必ず ensureInitialized() の後で実行してください。  WidgetsFlutterBinding.ensureInitialized();
  // 以下の初期化コードを追加します。  // 通知許可ダイアログを表示するタイミングを制御したい場合は、2 番目の引数を false にして、任意のタイミングで .subscribe() を呼び出してください。  FlareLane.shared.initialize("PROJECT_ID", requestPermissionOnLaunch: true);
  runApp(...);}
7. ユーザー ID の連携
Section titled “7. ユーザー ID の連携”アプリをインストールした時点で FlareLane に作成されるデバイスは「匿名デバイス」です。別途管理している一意のユーザー IDを連携することで、FlareLane のデバイスをお客様自身のユーザー ID と紐付けることができます。
ユーザー ID の連携には多くのメリットがあります。 会員と非会員を区別できるようになるほか、いつでもユーザー ID 単位でプッシュ通知を送信できるようになるため、初回の連携時に設定しておくことをおすすめします。
一般的には、ユーザーがサインアップまたはログインに成功したタイミングで、setUserId 関数を使ってユーザー ID を連携します。
FlareLane.shared.setUserId("USER_ID");8. 追加の連携ガイド
Section titled “8. 追加の連携ガイド”URL の自動処理
Section titled “URL の自動処理”- FlareLane はデフォルトで、プッシュ通知がクリックされた際に https リンクやディープリンクなどの URL を自動的に処理します。 独自のクリックハンドラーを実装する必要がある場合は、URL の自動処理を無効にするをご覧ください。
アプリ内メッセージ(ポップアップ)の表示
Section titled “アプリ内メッセージ(ポップアップ)の表示”- アプリ内メッセージ(ポップアップ)を参照し、ポップアップを表示したい箇所に**1 行のコード(displayInApp)**を追加します。
Android
Section titled “Android”通知カラーの設定
Section titled “通知カラーの設定”<resources> <!-- 通知カラーを変更します --> <string name="flarelane_notification_accent_color">#BC0000</string></resources>通知チャンネルの設定
Section titled “通知チャンネルの設定”- Android:通知チャンネルの設定を参照し、サービスに合わせた Android の通知チャンネルを設定します。
通知アイコンの設定
Section titled “通知アイコンの設定”- Android:通知アイコンの設定を参照し、アイコンアセットを設定します。
その他のリソース
Section titled “その他のリソース”| ガイド |
|---|
| モバイル SDK リファレンス |
| Flutter SDK リリースノート |