Web SDK
With the FlareLane Web SDK, you can run CRM marketing campaigns targeting website users, including through the Web Push channel. This guide walks you through installing the SDK on a website you operate yourself, such as your own online store.
1. Enter Website Information
Section titled “1. Enter Website Information”In the FlareLane console, go to [Channels] > [Web Push] to begin entering your basic information.
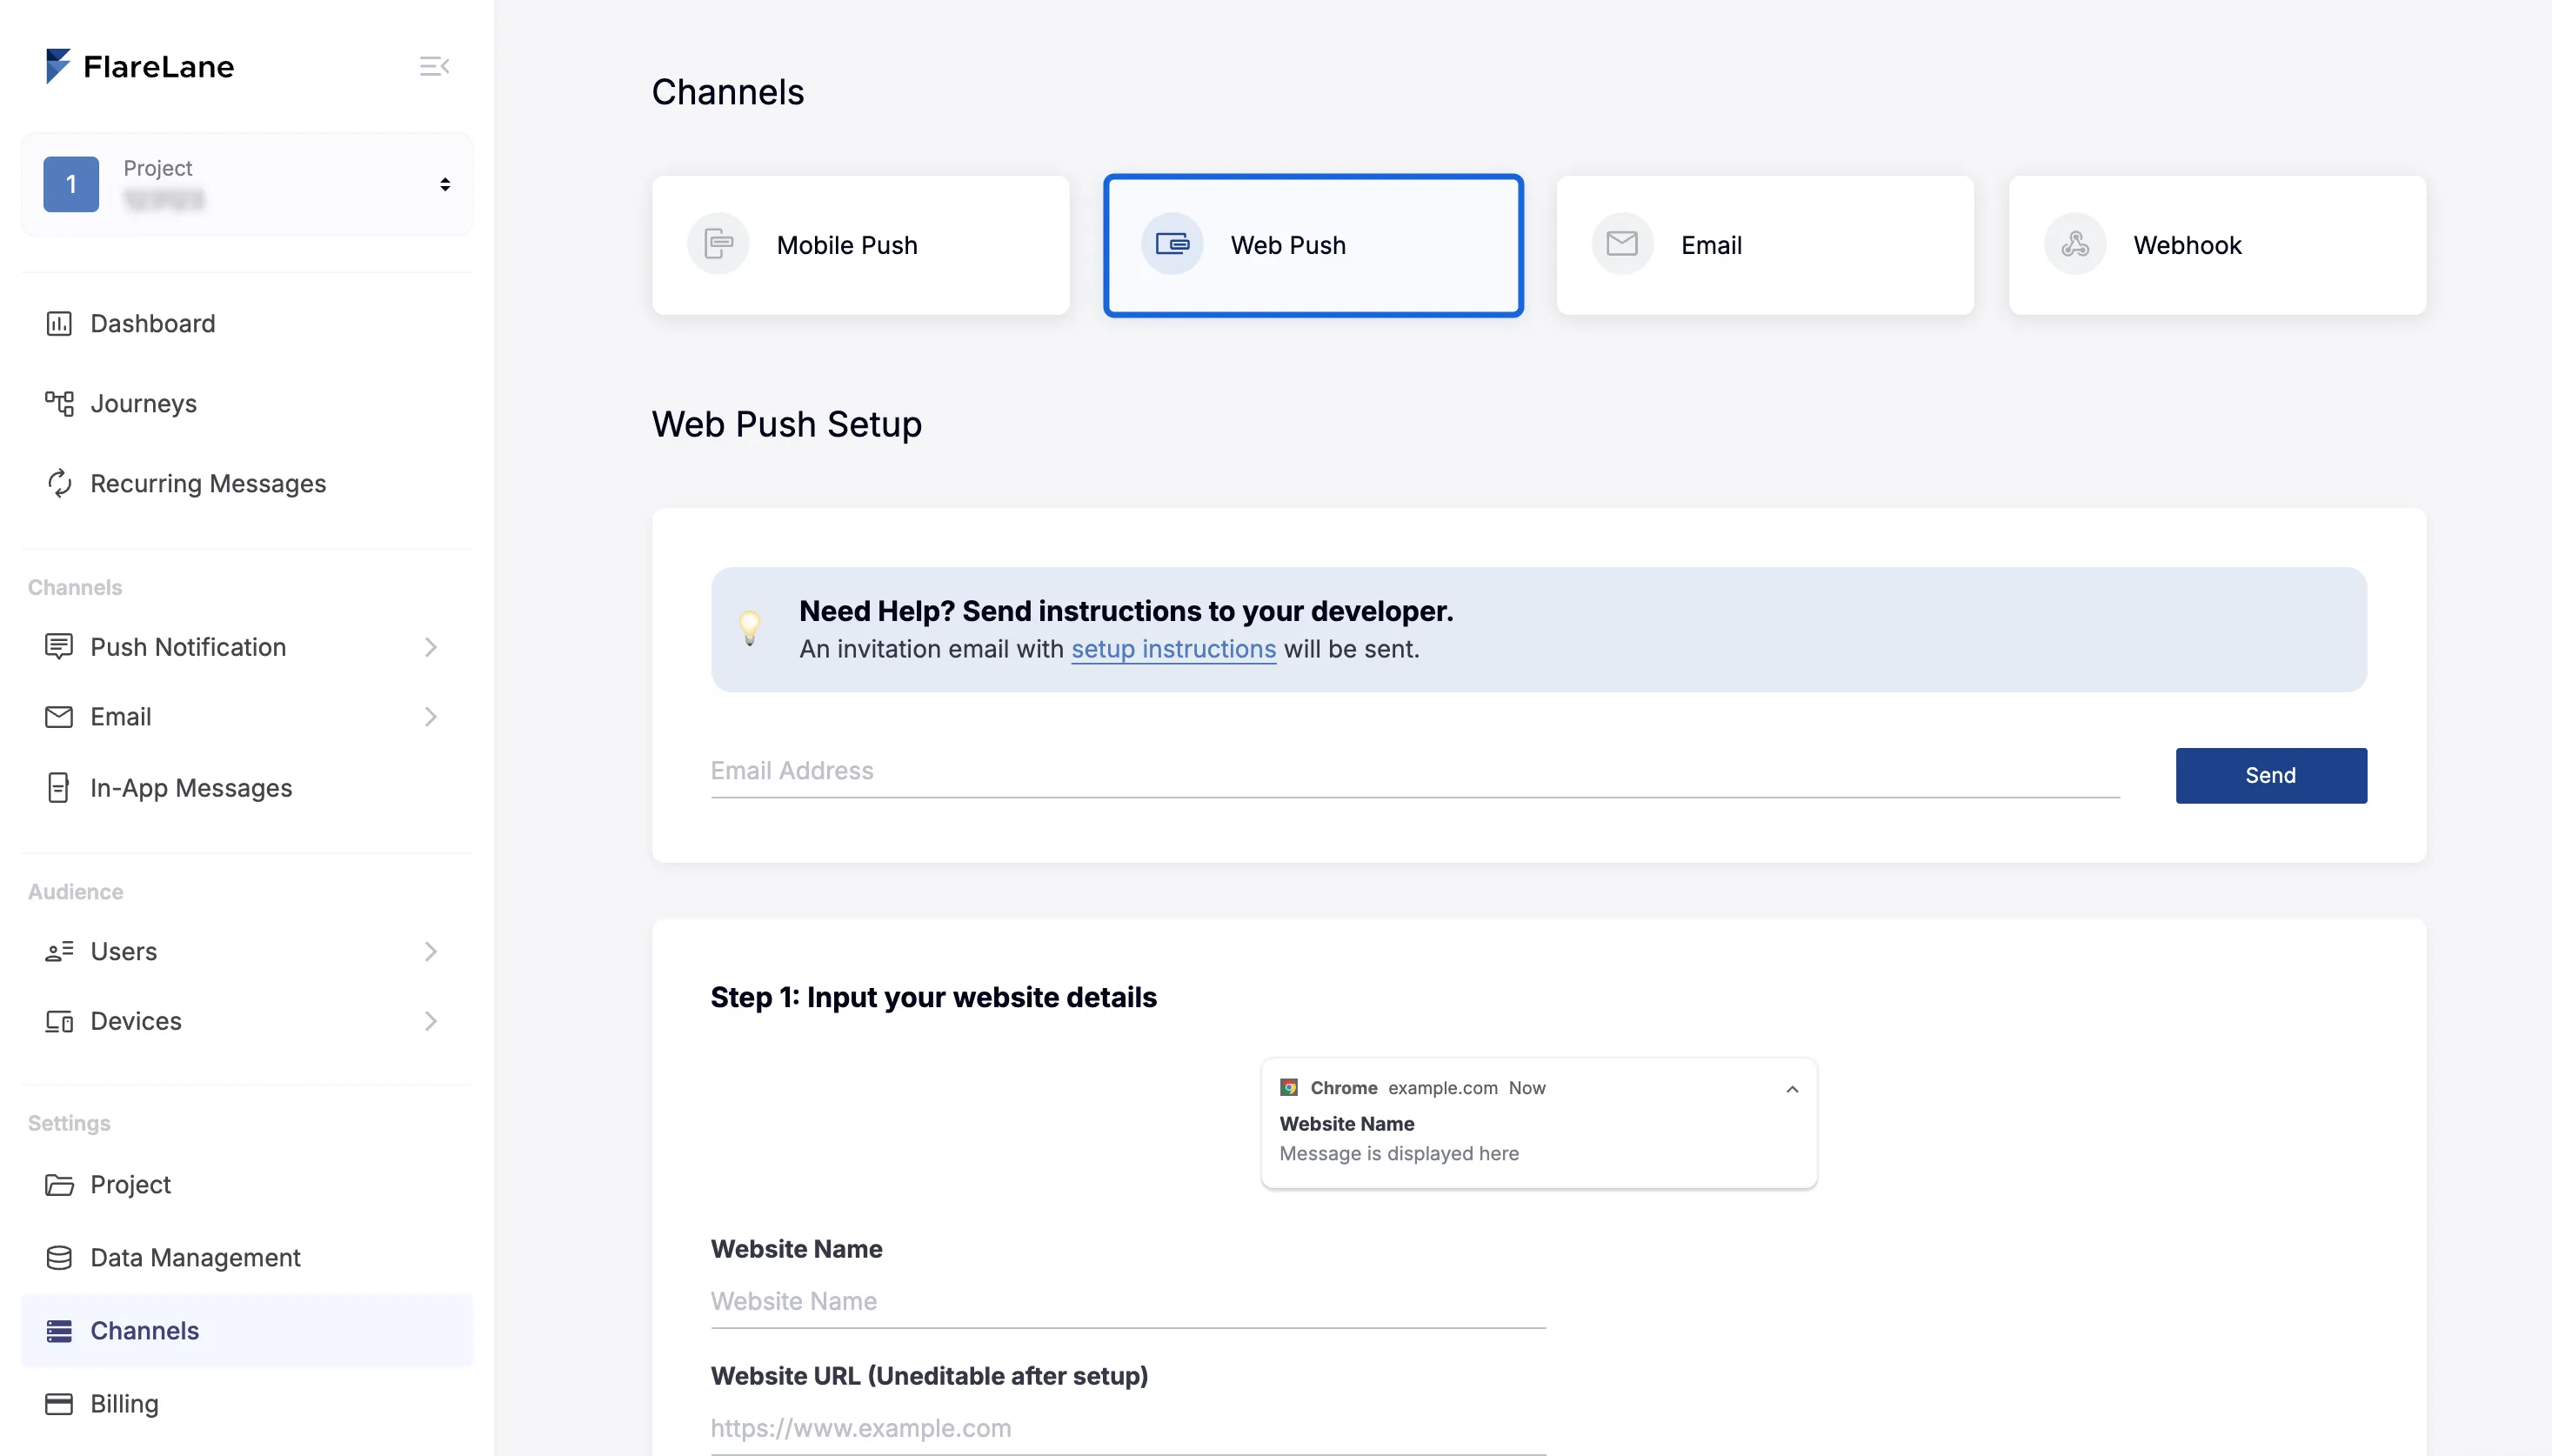
| Field | Description |
|---|---|
| Website Name | The default name shown for the site when a push title is not provided. |
| Website URL | Enter the URL where Web Push will be installed, starting with https:// (Web Push will not work if the address does not match). Only a root URL can be entered. A mobile subdomain (m.example.com) based on that URL is also supported. |
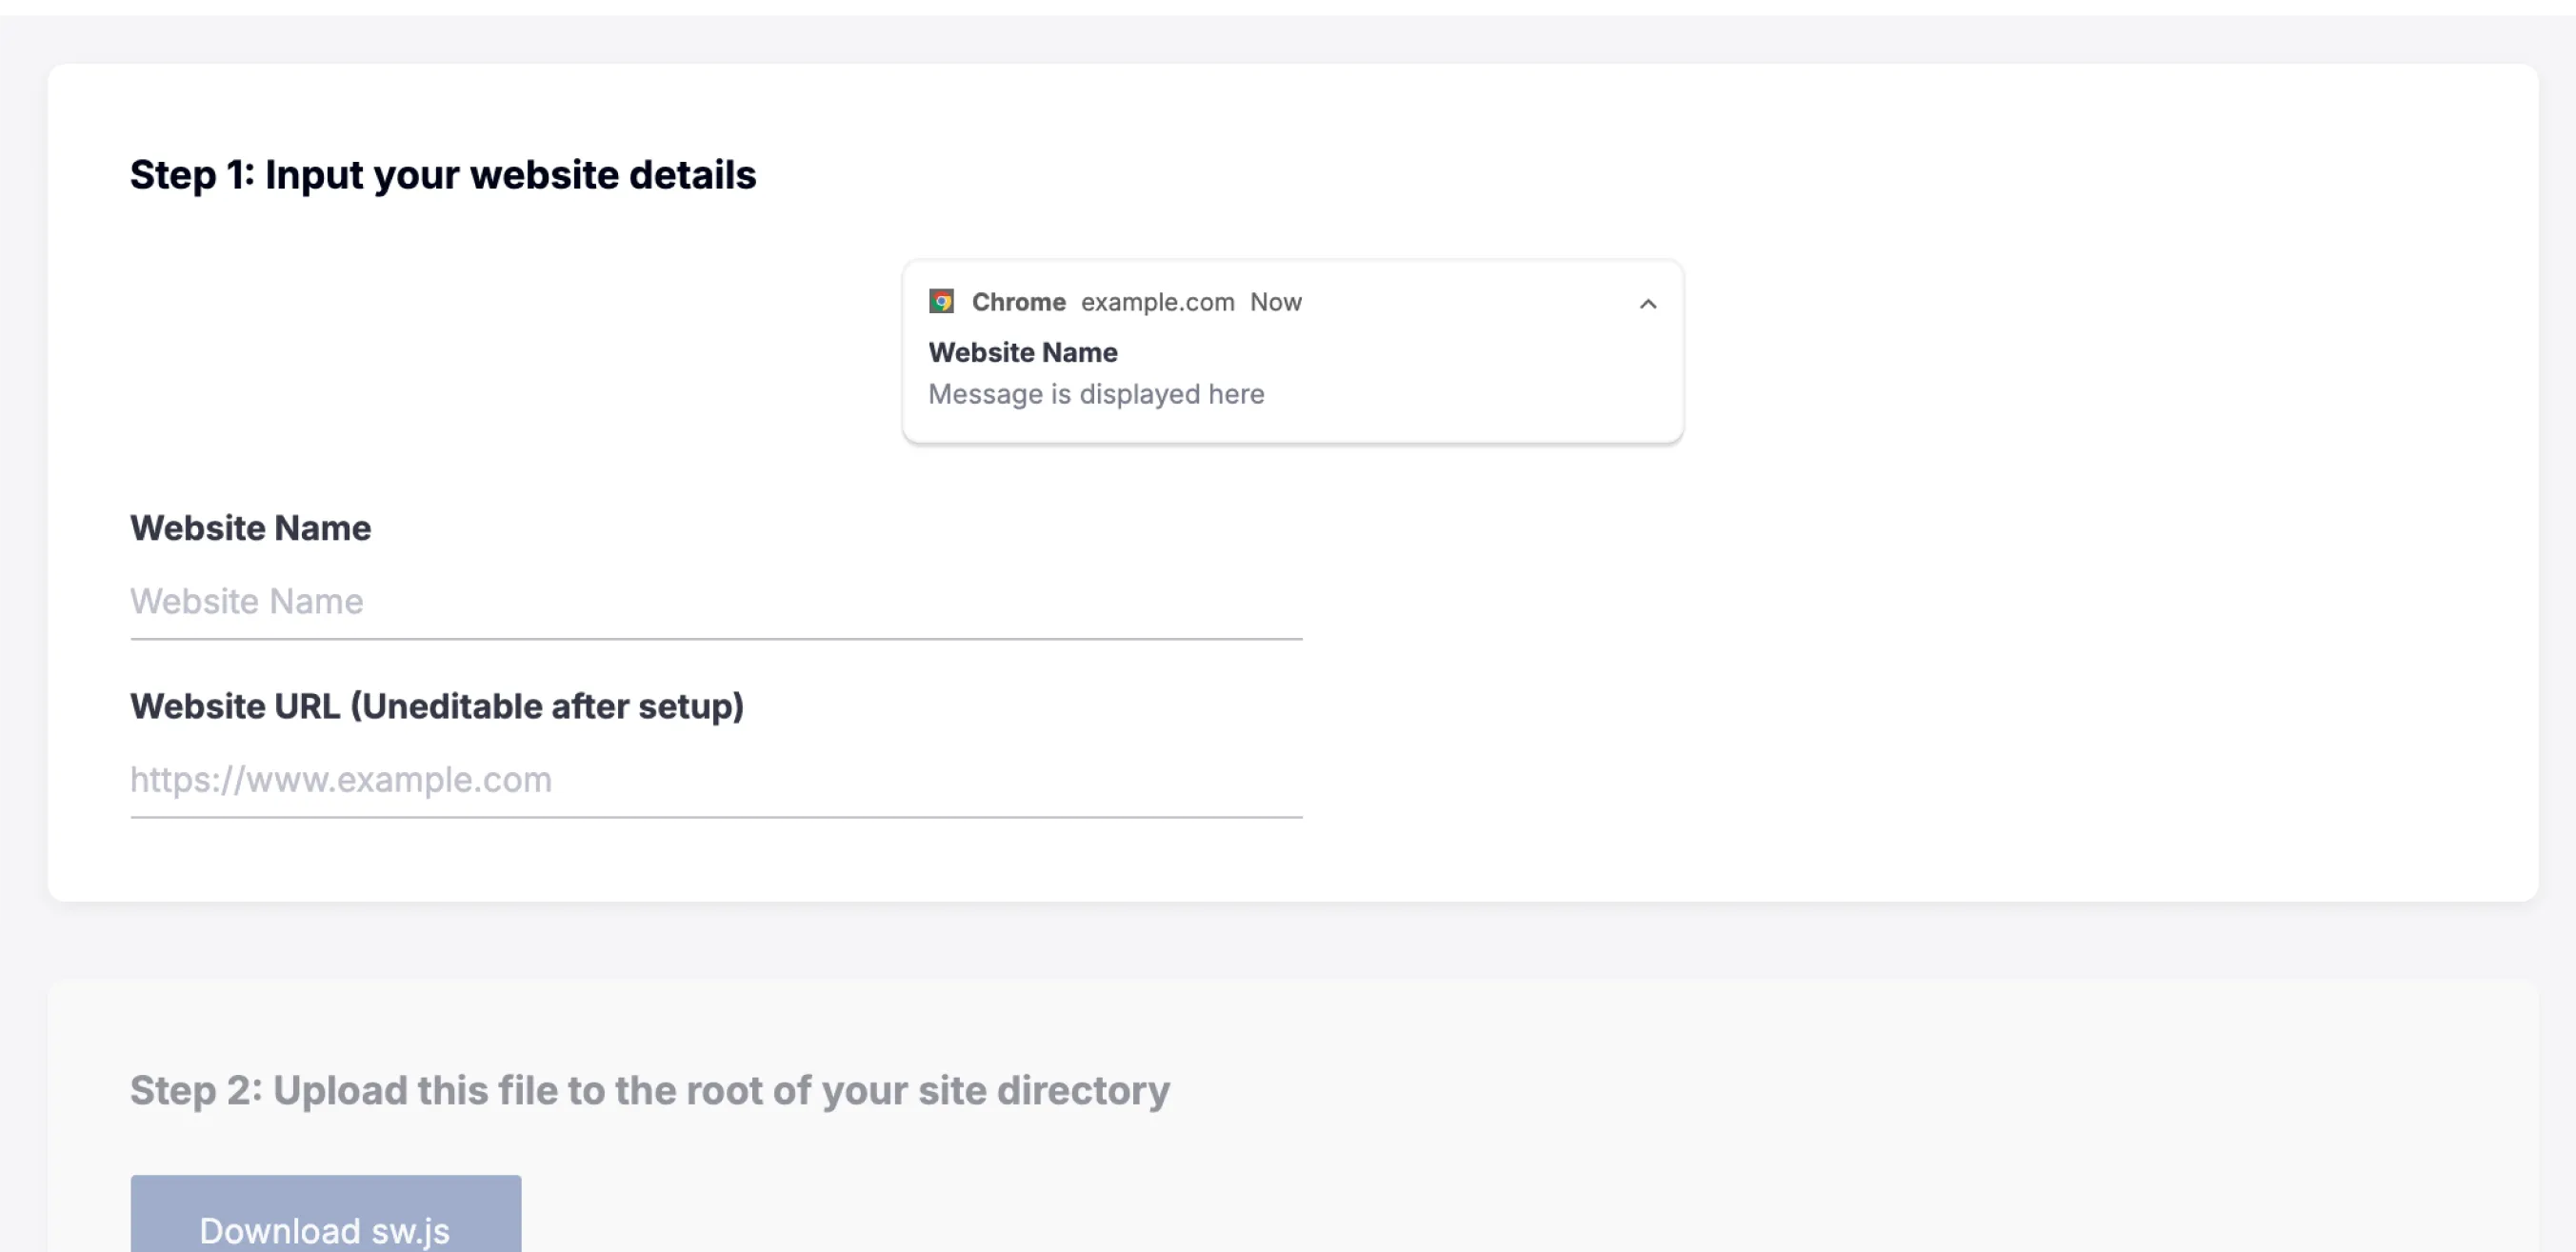
2. Upload the sw.js File
Section titled “2. Upload the sw.js File”Download the sw.js file below and upload it to the root path of your website. (For example, for a sw.js file on the example.com domain, it must be accessible at example.com/sw.js.)
sw.js
If uploaded correctly, the file and its code can be accessed externally, like this:
https://gp.flarelane.com/sw.js
3. Install and Initialize the SDK
Section titled “3. Install and Initialize the SDK”Add the following script just above your website's </body> tag. You can find your project ID on the [Projects] page in the console.
<script src="https://cdn.flarelane.com/WebSDK.js" charset="UTF-8"></script><script>FlareLane.initialize({ projectId: "PROJECT_ID" });</script>4. Integrate the User ID
Section titled “4. Integrate the User ID”When a user subscribes to Web Push, the device created in FlareLane is an "anonymous device." By integrating the unique user ID that you manage on your side, you can match FlareLane devices to your own user IDs.
Integrating user IDs offers many benefits. It lets you distinguish between members and non-members, and you can send push notifications by user ID at any time, so we recommend setting this up during your initial integration.
Typically, you integrate the user ID via the setUserId function when a user successfully signs up or logs in.
FlareLane.setUserId("USER_ID");5. Test Web Push
Section titled “5. Test Web Push”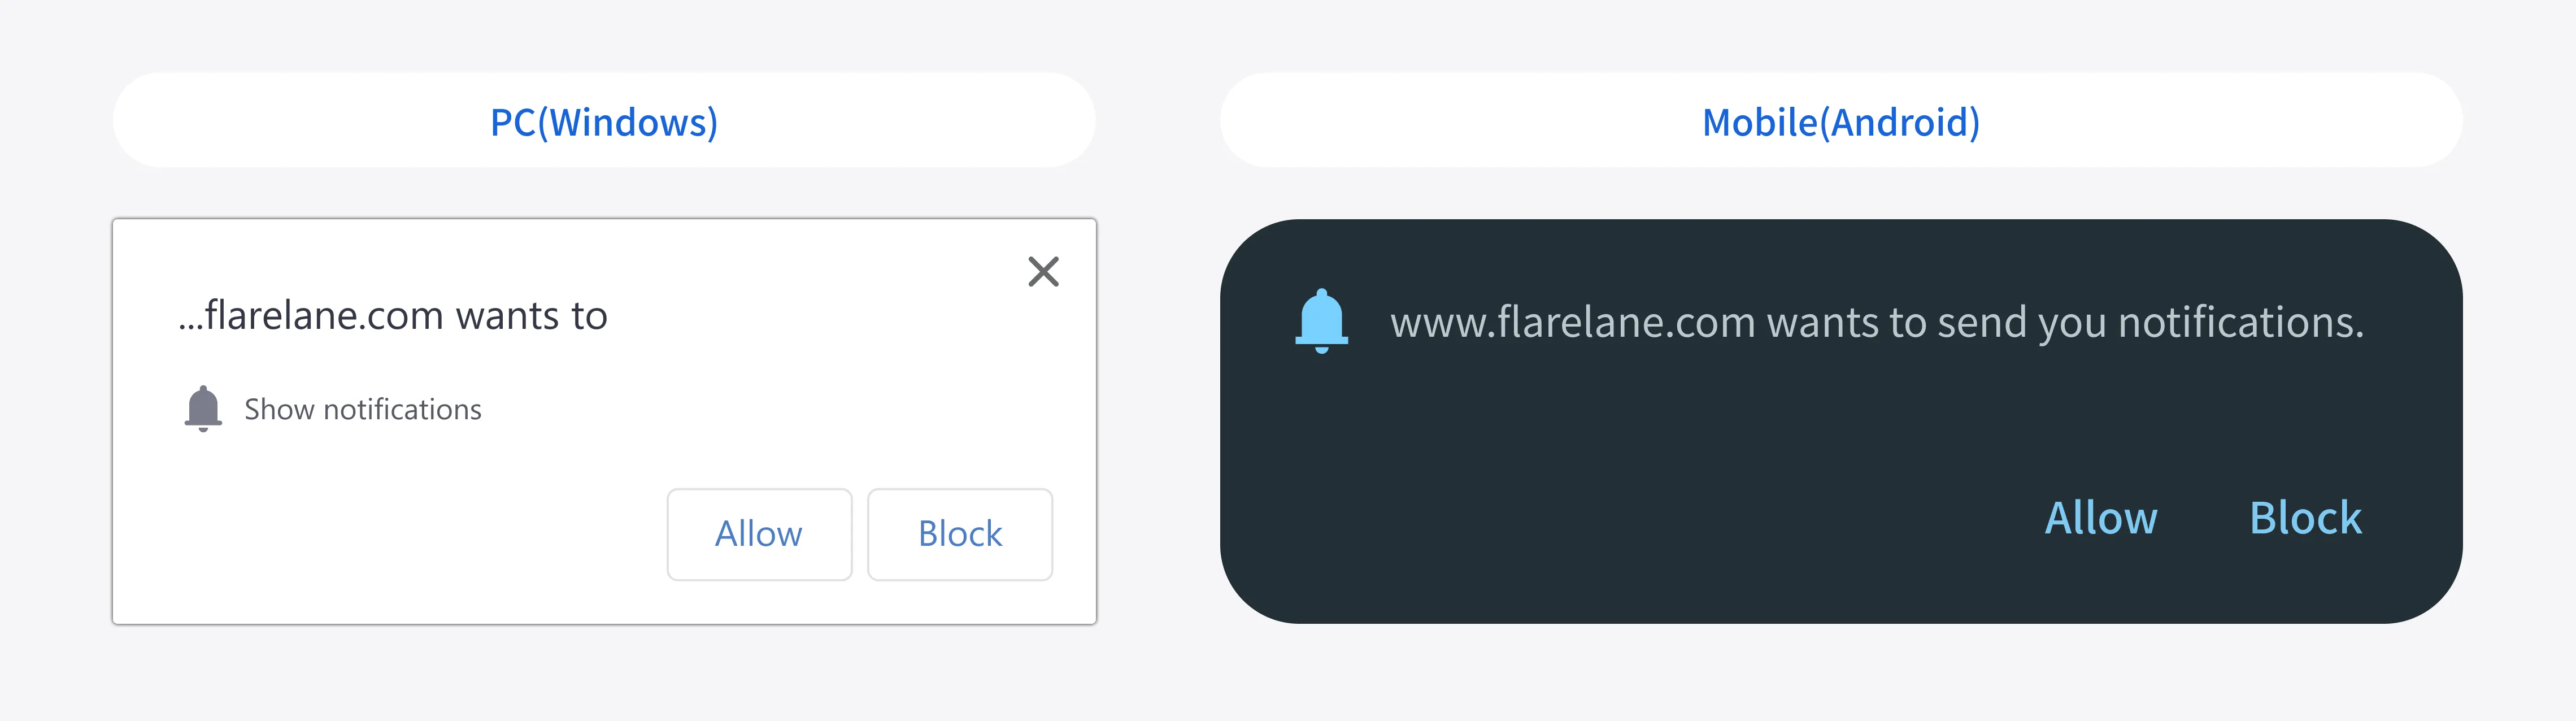
Once the integration is complete, users will see a subscription prompt when they visit your website. (The language depends on the browser language.)
When a user clicks Allow, they are automatically subscribed to notifications and can continue to receive notifications even after leaving the browser.
6. Additional Integration Guides
Section titled “6. Additional Integration Guides”Display In-App Messages (Popups)
Section titled “Display In-App Messages (Popups)”- Following the In-App Messages (Popups) guide, add a single line of code (displayInApp) at the point where you want the popup to appear.
Customer Data Integration
Section titled “Customer Data Integration”- Set up the customer data integration needed for hyper-personalized push marketing, such as customer journey campaigns and personalized messages (Liquid).
Define Custom Behavior on Push Click
Section titled “Define Custom Behavior on Push Click”- Use the setNotificationConvertedHandler function in the Web SDK Reference.