iOS SDK
1. Prerequisites
Section titled “1. Prerequisites”- Sign up in the FlareLane Console and create a project.
2. Set Up Credentials
Section titled “2. Set Up Credentials”Follow the guide below to enter the credentials FlareLane needs to send push notifications.
3. Xcode Setup
Section titled “3. Xcode Setup”3-1. Add Capabilities
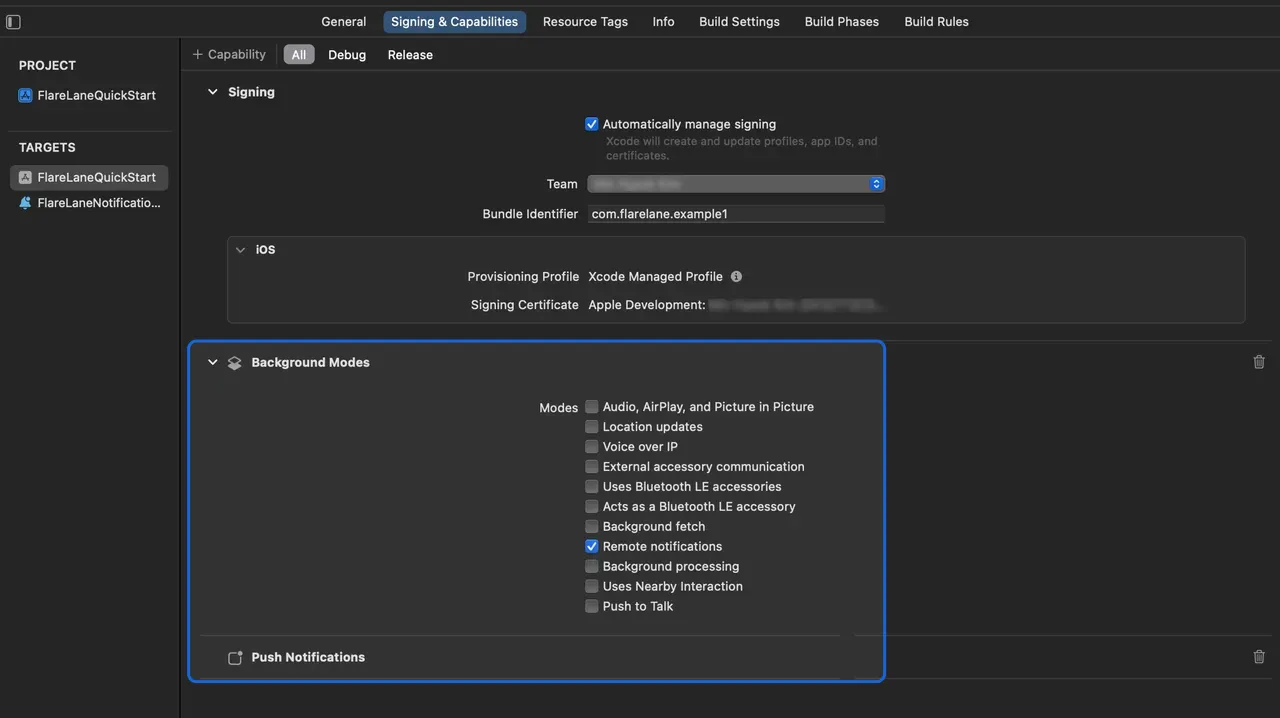
Section titled “3-1. Add Capabilities”Go to your target's Signing & Capabilities, click + Capability in the top left, and add Push Notifications.
Then add Background Modes and enable Remote notifications.
3-2. Set Up the Service Extension
Section titled “3-2. Set Up the Service Extension”On iOS, a Notification Service Extension is required to attach media such as images.
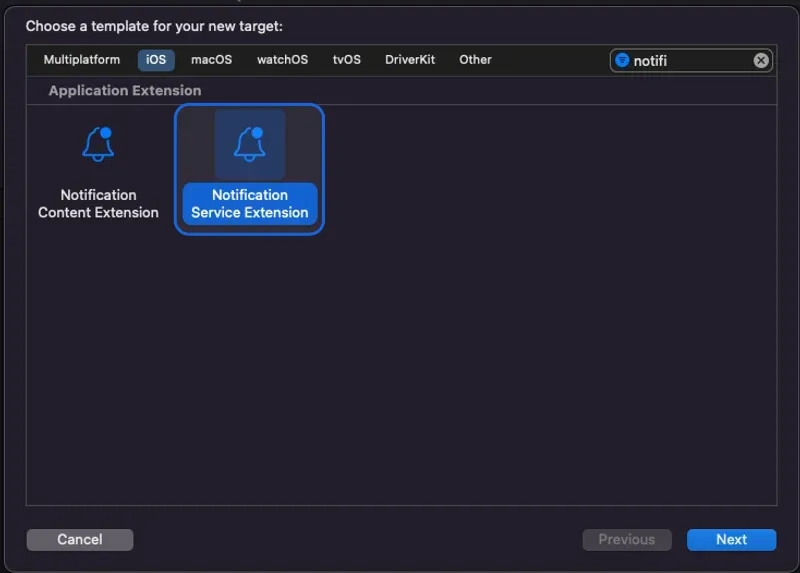
In Xcode, go to File > New > Target and select Notification Service Extension.
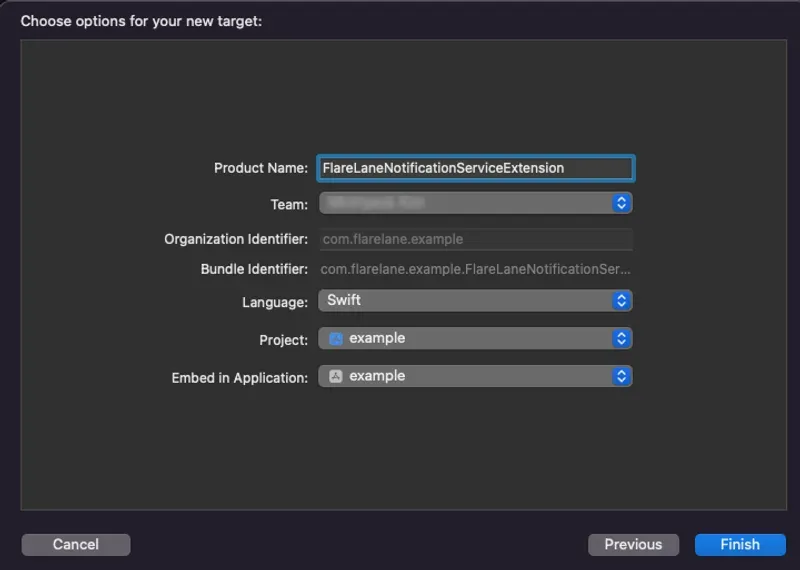
Enter an appropriate name in Product Name. For this guide, we'll use FlareLaneNotificationServiceExtension.
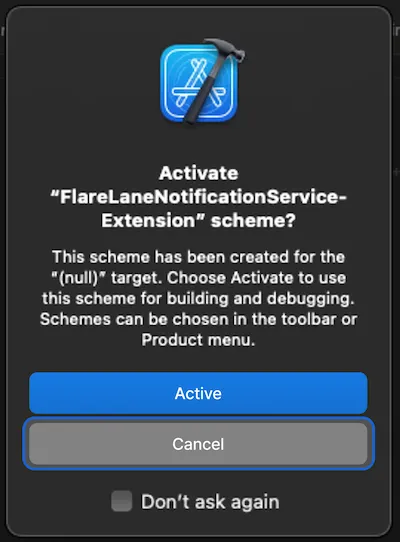
Click Cancel so that no separate Scheme is activated.
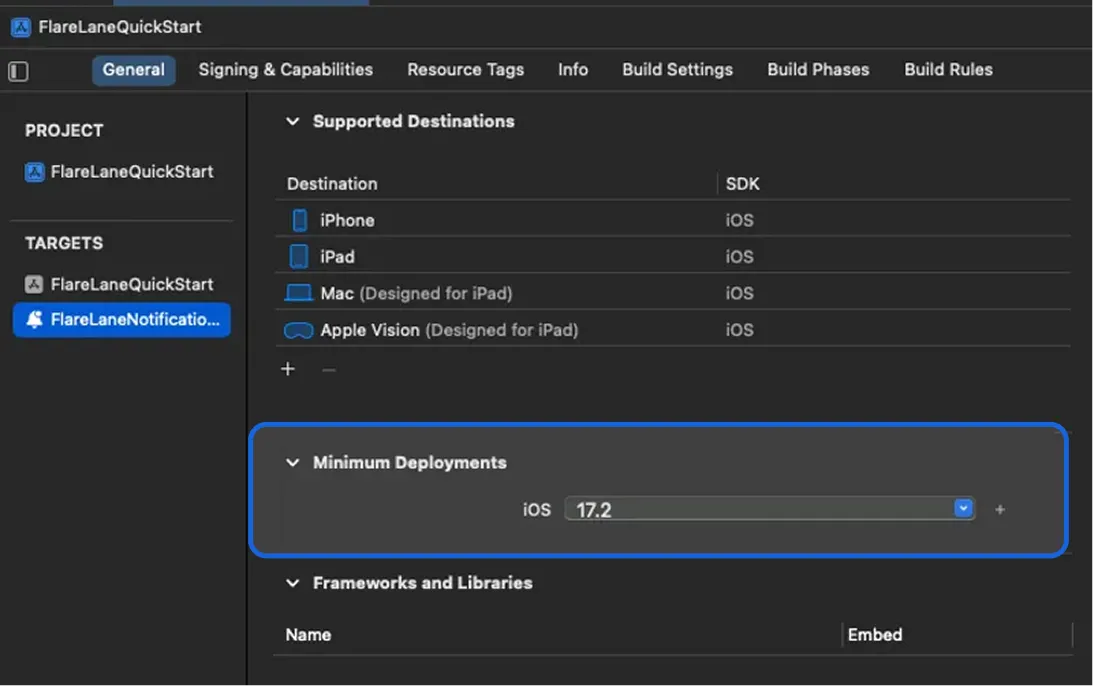
Next, set the Minimum Deployments version of the Notification Service Extension Target you just created to match the version of your main app target.
3-3. Set Up an App Group
Section titled “3-3. Set Up an App Group”An App Group is required to sync data between the main app and the extension.
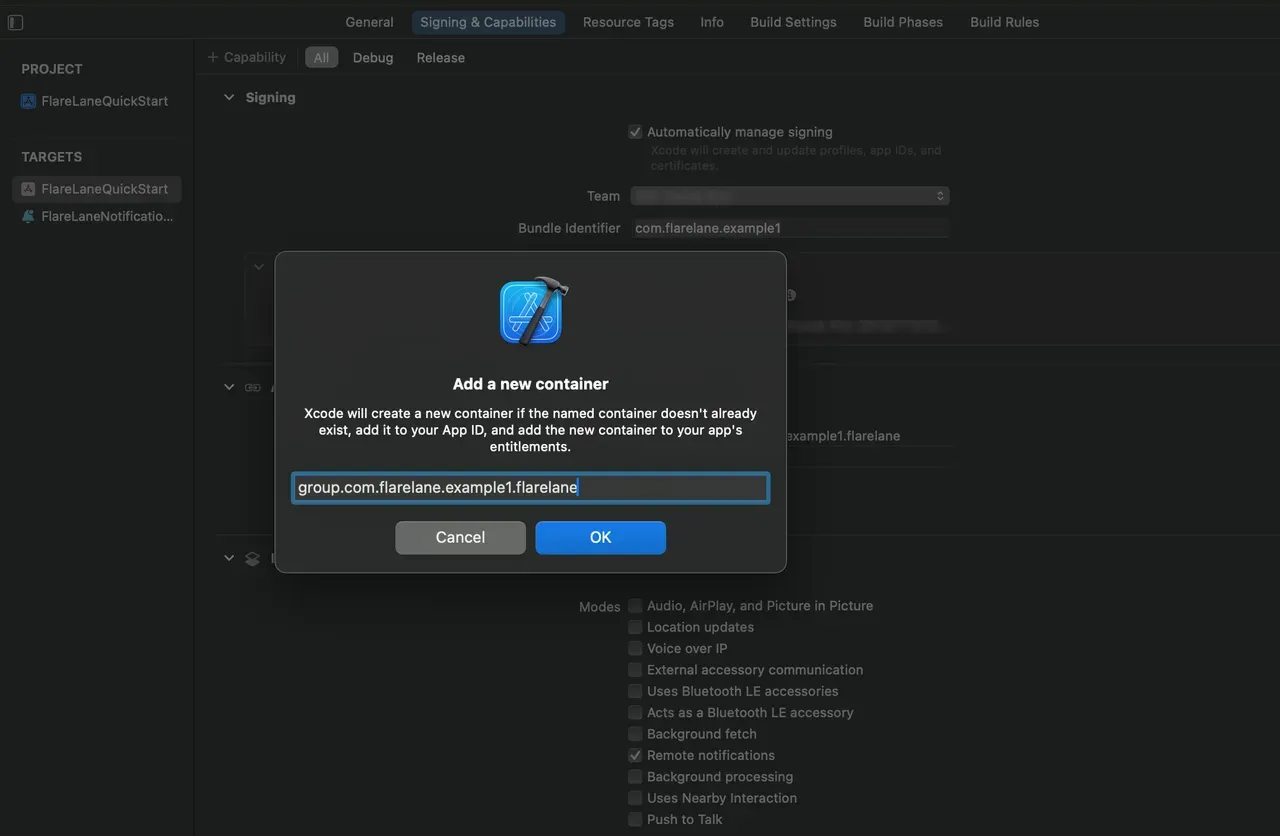
Go to your target's Signing & Capabilities, click + Capability in the top left, and add App Groups.
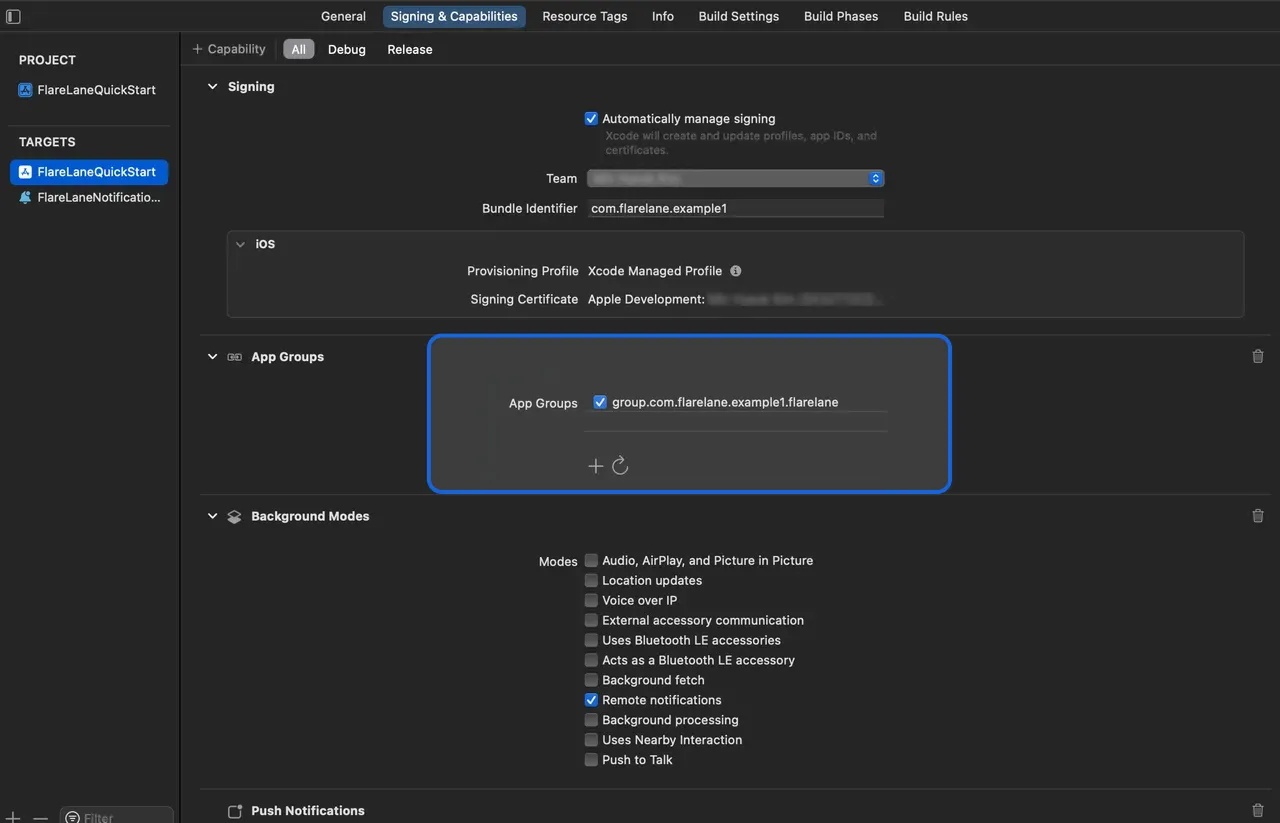
Add a group named group.bundleID.flarelane, where bundleID must match your main app's Bundle Identifier.
Once it has been added successfully, enable that App Group.
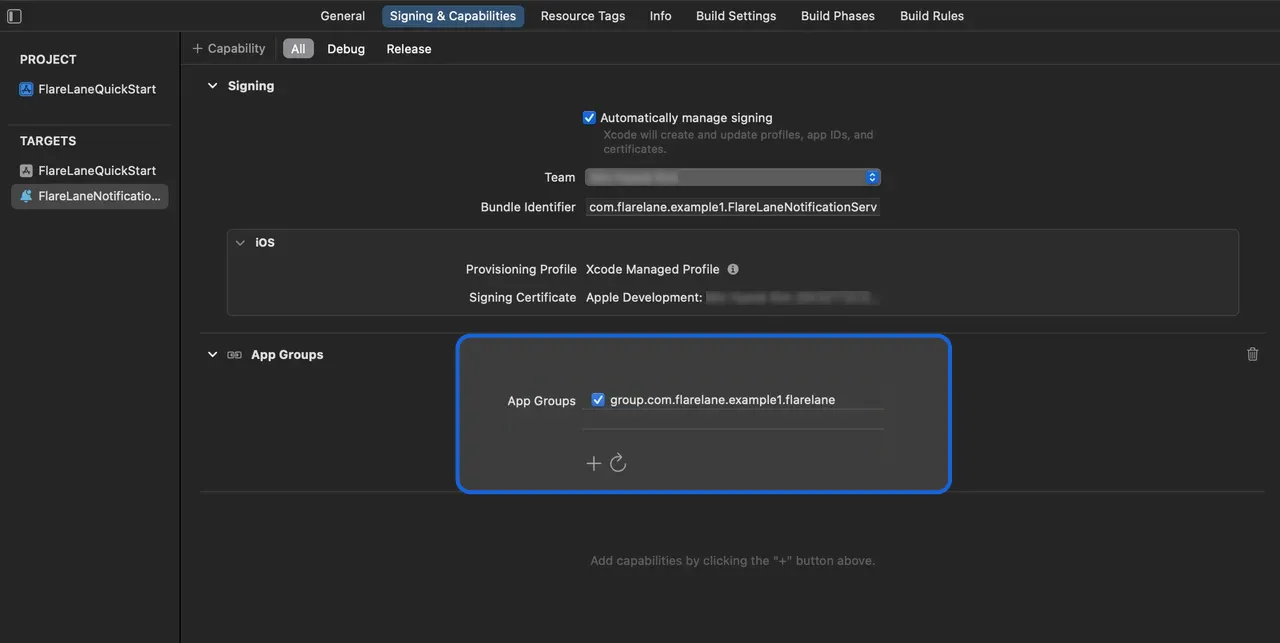
Likewise, add and enable an App Group with the same name in the extension you created earlier.
4. Integrate the SDK
Section titled “4. Integrate the SDK”Choose one of the two integration methods below, whichever best fits your project.
CocoaPods
Section titled “CocoaPods”Open your Podfile and add the following.
// Add the line below at the top of the file to enable Dynamic Frameworks.use_frameworks!
target 'YOUR_PROJECT_NAME' do  // Add the line below  pod 'FlareLane', '1.10.0'end
// Add the line below at the bottom of the file.// Set the target name to the Product Name of the extension you entered earlier.target 'FlareLaneNotificationServiceExtension' do  pod 'FlareLane', '1.10.0'end
Run pod install to finish installing the SDK.
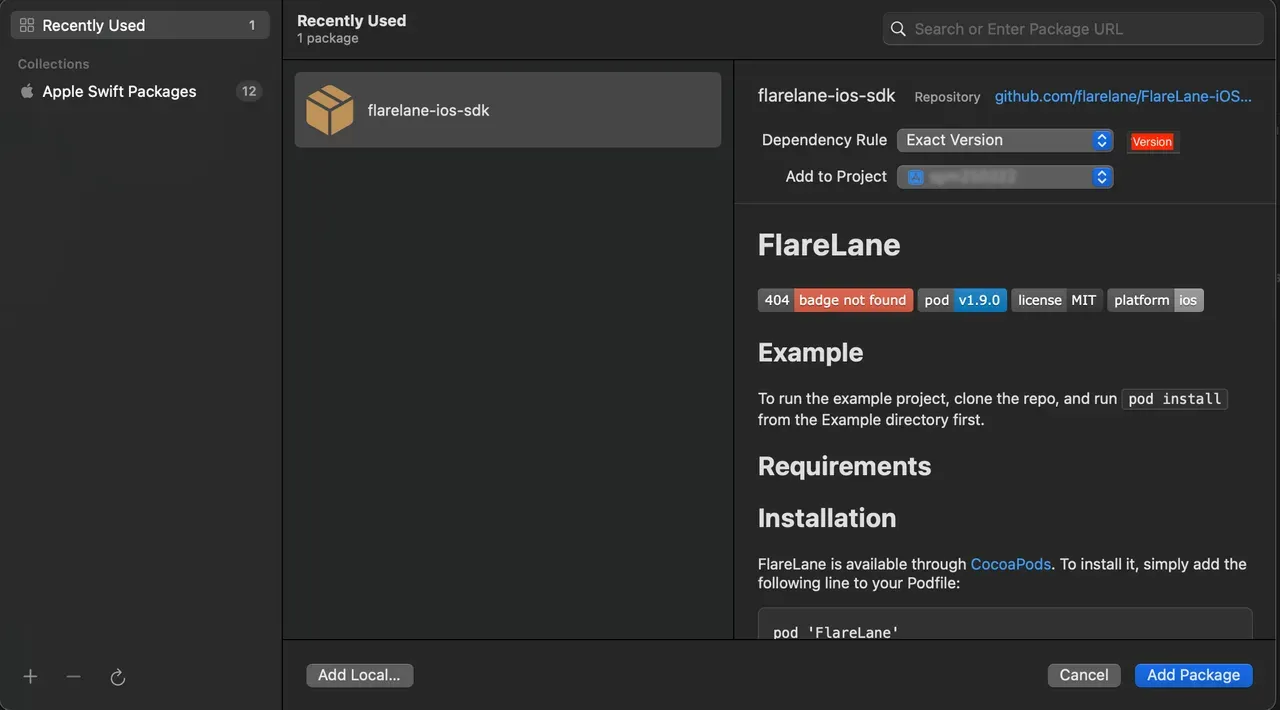
SPM (Swift Package Manager)
Section titled “SPM (Swift Package Manager)”Enter https://github.com/flarelane/FlareLane-iOS-SDK as the package URL, and set Exact Version to 1.9.3.
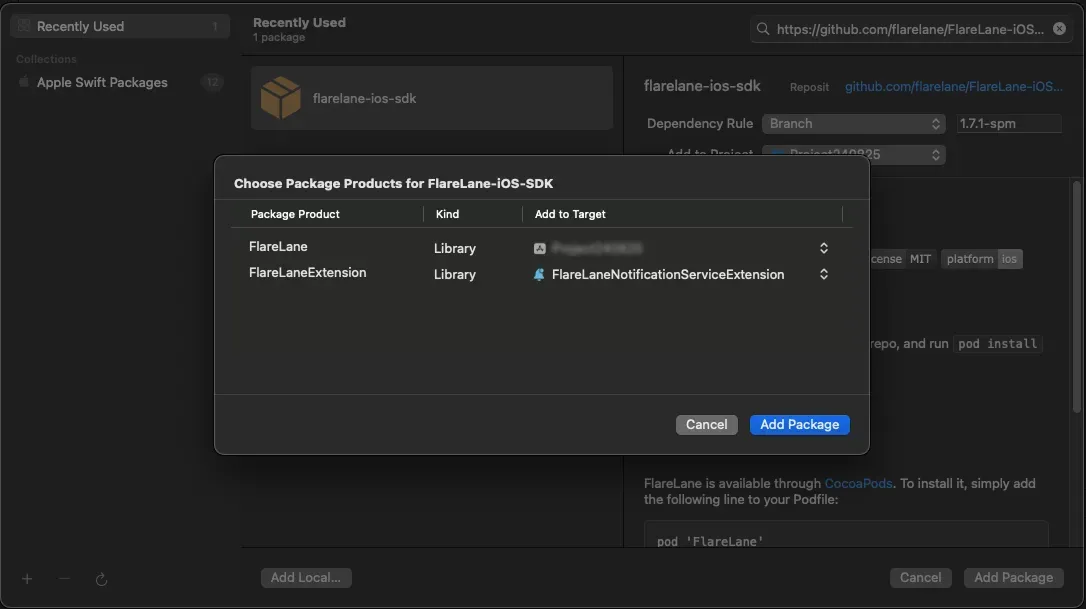
Select FlareLane for the main target, and FlareLaneExtension for the extension target.
5. Add the Code
Section titled “5. Add the Code”5-1. (SwiftUI only) Create AppDelegate.swift
Section titled “5-1. (SwiftUI only) Create AppDelegate.swift”SwiftUI projects don't include an AppDelegate.swift file, so you need to create one first.
Create a new AppDelegate.swift file and make a few changes to your existing <YOUR_PROJECT_NAME>App.swift file.
import UIKit
class AppDelegate: NSObject, UIApplicationDelegate {  func application(_ application: UIApplication, didFinishLaunchingWithOptions launchOptions: [UIApplication.LaunchOptionsKey : Any]? = nil) -> Bool {    return true  }}
struct <YOUR_PROJECT_NAME>App: App { // Add the code below @UIApplicationDelegateAdaptor(AppDelegate.self) var appDelegate}5-2. Add AppDelegate Methods
Section titled “5-2. Add AppDelegate Methods”- Add the
application(:didFinishLaunchingWithOptions:)method - Add the
application(:didRegisterForRemoteNotificationsWithDeviceToken:)method
import FlareLane
class AppDelegate: UIResponder, UIApplicationDelegate {  func application(_ application: UIApplication, didFinishLaunchingWithOptions launchOptions: [UIApplication.LaunchOptionsKey: Any]?) -> Bool {    // 1    // To control when the notification permission prompt appears, set the third parameter to false and call .subscribe() at the appropriate time.    FlareLane.initWithLaunchOptions(launchOptions, projectId: "PROJECT_ID", requestPermissionOnLaunch: true)  }
  func application(_ application: UIApplication, didRegisterForRemoteNotificationsWithDeviceToken deviceToken: Data) {    // 2    FlareLaneAppDelegate.shared.application(application, didRegisterForRemoteNotificationsWithDeviceToken: deviceToken)  }}
@import FlareLane;
@implementation AppDelegate- (BOOL)application:(UIApplication *)application didFinishLaunchingWithOptions:(NSDictionary *)launchOptions { // 1 // To control when the notification permission prompt appears, set the third parameter to false and call .subscribe() at the appropriate time. [FlareLane initWithLaunchOptions:launchOptions projectId:@"PROJECT_ID" requestPermissionOnLaunch:true];}
- (void)application:(UIApplication *)application didRegisterForRemoteNotificationsWithDeviceToken:(NSData *)deviceToken { // 2 [[FlareLaneAppDelegate shared] application:application didRegisterForRemoteNotificationsWithDeviceToken:deviceToken];}5-3. Add UNUserNotificationCenterDelegate Methods
Section titled “5-3. Add UNUserNotificationCenterDelegate Methods”- Set the AppDelegate as the UNUserNotificationCenterDelegate
- Add the
userNotificationCenter(:willPresent:withCompletionHandler:)method - Add the corresponding method
import FlareLane
@mainclass AppDelegate: UIResponder, UIApplicationDelegate {  func application(_ application: UIApplication, didFinishLaunchingWithOptions launchOptions: [UIApplication.LaunchOptionsKey: Any]?) -> Bool {    // 1    UNUserNotificationCenter.current().delegate = self  }}
extension AppDelegate: UNUserNotificationCenterDelegate { // 2 func userNotificationCenter(_ center: UNUserNotificationCenter, willPresent notification: UNNotification, withCompletionHandler completionHandler: @escaping (UNNotificationPresentationOptions) -> Void) { FlareLaneNotificationCenter.shared.userNotificationCenter(center, willPresent: notification, withCompletionHandler: completionHandler) } // 3 func userNotificationCenter(_ center: UNUserNotificationCenter, didReceive response: UNNotificationResponse, withCompletionHandler completionHandler: @escaping () -> Void) { FlareLaneNotificationCenter.shared.userNotificationCenter(center, didReceive: response, withCompletionHandler: completionHandler) }}#import <UserNotifications/UserNotifications.h>
@interface AppDelegate : UIResponder <..., UNUserNotificationCenterDelegate>@end
// AppDelegate.m@implementation AppDelegate- (BOOL)application:(UIApplication *)application didFinishLaunchingWithOptions:(NSDictionary *)launchOptions{ // 1 [[UNUserNotificationCenter currentNotificationCenter] setDelegate: self];}
// 2- (void)userNotificationCenter:(UNUserNotificationCenter *)center willPresentNotification:(UNNotification *)notification withCompletionHandler:(void (^)(UNNotificationPresentationOptions))completionHandler{ [[FlareLaneNotificationCenter shared] userNotificationCenter:center willPresentNotification:notification withCompletionHandler:completionHandler];}// 3- (void)userNotificationCenter:(UNUserNotificationCenter *)center didReceiveNotificationResponse:(UNNotificationResponse *)response withCompletionHandler:(void (^)())completionHandler{ [[FlareLaneNotificationCenter shared] userNotificationCenter:center didReceiveNotificationResponse:response withCompletionHandler:completionHandler];}@end5-4. Add UNNotificationServiceExtension Methods
Section titled “5-4. Add UNNotificationServiceExtension Methods”- Add the
didReceive(:withContentHandler:)method - Add the
serviceExtensionTimeWillExpire()method
import UserNotificationsimport FlareLane
class NotificationService: UNNotificationServiceExtension {  override func didReceive(_ request: UNNotificationRequest, withContentHandler contentHandler: @escaping (UNNotificationContent) -> Void) {    // 1    // Branch the logic so that only FlareLane's methods run for push notifications sent by FlareLane.    if FlareLaneNotificationServiceExtensionHelper.shared.isFlareLaneNotification(request) {      FlareLaneNotificationServiceExtensionHelper.shared.didReceive(request, withContentHandler: contentHandler)    } else {      // ...    }  }
  override func serviceExtensionTimeWillExpire() {    // 2    FlareLaneNotificationServiceExtensionHelper.shared.serviceExtensionTimeWillExpire()  }}
@import FlareLane;
@implementation NotificationService
- (void)didReceiveNotificationRequest:(UNNotificationRequest *)request withContentHandler:(void (^)(UNNotificationContent * _Nonnull))contentHandler { // 1 // Branch the logic so that only FlareLane's methods run for push notifications sent by FlareLane. if ([[FlareLaneNotificationServiceExtensionHelper shared] isFlareLaneNotification:request]) { [[FlareLaneNotificationServiceExtensionHelper shared] didReceive:request withContentHandler:contentHandler]; } else { // ... }}
- (void)serviceExtensionTimeWillExpire { // 2 [[FlareLaneNotificationServiceExtensionHelper shared] serviceExtensionTimeWillExpire];}6. Link a User ID
Section titled “6. Link a User ID”When the app is installed, the device created in FlareLane is an "anonymous device." By linking the unique User ID that you manage separately, you can match FlareLane's device to your own User ID.
Linking a User ID has many benefits. It lets you distinguish between members and non-members, and lets you send push notifications by User ID at any time, so we recommend setting it up early in your integration.
Typically, you link the User ID through the setUserId function when a user signs up or logs in successfully.
FlareLane.setUserId(userId: "USER_ID")[FlareLane setUserIdWithUserId: @"USER_ID"];7. Additional Integration Guides
Section titled “7. Additional Integration Guides”Bridge Integration for WebView-Based Apps
Section titled “Bridge Integration for WebView-Based Apps”- FlareLane offers a variety of convenience features for WebView-based apps so that actions taken on the website can also be recognized in the app. See the WebView-based mobile app bridge guide.
Automatic URL Handling
Section titled “Automatic URL Handling”- By default, FlareLane automatically handles URLs such as https links and deep links when a push notification is clicked. If you need to implement your own click handler, see Disable Automatic URL Handling.
Displaying In-App Messages (Pop-ups)
Section titled “Displaying In-App Messages (Pop-ups)”- See In-App Messages (Pop-ups) and add a single line of code (displayInApp) at the point where you want the pop-up to appear.
Other Resources
Section titled “Other Resources”| Guide |
|---|
| Mobile SDK Reference |
| iOS SDK Release Notes |