How Customer Journeys Work
Customer Journey states
Section titled “Customer Journey states”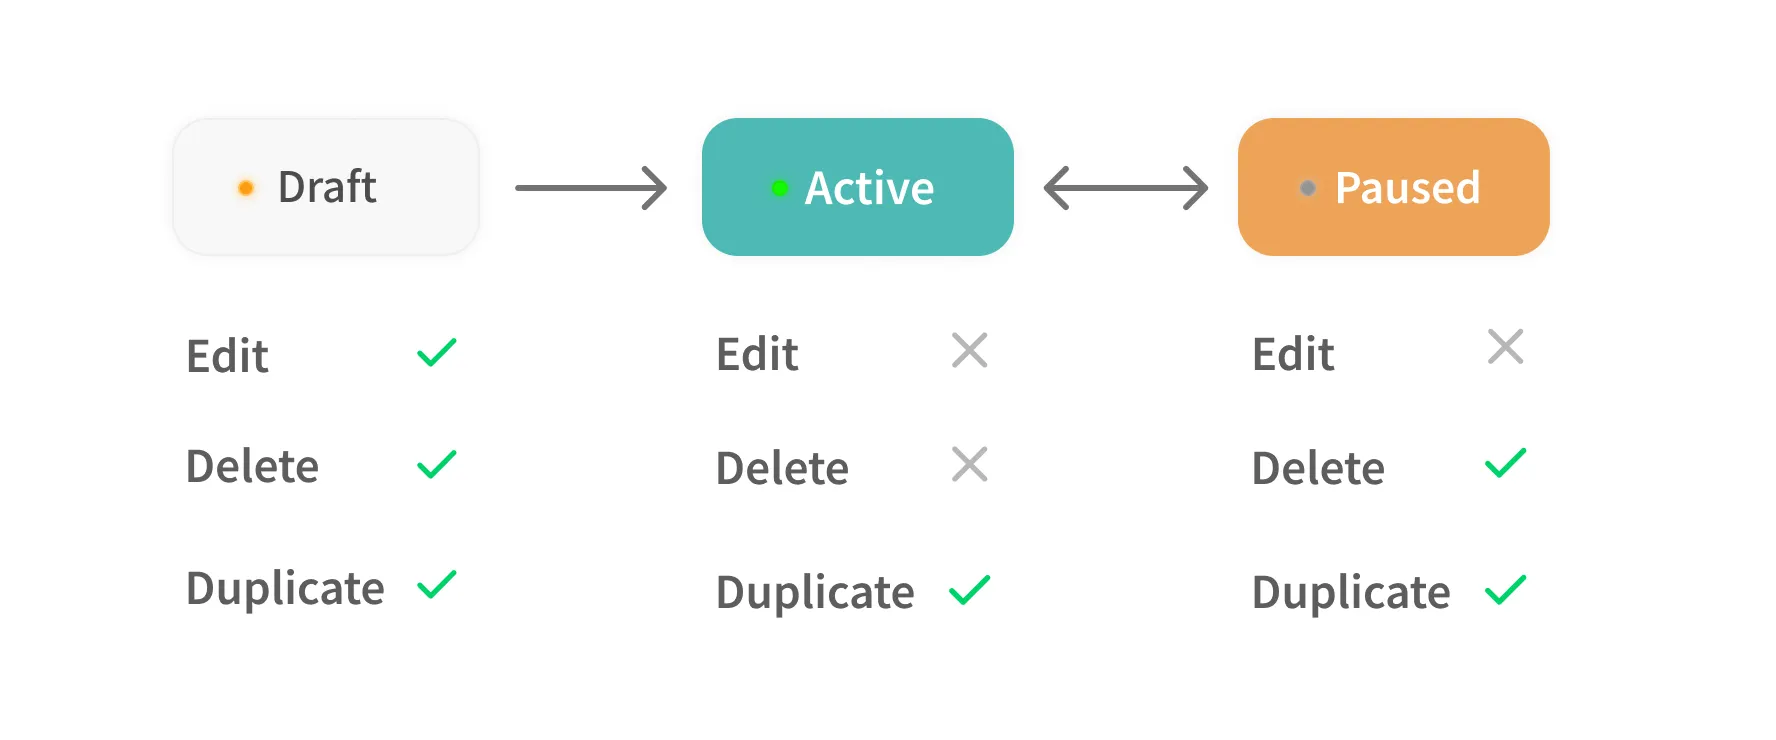
Active / Paused
Section titled “Active / Paused”A newly created Customer Journey starts in the "Draft" state. To run it, you must switch it to the "Active" state. Once it's "Active," the only available action is "Pause."
Edit / Duplicate
Section titled “Edit / Duplicate”Editing is only possible in the "Draft" state. To preserve the accuracy of your statistics, editing is not allowed after the initial activation. If you need to modify a campaign after activation, duplicate the existing campaign, activate the new one, and then pause the original.
Delete
Section titled “Delete”You can delete a Customer Journey automation you've created. This is only possible in the "Draft" or "Paused" state.
Entry and exit conditions
Section titled “Entry and exit conditions”Automation begins for users who meet the entry conditions. There are two types of entry conditions: event-based and segment-based. When a user who has entered the journey meets the exit condition, no further messages are sent and the journey ends for that user.
Event-based
Section titled “Event-based”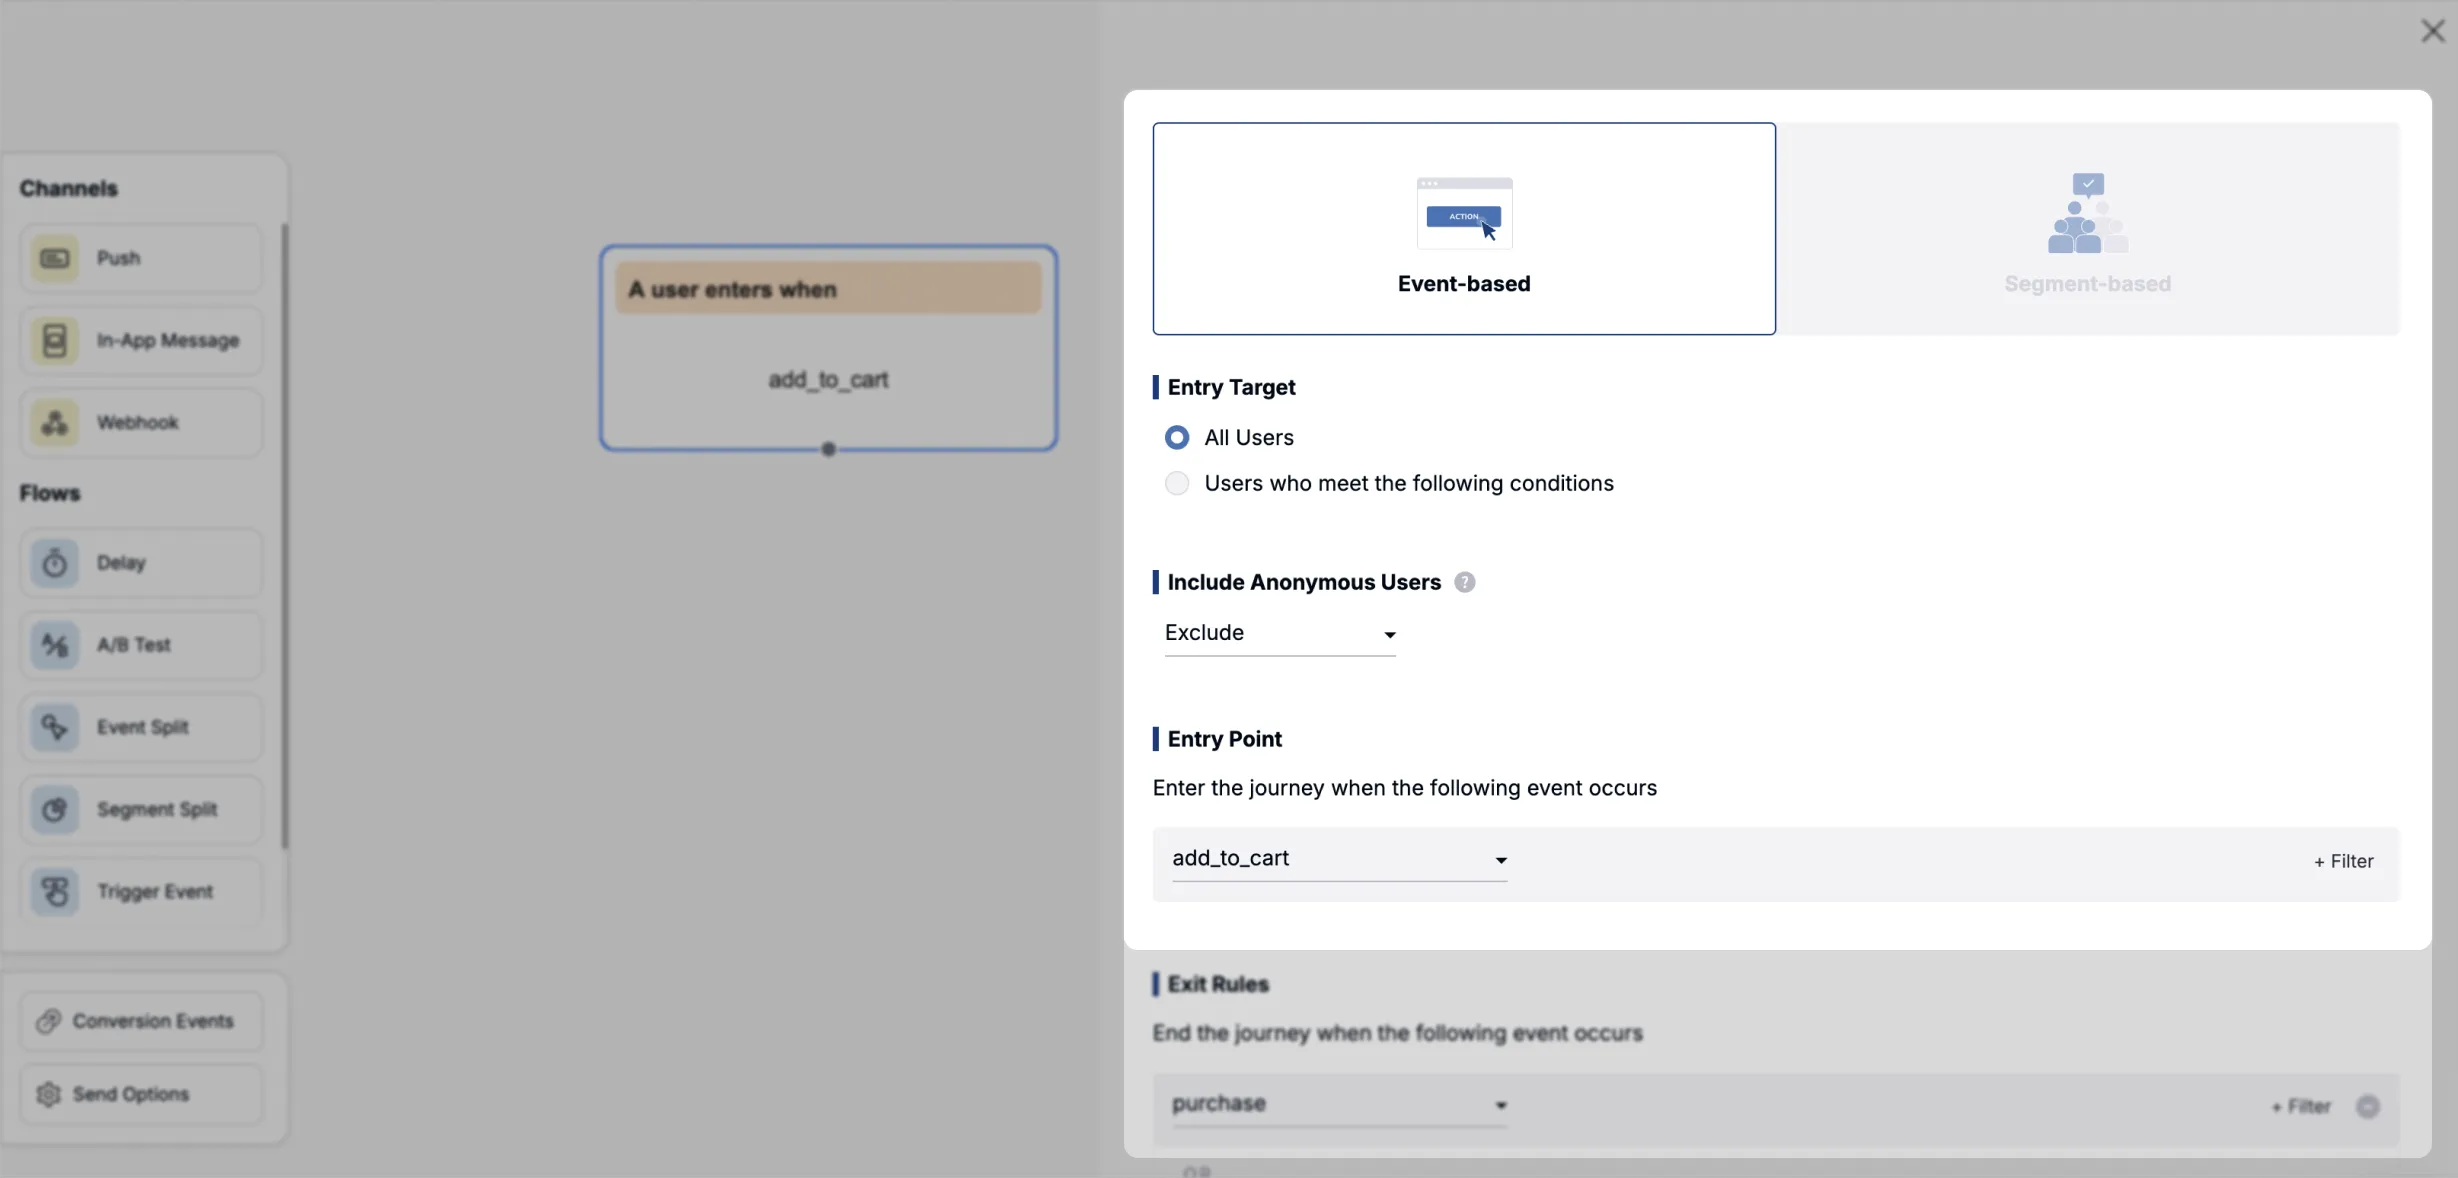
The journey starts when a user performs an action such as adding to cart or making a purchase, triggering an event. You can also further refine the entry conditions.
Detailed data conditions
Section titled “Detailed data conditions”Instead of targeting every user who triggers the event, you can set specific conditions to define who enters the journey. By configuring detailed data filters on the entry event, you can create even more granular conditions.
Available event data filter operators:
| Operator | Description |
|---|---|
| = | The tag equals the entered value (for an array, an includes search matching one of the elements) |
| ≠ | The tag does not equal the entered value (for an array, an excludes search matching one of the elements) |
| ≥ | A numeric tag is greater than or equal to the entered value |
| ≤ | A numeric tag is less than or equal to the entered value |
| > | A numeric tag is greater than the entered value |
| < | A numeric tag is less than the entered value |
| Is one of | A comma-separated OR match against multiple values (entering 1,2,3 matches if the value equals any of the three) |
| Contains | The entered string is partially contained |
| Does not contain | The entered string is not partially contained |
Data-driven personalized messages
Section titled “Data-driven personalized messages”Data included in the entry event can later be used as personalized message (Liquid) variables within the journey. For example, if a purchase completion (purchase) event includes a product name (product_name), you can use syntax like the following with the sub-variables inside entry_event.data.
Example message: "Hi! How did you like the {{ entry_event.data.product_name }} you ordered?"
Exit events
Section titled “Exit events”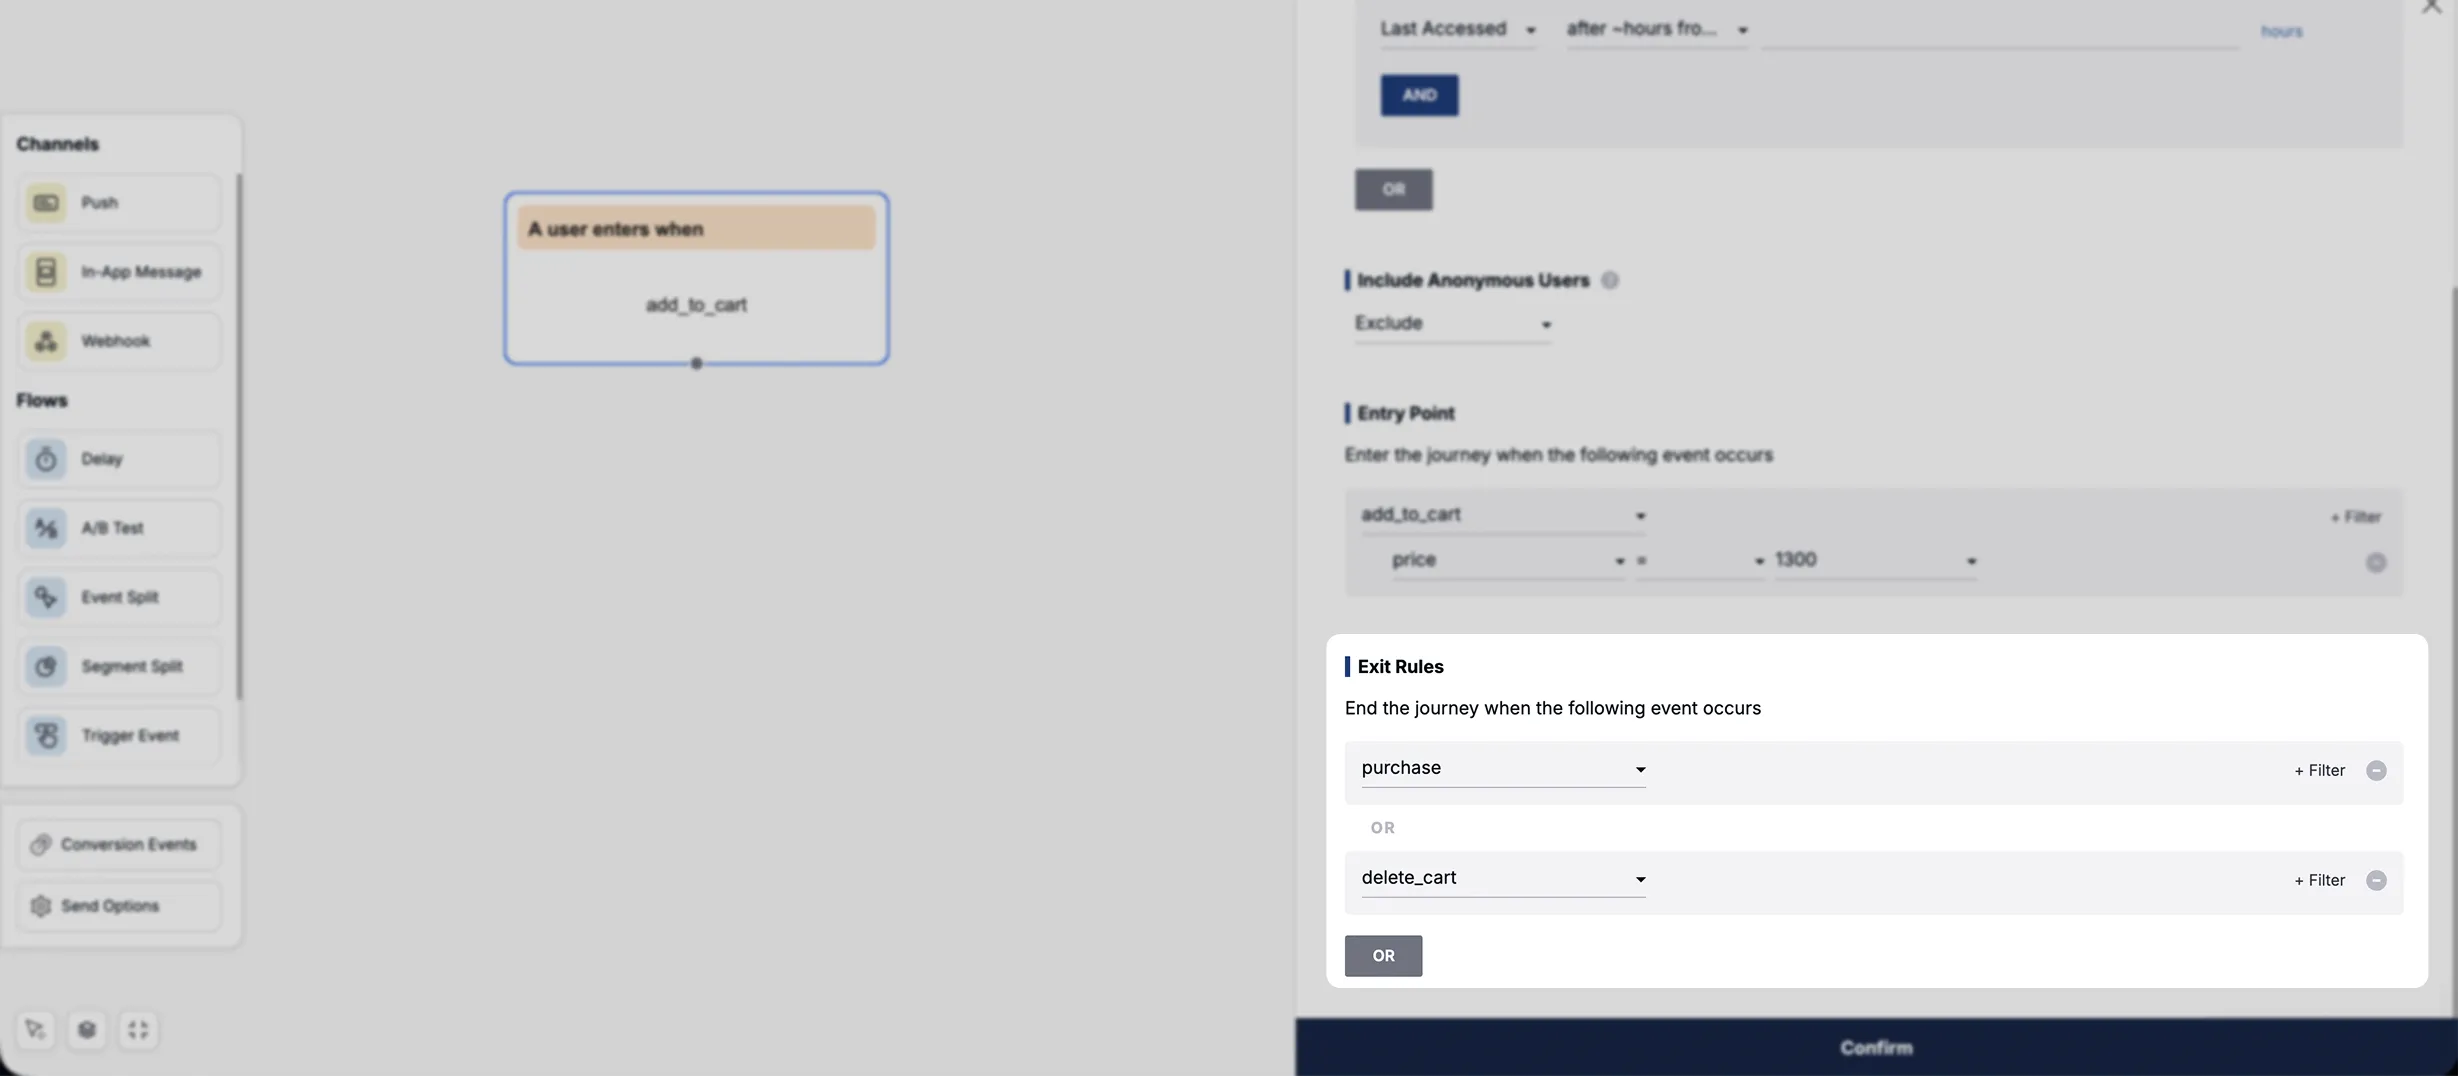
If no exit event is set, by default the user proceeds through the journey to the end after entering. However, if you set an exit event, you can end the journey midway when the exit event occurs after the user has entered.
You can set multiple events as exit conditions, and the exit condition's data filter also offers a "Compare with the entry condition event's data" option. This lets you set dynamic exit conditions such as "End the journey if the user purchases exactly the same product they searched for."
Segment-based
Section titled “Segment-based”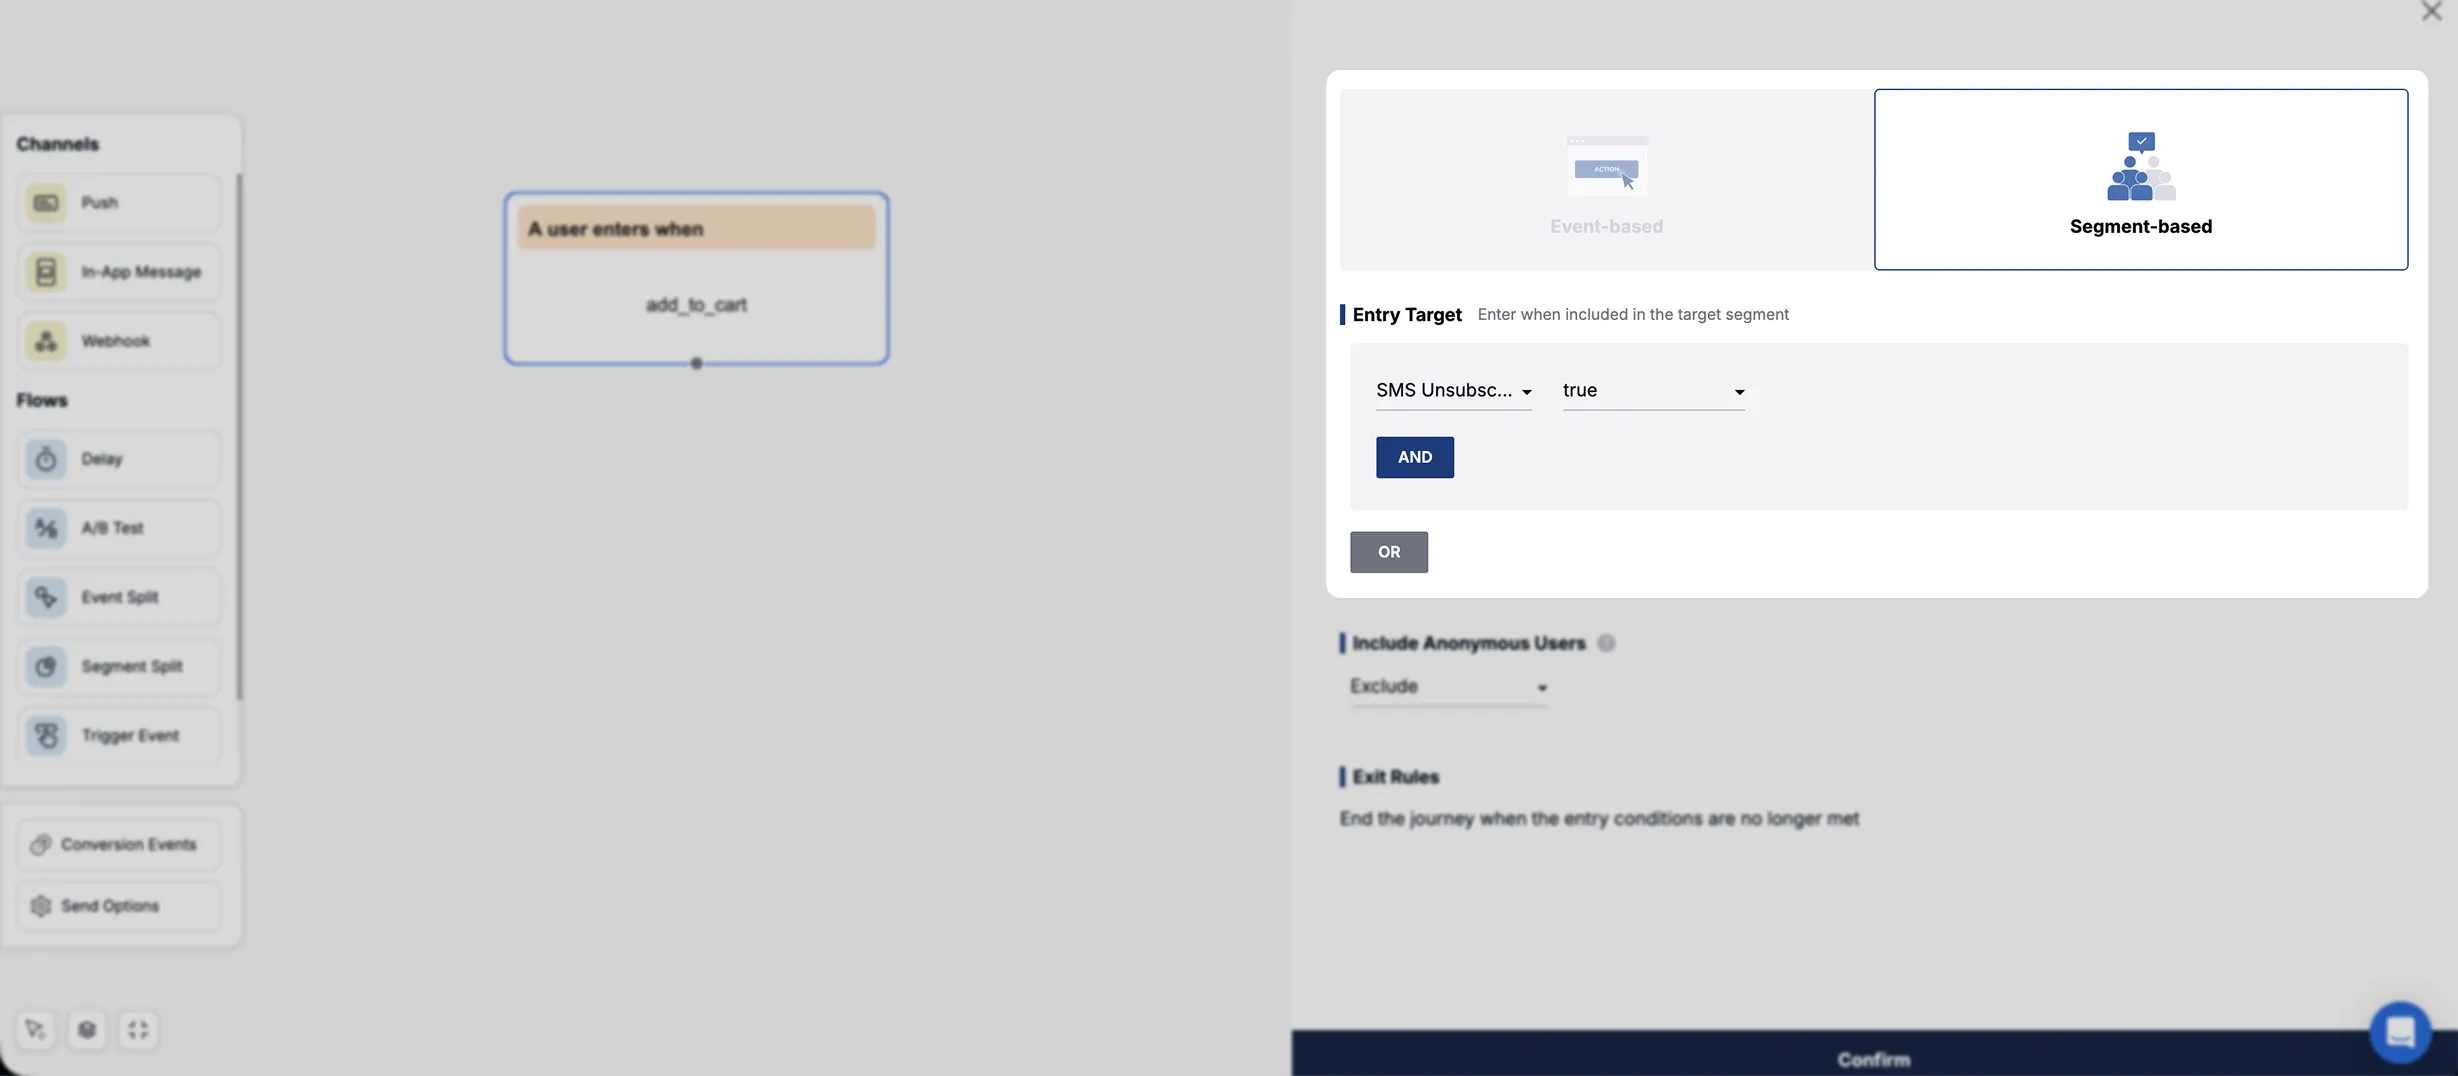
The journey starts when a user meets a certain characteristic, such as 7 days having passed since their last visit or reaching level 10. You can build conditions by setting various filters in the same way as the segment filter feature.
There's no need to set a separate exit condition. If a user who started the journey no longer meets the entry condition, any subsequent messages are automatically canceled and the journey ends.
Delivery settings
Section titled “Delivery settings”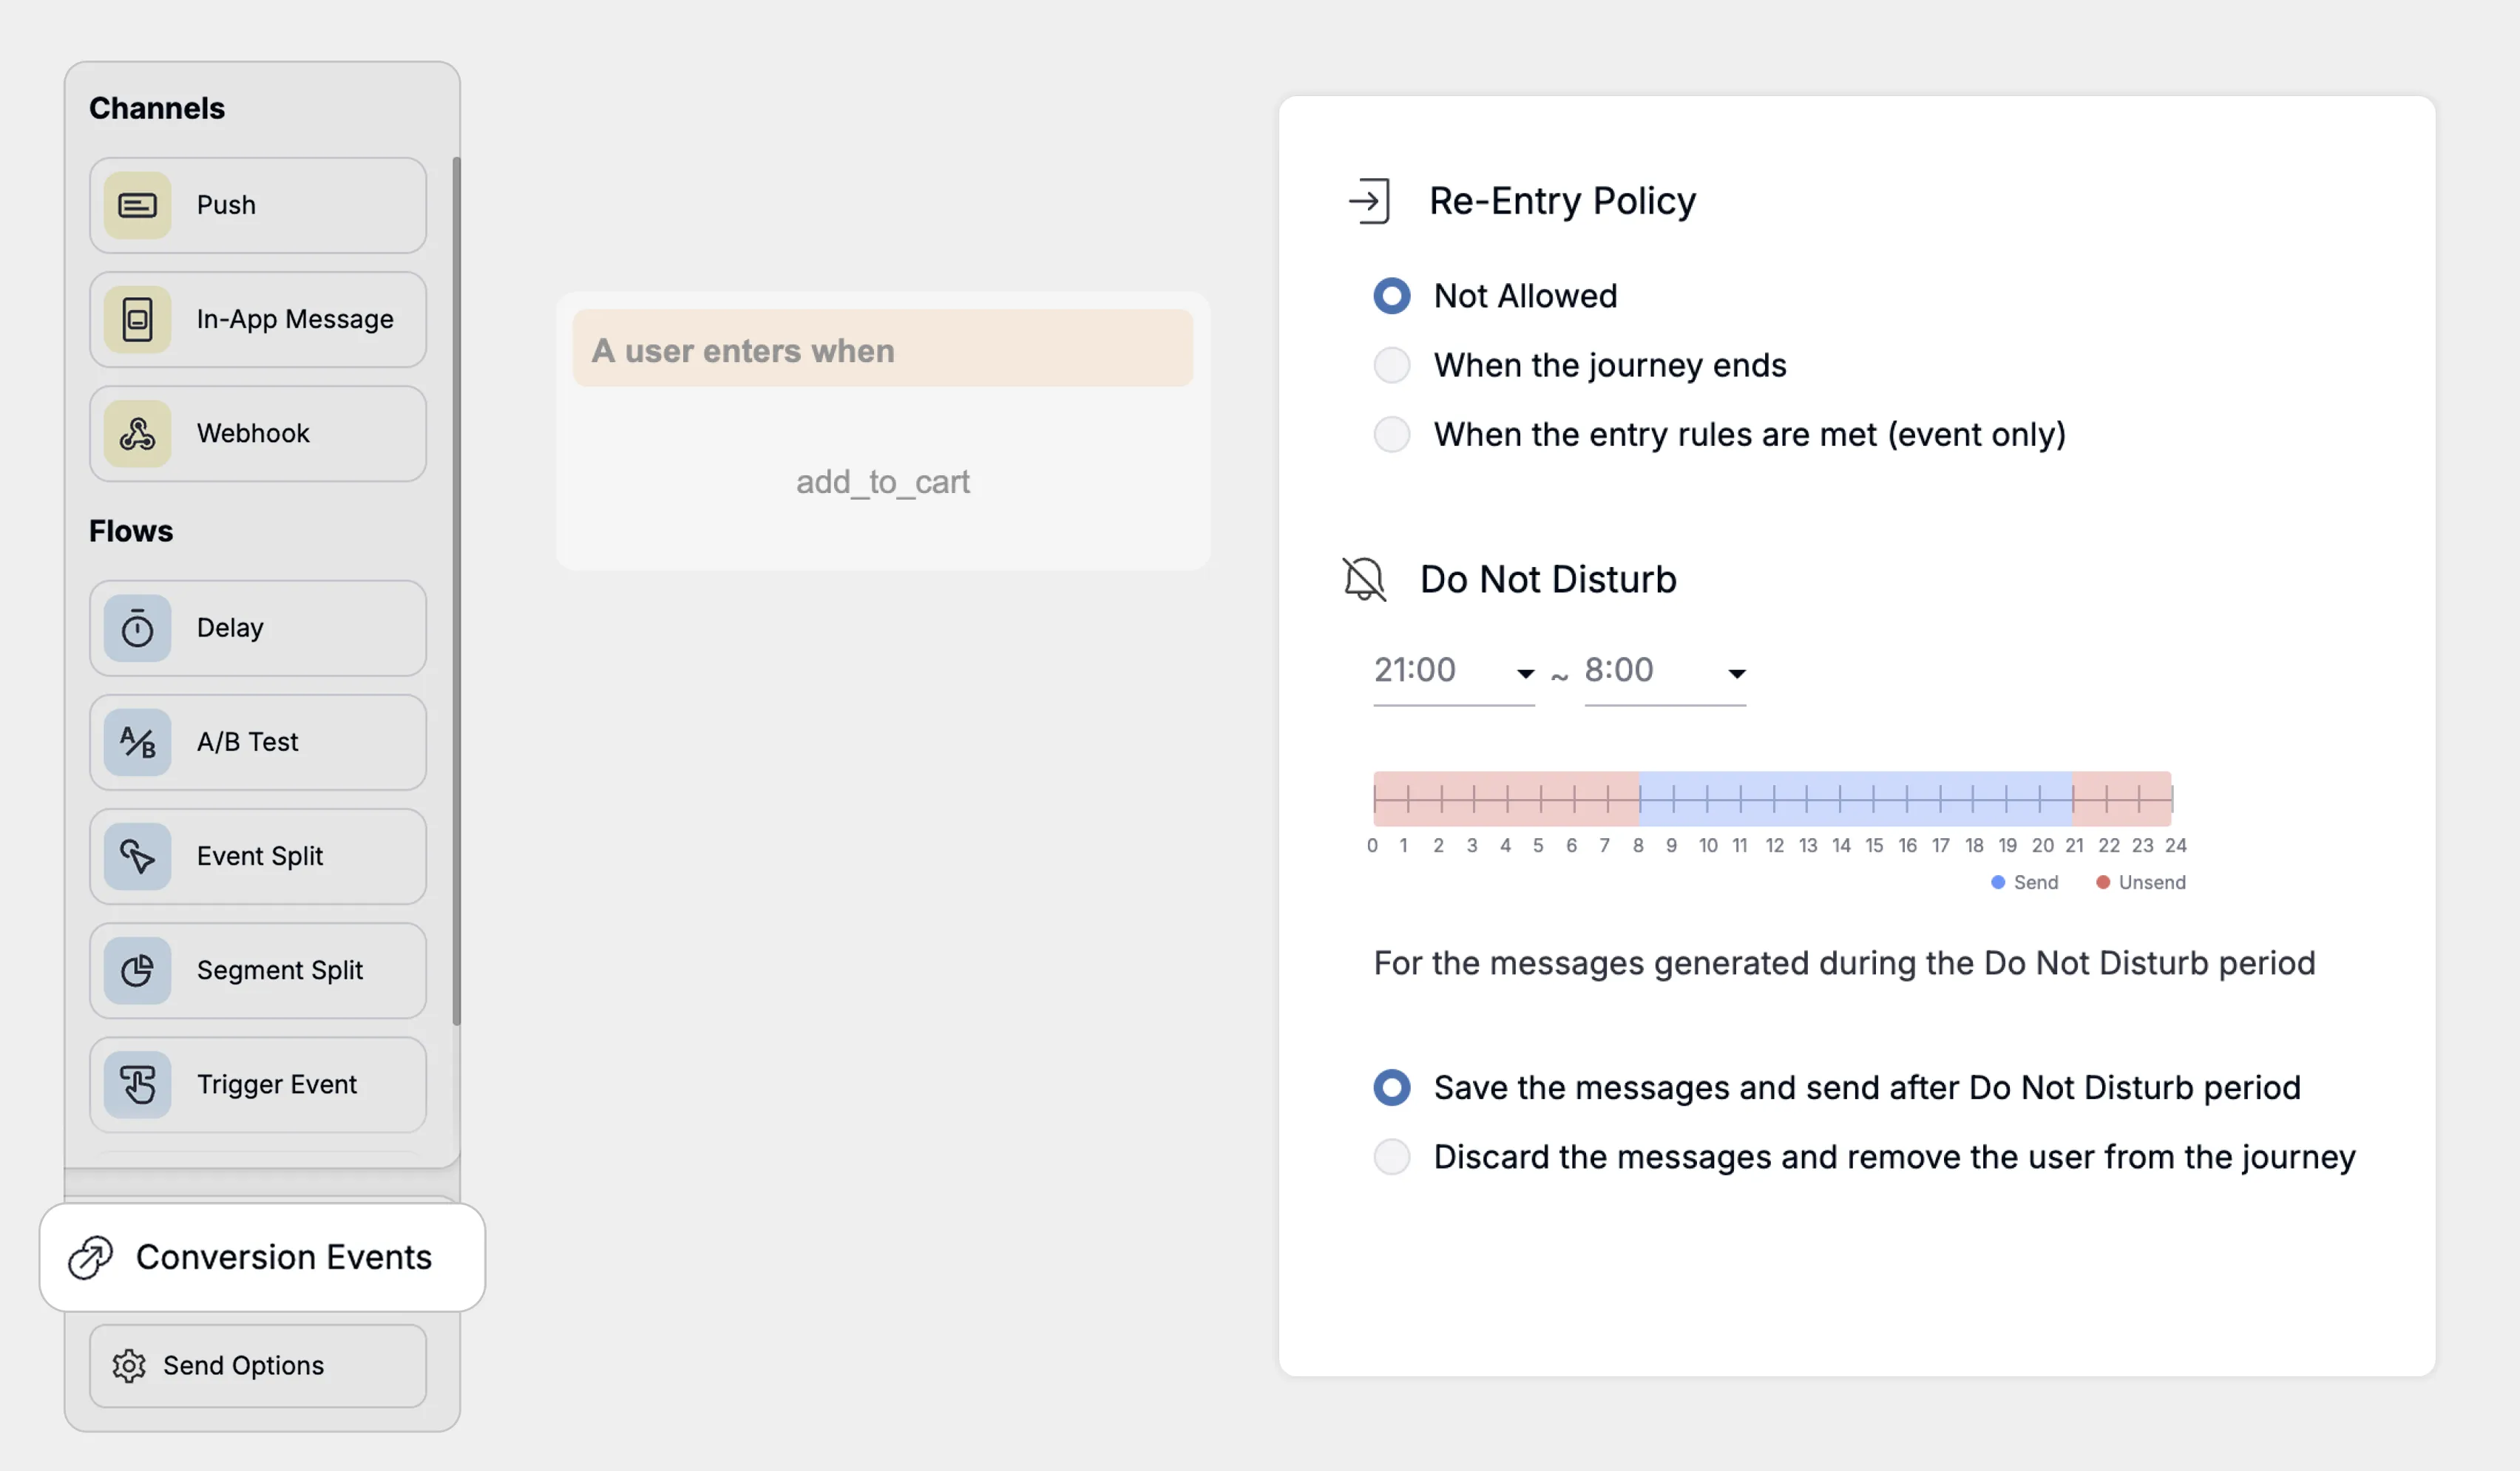
Re-entry policy
Section titled “Re-entry policy”Set the maximum number of times a target can enter the journey and the policy that governs re-entry.
| Re-entry policy | Description |
|---|---|
| No re-entry | Prevents re-entry after the initial entry. |
| Allow re-entry after the journey ends | Allows re-entry only after the journey has ended. |
| Allow re-entry whenever the entry condition is met | Available only when the entry and exit conditions are event-based. Allows re-entry every time the entry event condition is met. |
Override frequency capping
Section titled “Override frequency capping”If your project has frequency capping configured, you can ignore it. When checked, messages from this automated campaign are always sent.
Do Not Disturb hours
Section titled “Do Not Disturb hours”You can prevent notifications from being sent while users are asleep or busy. The time range is automatically calculated based on the local time zone of the user's device. If a send falls within Do Not Disturb hours, two options are available.
- Reschedule for the next available time: Don't send now; send again when the Do Not Disturb period ends.
- Cancel the send and end the current journey: If a send falls within Do Not Disturb hours and does not need to be delivered, cancel it and end that user's current journey.
How to test entry
Section titled “How to test entry”Here are answers to frequently asked questions about testing journey entry.
- With an event-based entry condition, I triggered the event but didn't enter the journey.
- Check whether the "re-entry condition" in your journey settings is set to "No re-entry." During testing, setting the "Allow re-entry whenever the entry condition is met" policy makes entry testing easier. Under normal circumstances, entry occurs within about 30 seconds of the event firing.
- With a segment-based entry condition, I triggered the event but didn't enter the journey.
- Segment-based automation does not enroll everyone who meets the condition all at once. Instead, users who meet the condition "after the journey is activated" enter. Roughly every 30 minutes, the system checks who meets the condition and enrolls/removes them in a batch. To repeatedly test segment automation, try updating tags back and forth so the user goes from not meeting the condition (exiting the journey) → about half an hour later → meeting the condition again (entering the journey).