Webhook
With webhooks, you can build multi-channel messaging by leveraging the APIs of external messaging services, or connect actions like coupon issuance through integration with your own server.
It requires a bit of development knowledge, but it lets you keep using a messaging vendor you already have a rate contract with, or configure the broadest possible range of use cases through server integration. This is why many businesses use this channel.
Creating a Webhook
Section titled “Creating a Webhook”
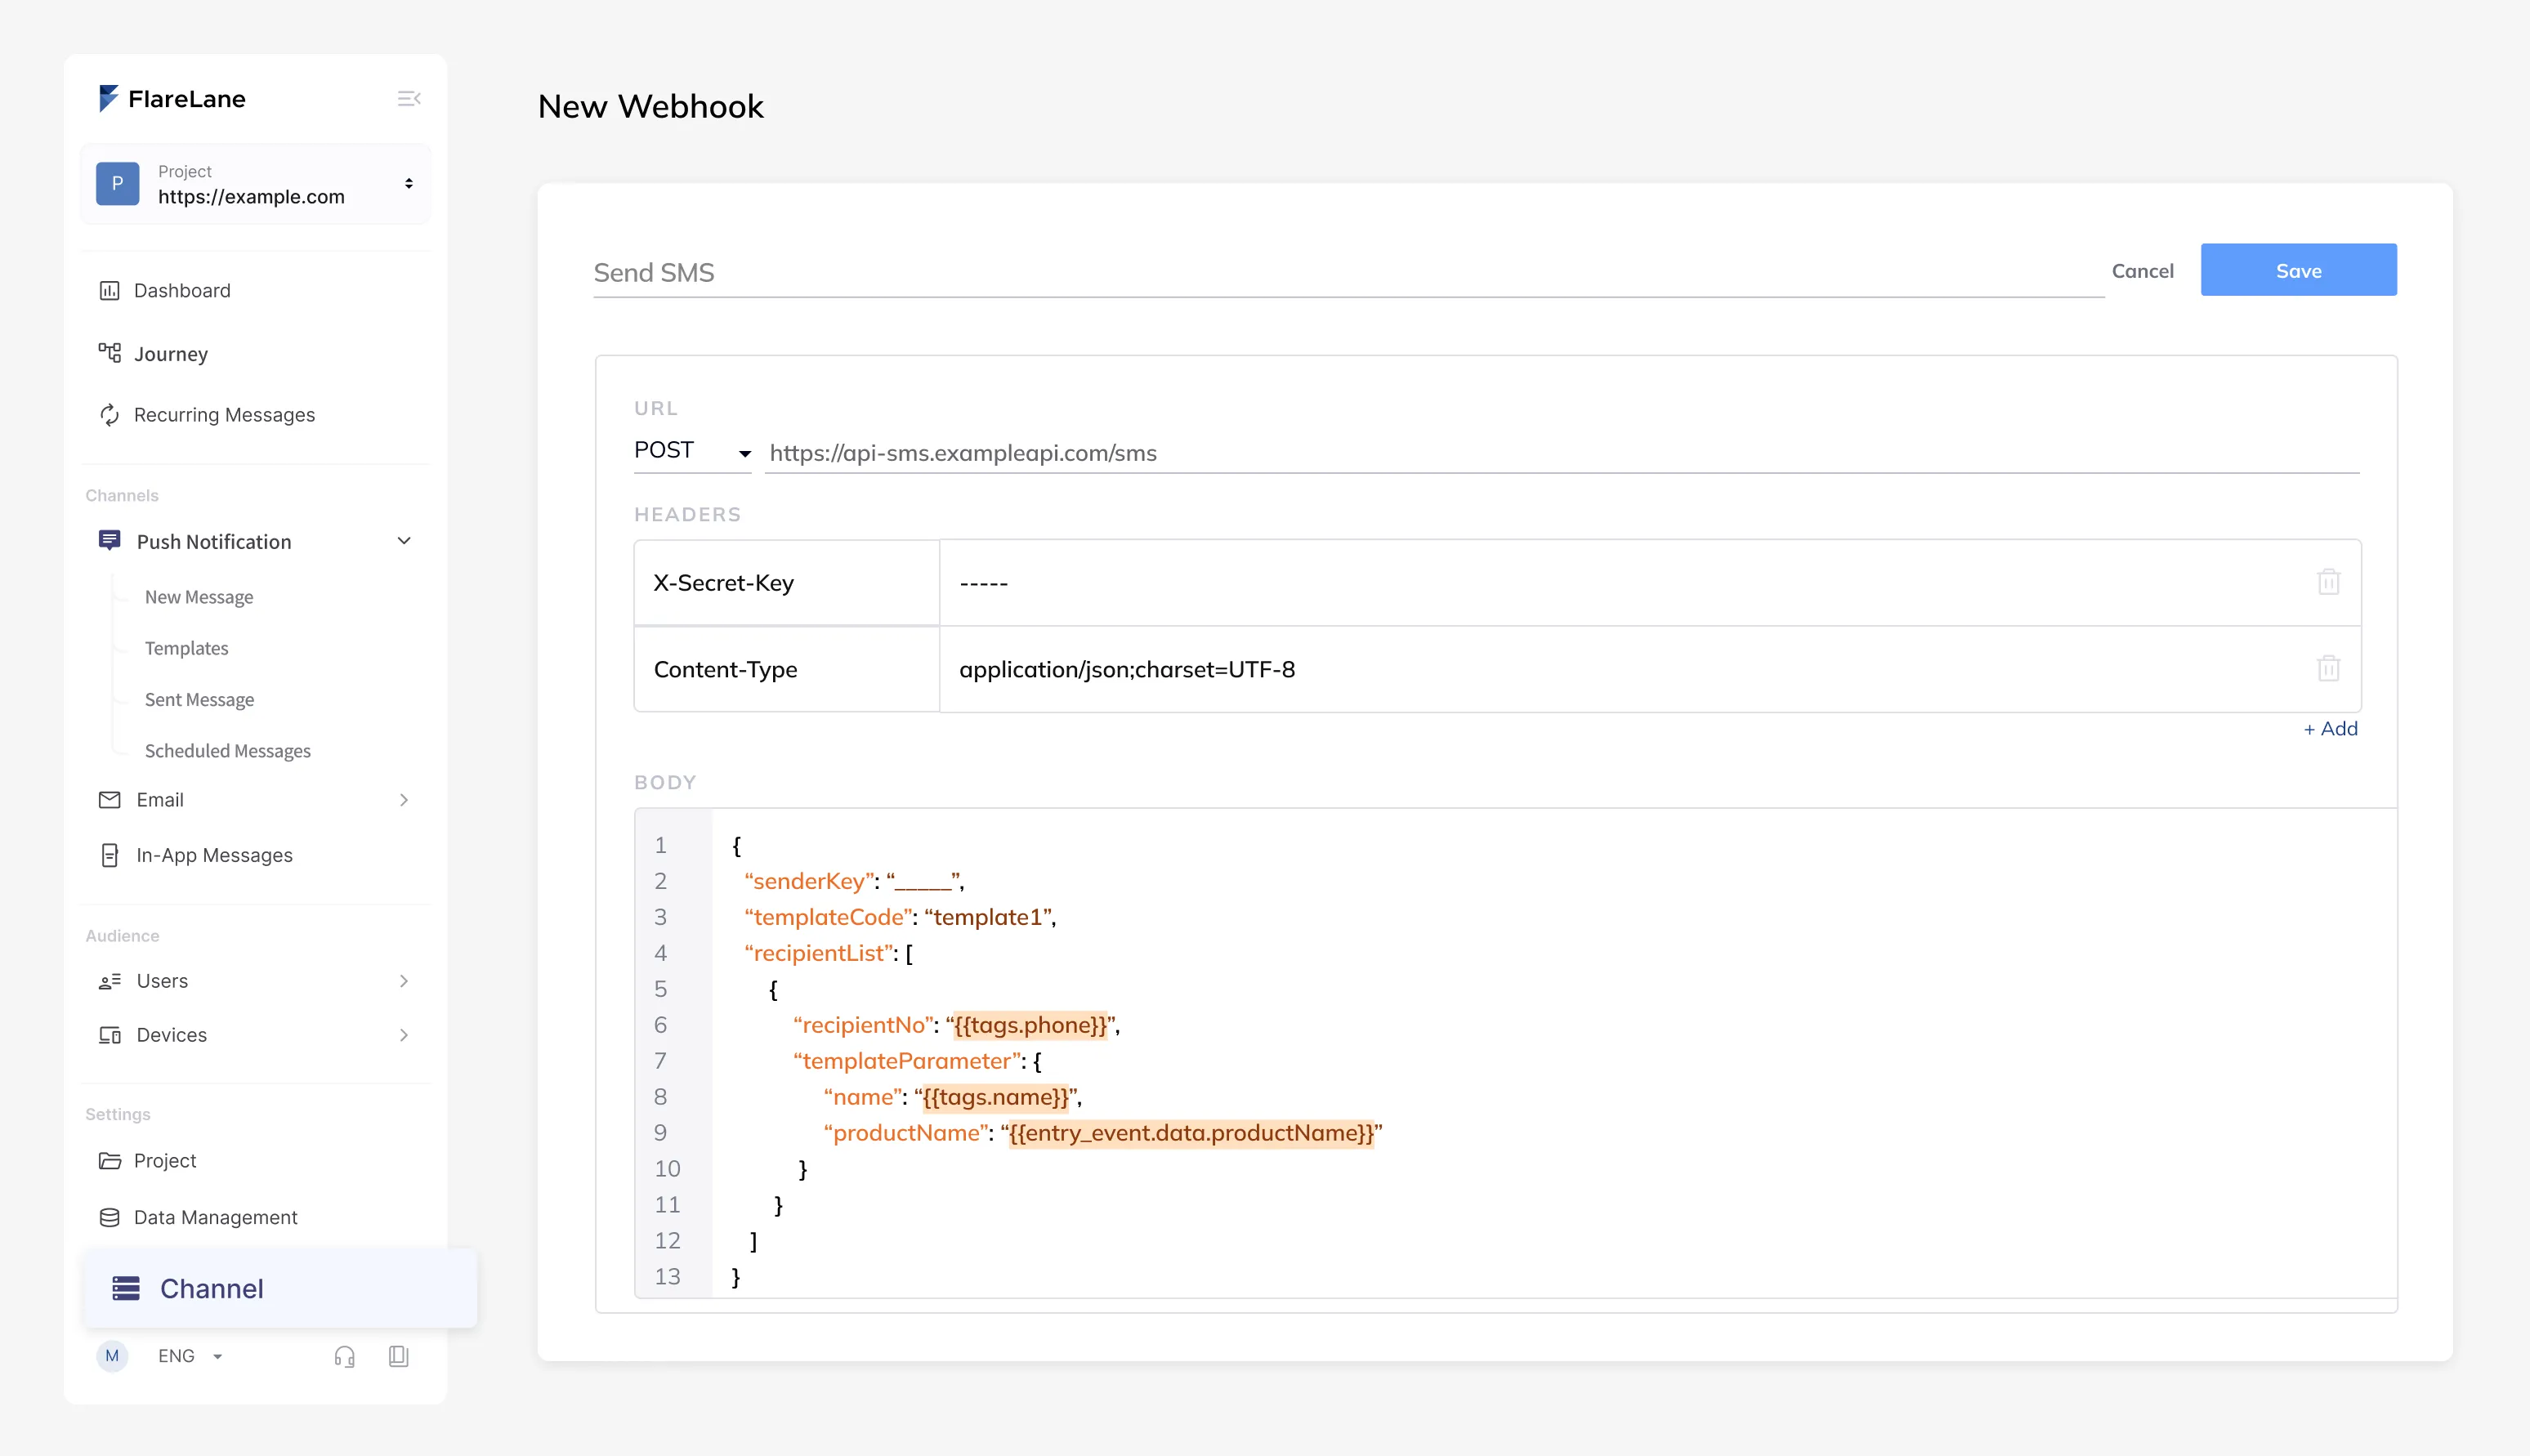
You can create a webhook on the Channels > Webhook page in the FlareLane console by configuring the endpoint, headers, and body parameters for an external HTTP request.
In each field, you can use Personalized Messages (Liquid) syntax to enter user tags or data values for dynamic parameter configuration.
Use Cases
Section titled “Use Cases”Sending Alimtalk via a Third-party Vendor
Section titled “Sending Alimtalk via a Third-party Vendor”Refer to the sending API provided by the vendor and register it in the FlareLane webhook channel. FlareLane then performs the actual sending by invoking the vendor's sending API through the webhook.
You can pass various dynamic variables needed to compose the message through the webhook as well. Refer to Personalized Messages (Liquid) to see which variables you can enter.
Using a Phone Number Tag with a Third-party SMS Sending API
Section titled “Using a Phone Number Tag with a Third-party SMS Sending API”{ "body": "{{ text }}", // text variable entered manually "sendNo": "15446859", "recipientList": [ { "recipientNo": "{{ tags.phone_number }}", // auto-filled when a phone number tag exists "countryCode": "82" } ]}Using Your Own API Directly with a User ID
Section titled “Using Your Own API Directly with a User ID”{ "userId": "{{ userId }}", // auto-filled when a user ID exists "text": "{{ text }}" // text variable entered manually}Creating a Webhook Action in a Journey
Section titled “Creating a Webhook Action in a Journey”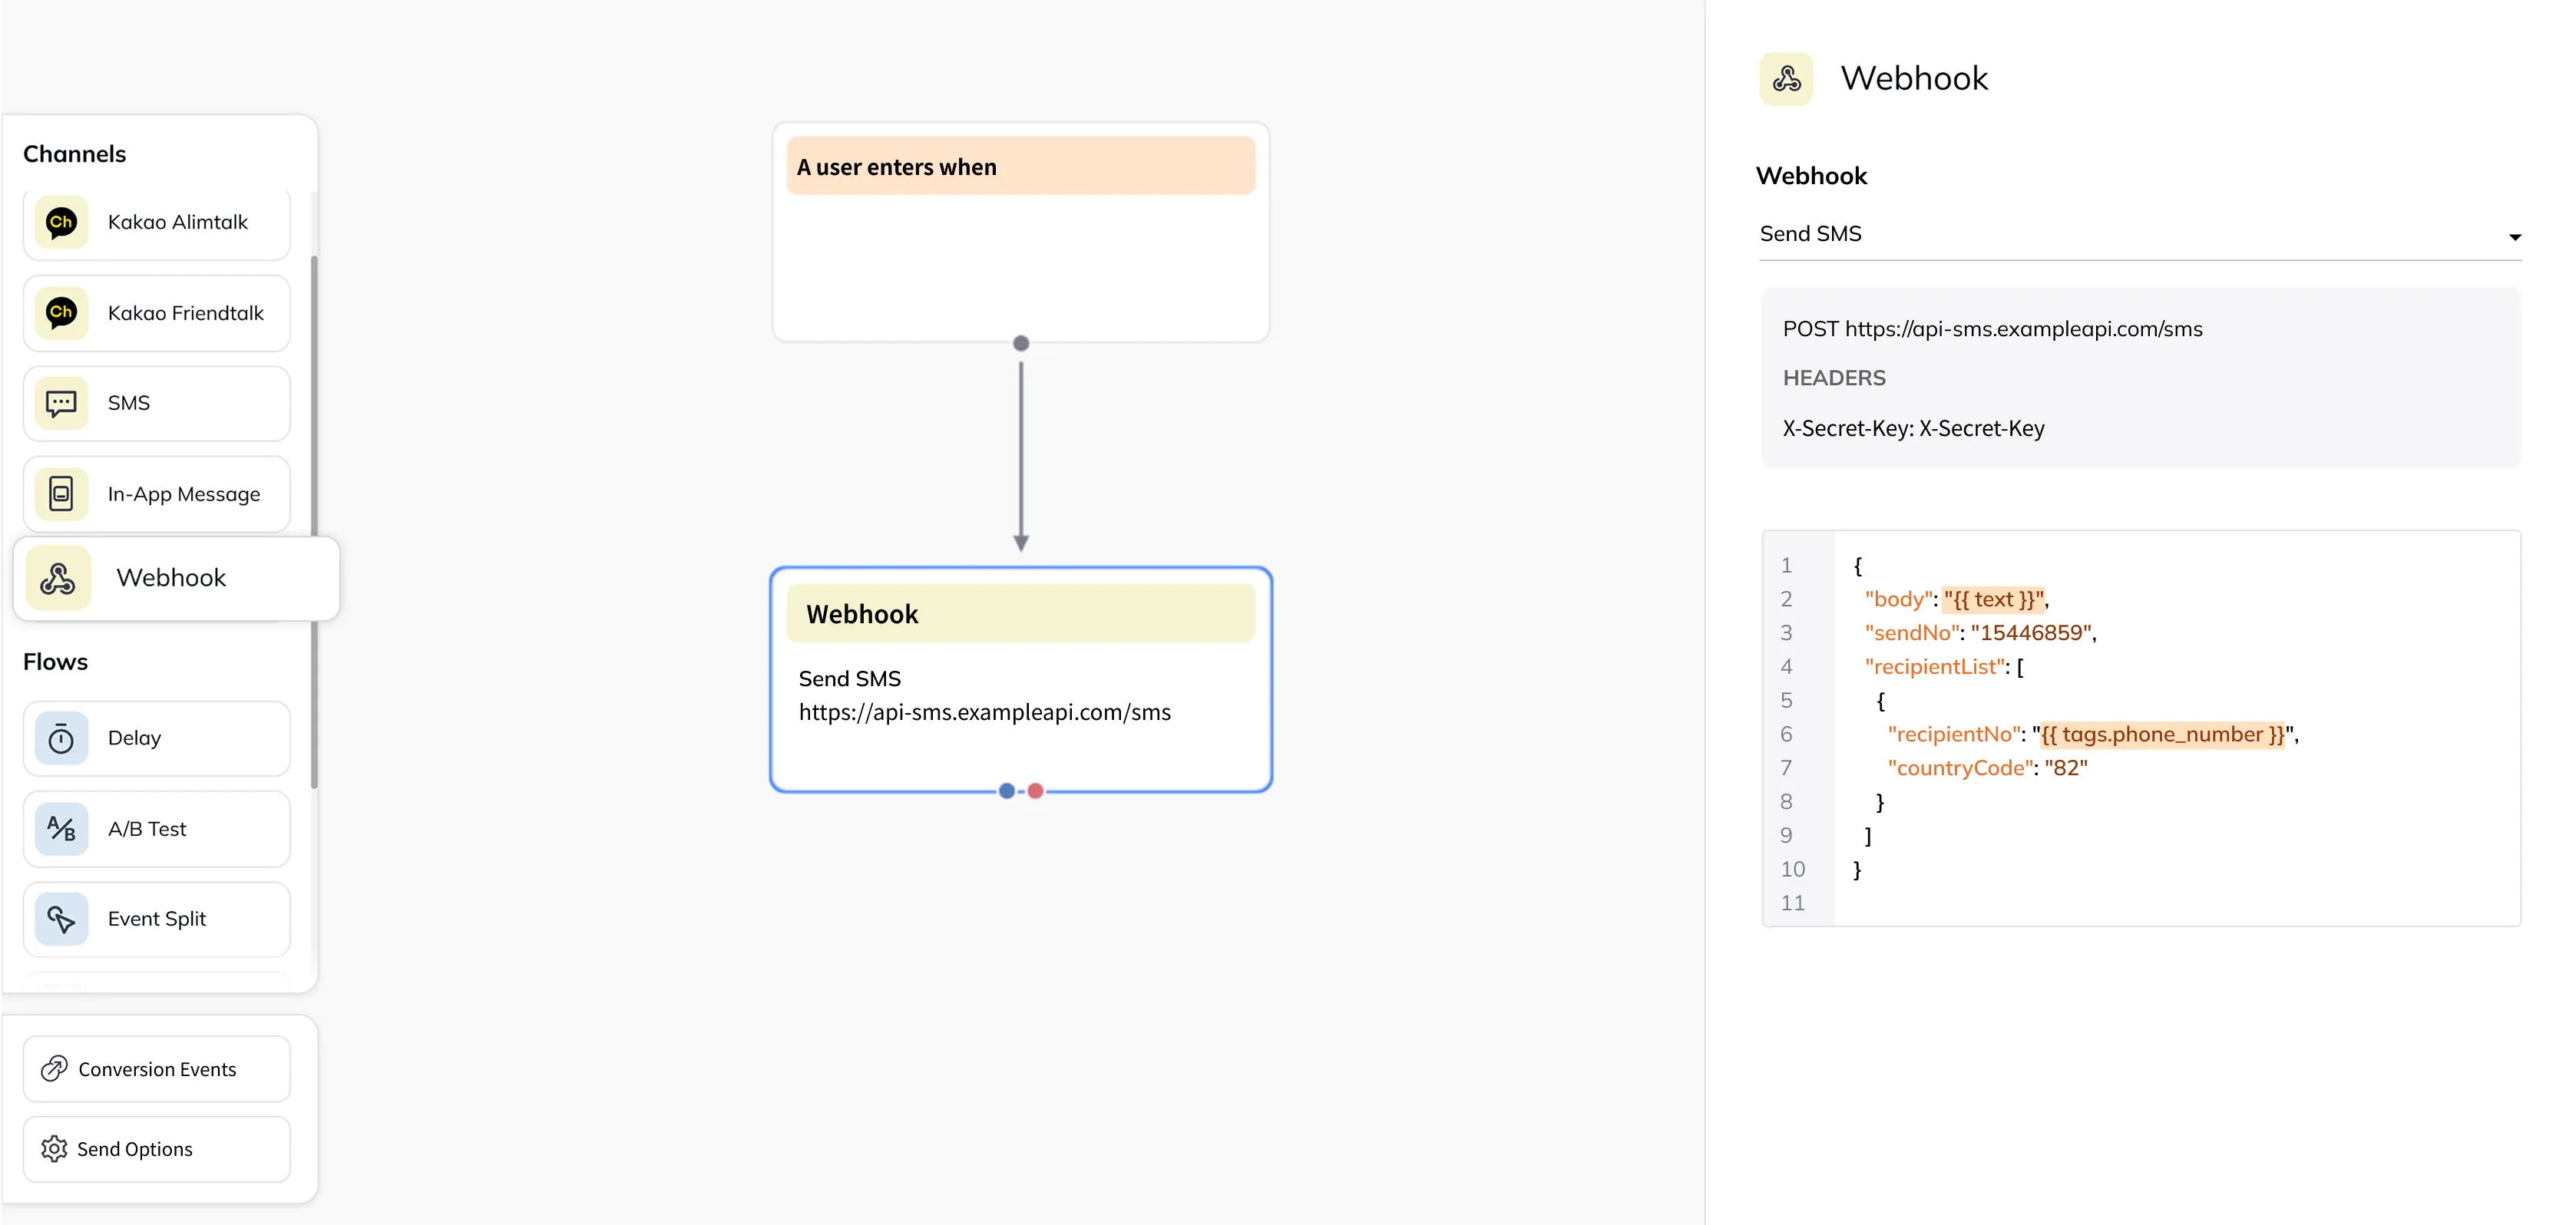
You can configure a created webhook as a webhook action within a customer journey.
If the webhook has input data fields, additional data fields are provided for entering them.
Test Send
Section titled “Test Send”
You can also run a send test for a specific user based on a created webhook. If you use data variables in the Personalized Messages (Liquid) syntax, an input field for entering the data opens alongside it.
Reviewing Send History
Section titled “Reviewing Send History”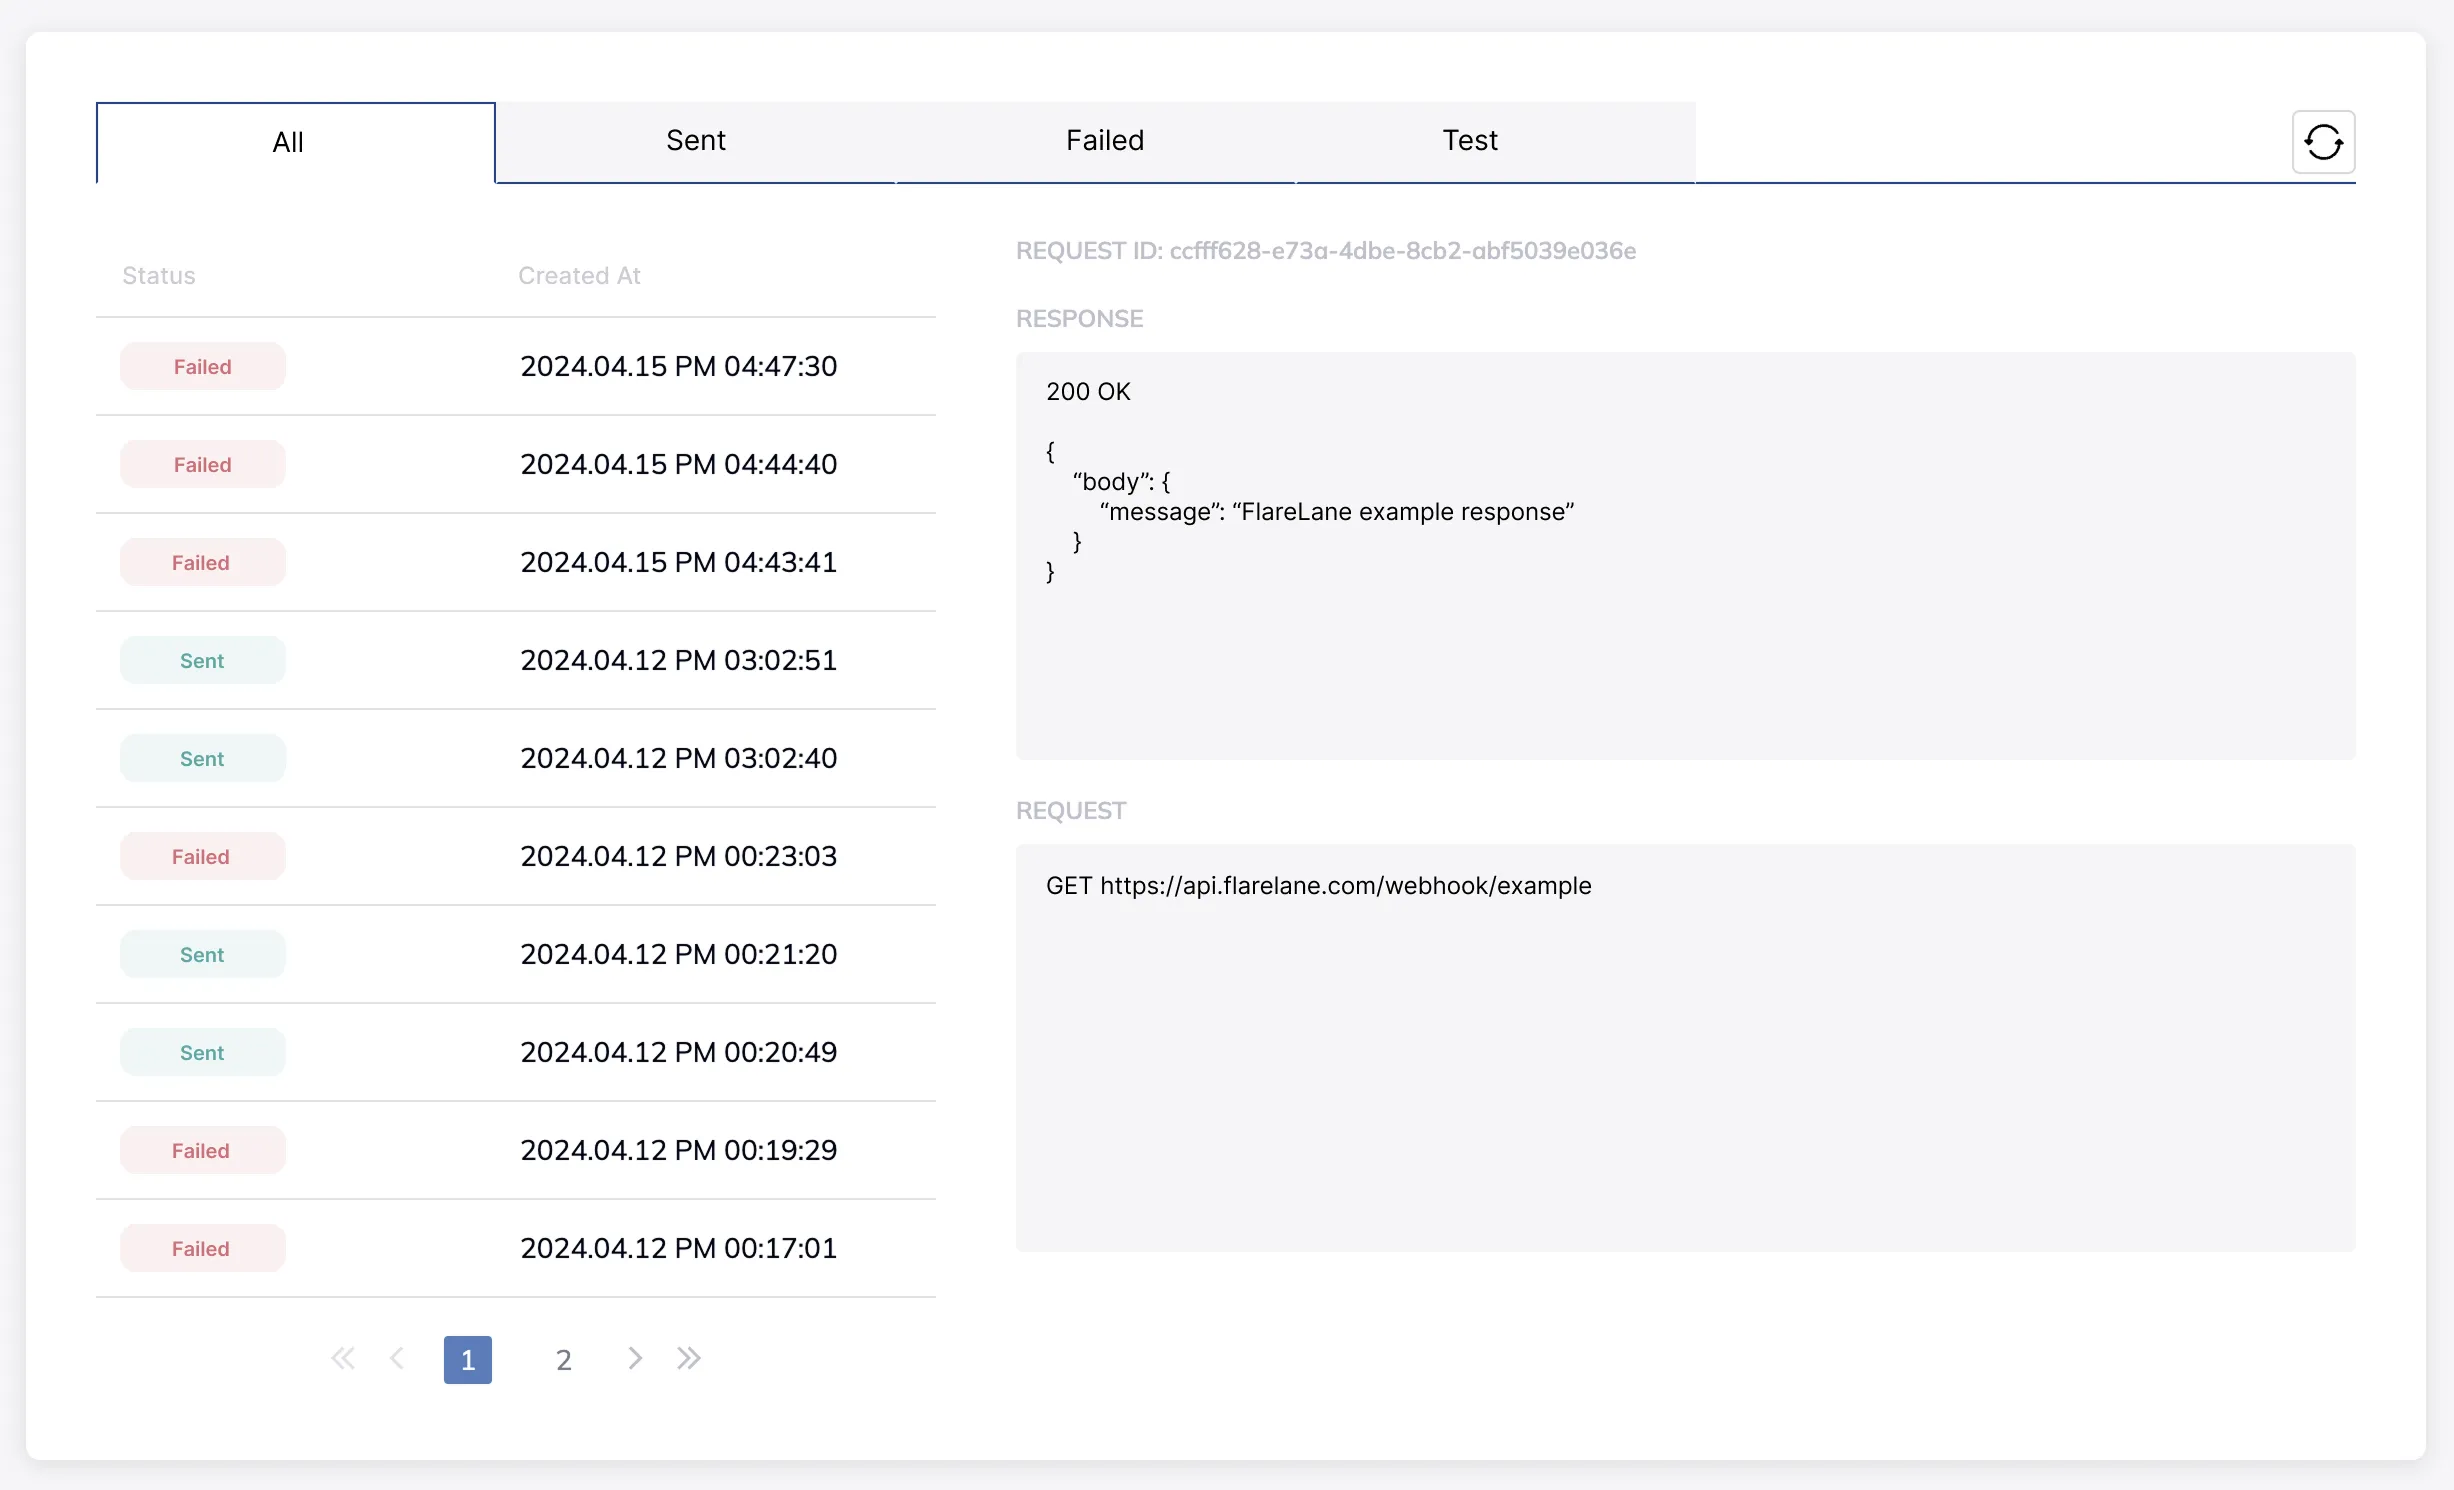
Webhook send history can be reviewed split into success and failure results. The request and response body at the time of sending are recorded in detail.