Web Push
Web Push is a messaging channel that lets you send push notifications to website visitors through their browser. Once a visitor grants notification permission, they can receive notifications even when they're not on your website, allowing you to drive return visits anytime.
Why Use Web Push?
Section titled “Why Use Web Push?”- It's the only channel that can reach the many "anonymous, non-member visitors" who were previously unreachable.
- It works across smartphones, tablets, PCs, and more, delivering high reach and response rates.
- It can significantly reduce the substantial sending costs of existing channels like SMS, Alimtalk, and Friendtalk.
Web Push vs. Other Channels
Section titled “Web Push vs. Other Channels”| Web Push | SMS | Alimtalk, Friendtalk | Mobile Push | |
|---|---|---|---|---|
| Cost | Low | High | Medium-High | Low |
| Reach anonymous non-member visitors | Yes | No | No | Yes |
| App install required | No | No | No | Yes |
| Message restrictions | None | Short text | Review required | None |
| Primary receiving devices | Smartphone Tablet PC | Smartphone | Smartphone | Smartphone Tablet |
Sending Web Push
Section titled “Sending Web Push”One-off Messages
Section titled “One-off Messages”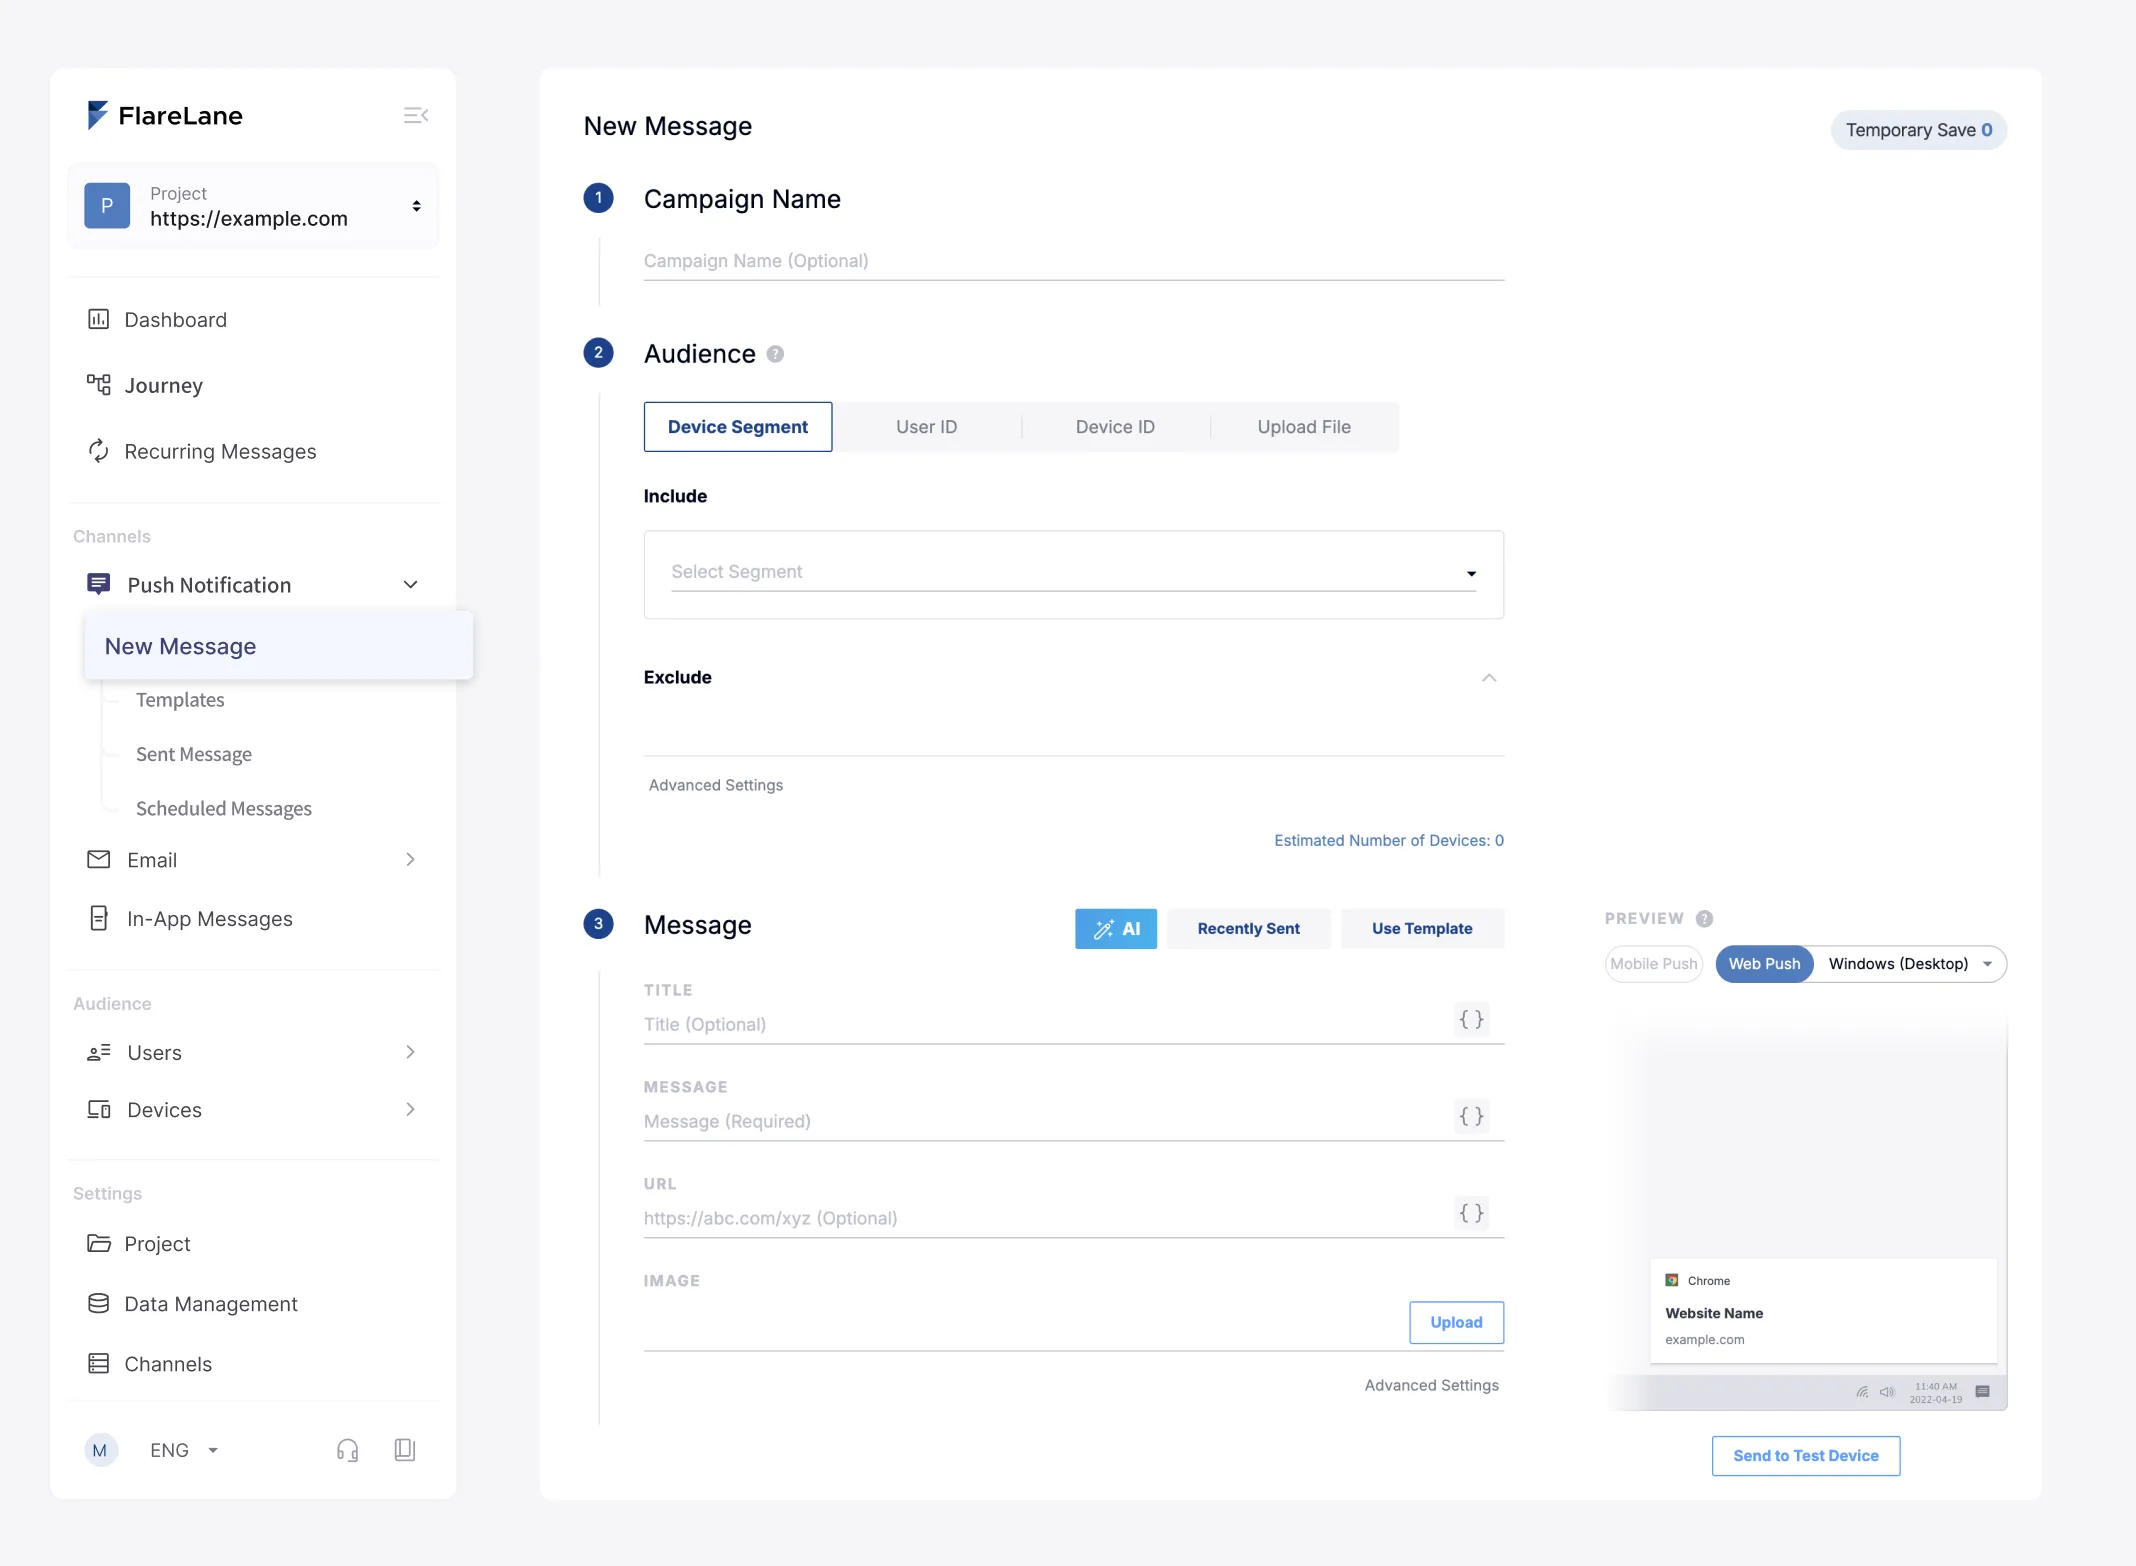
- Set your audience Define the recipients for your message. You can target a variety of conditions, including Segment Filters and CSV/Excel targets.
- Compose your message Compose your push message, including title, body, and image. You can also enter per-user personalization variables with the Personalized Messages (Liquid) feature. Refer to the URL & Deep Linking Guide to learn how to use URLs.
- Send a test Once your message is ready, you can send a test to internal team members to see how the actual message will look.
- Set up conversion events Set a goal event for the message you're sending, and you can perform conversion event setup and analysis based on the users who completed that action.
- Set the send timing You can send immediately or schedule the message for a specific time.
Customer Journey Automation
Section titled “Customer Journey Automation”To automate message sending, use the Customer Journey Automation feature. You can build data-driven automation based on events or customer profiles.
Reviewing Web Push Performance
Section titled “Reviewing Web Push Performance”FlareLane provides statistical metrics that let you analyze the performance of sent messages and gain insights.
How Web Push Works
Section titled “How Web Push Works”Web Push goes through three main stages: subscribe -> send -> receive.
1. Subscribing to Push Notifications
Section titled “1. Subscribing to Push Notifications”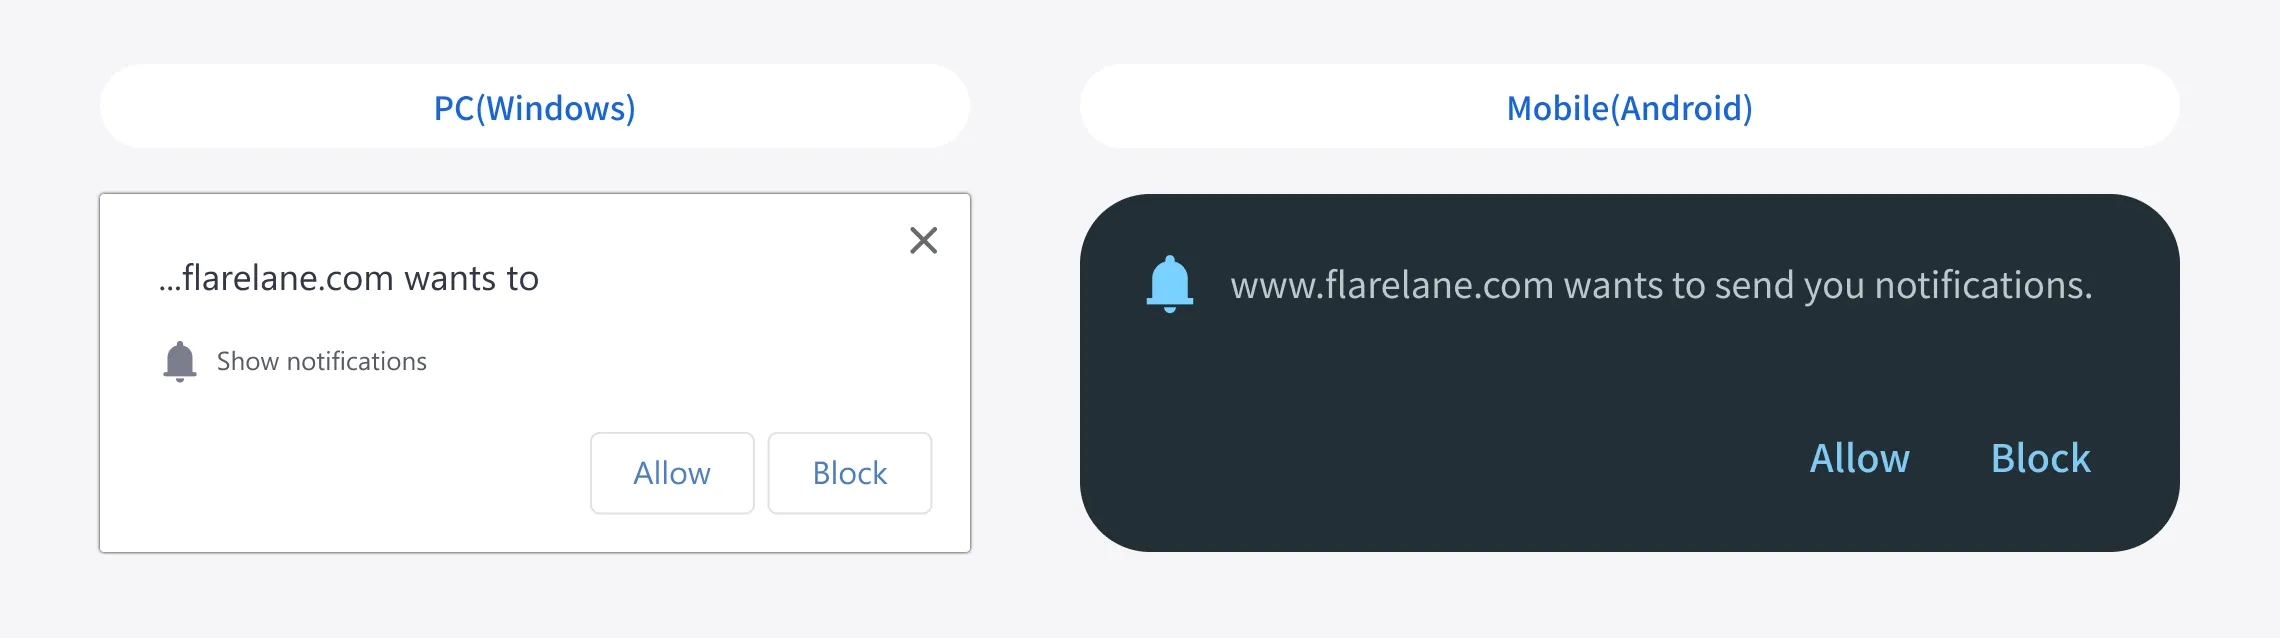
Once all integration is complete, a subscription prompt appears when a user visits your website. (The language varies depending on the browser language.)
When the user clicks Allow, they automatically become subscribed to notifications, and from that point on they can receive notifications even after leaving the browser.
2. Sending Push
Section titled “2. Sending Push”Through FlareLane, you can send push notifications to devices that have subscribed to web push.
3. Receiving Push
Section titled “3. Receiving Push”Sent push notifications are displayed through the browser app (such as Chrome) the user visited your website with.
Appearance by Device Type
Section titled “Appearance by Device Type”Web Push is supported on all devices with a browser installed, including PCs, tablets, and smartphones. However, the appearance varies slightly depending on the operating system.
Mobile OS (Android)
Section titled “Mobile OS (Android)”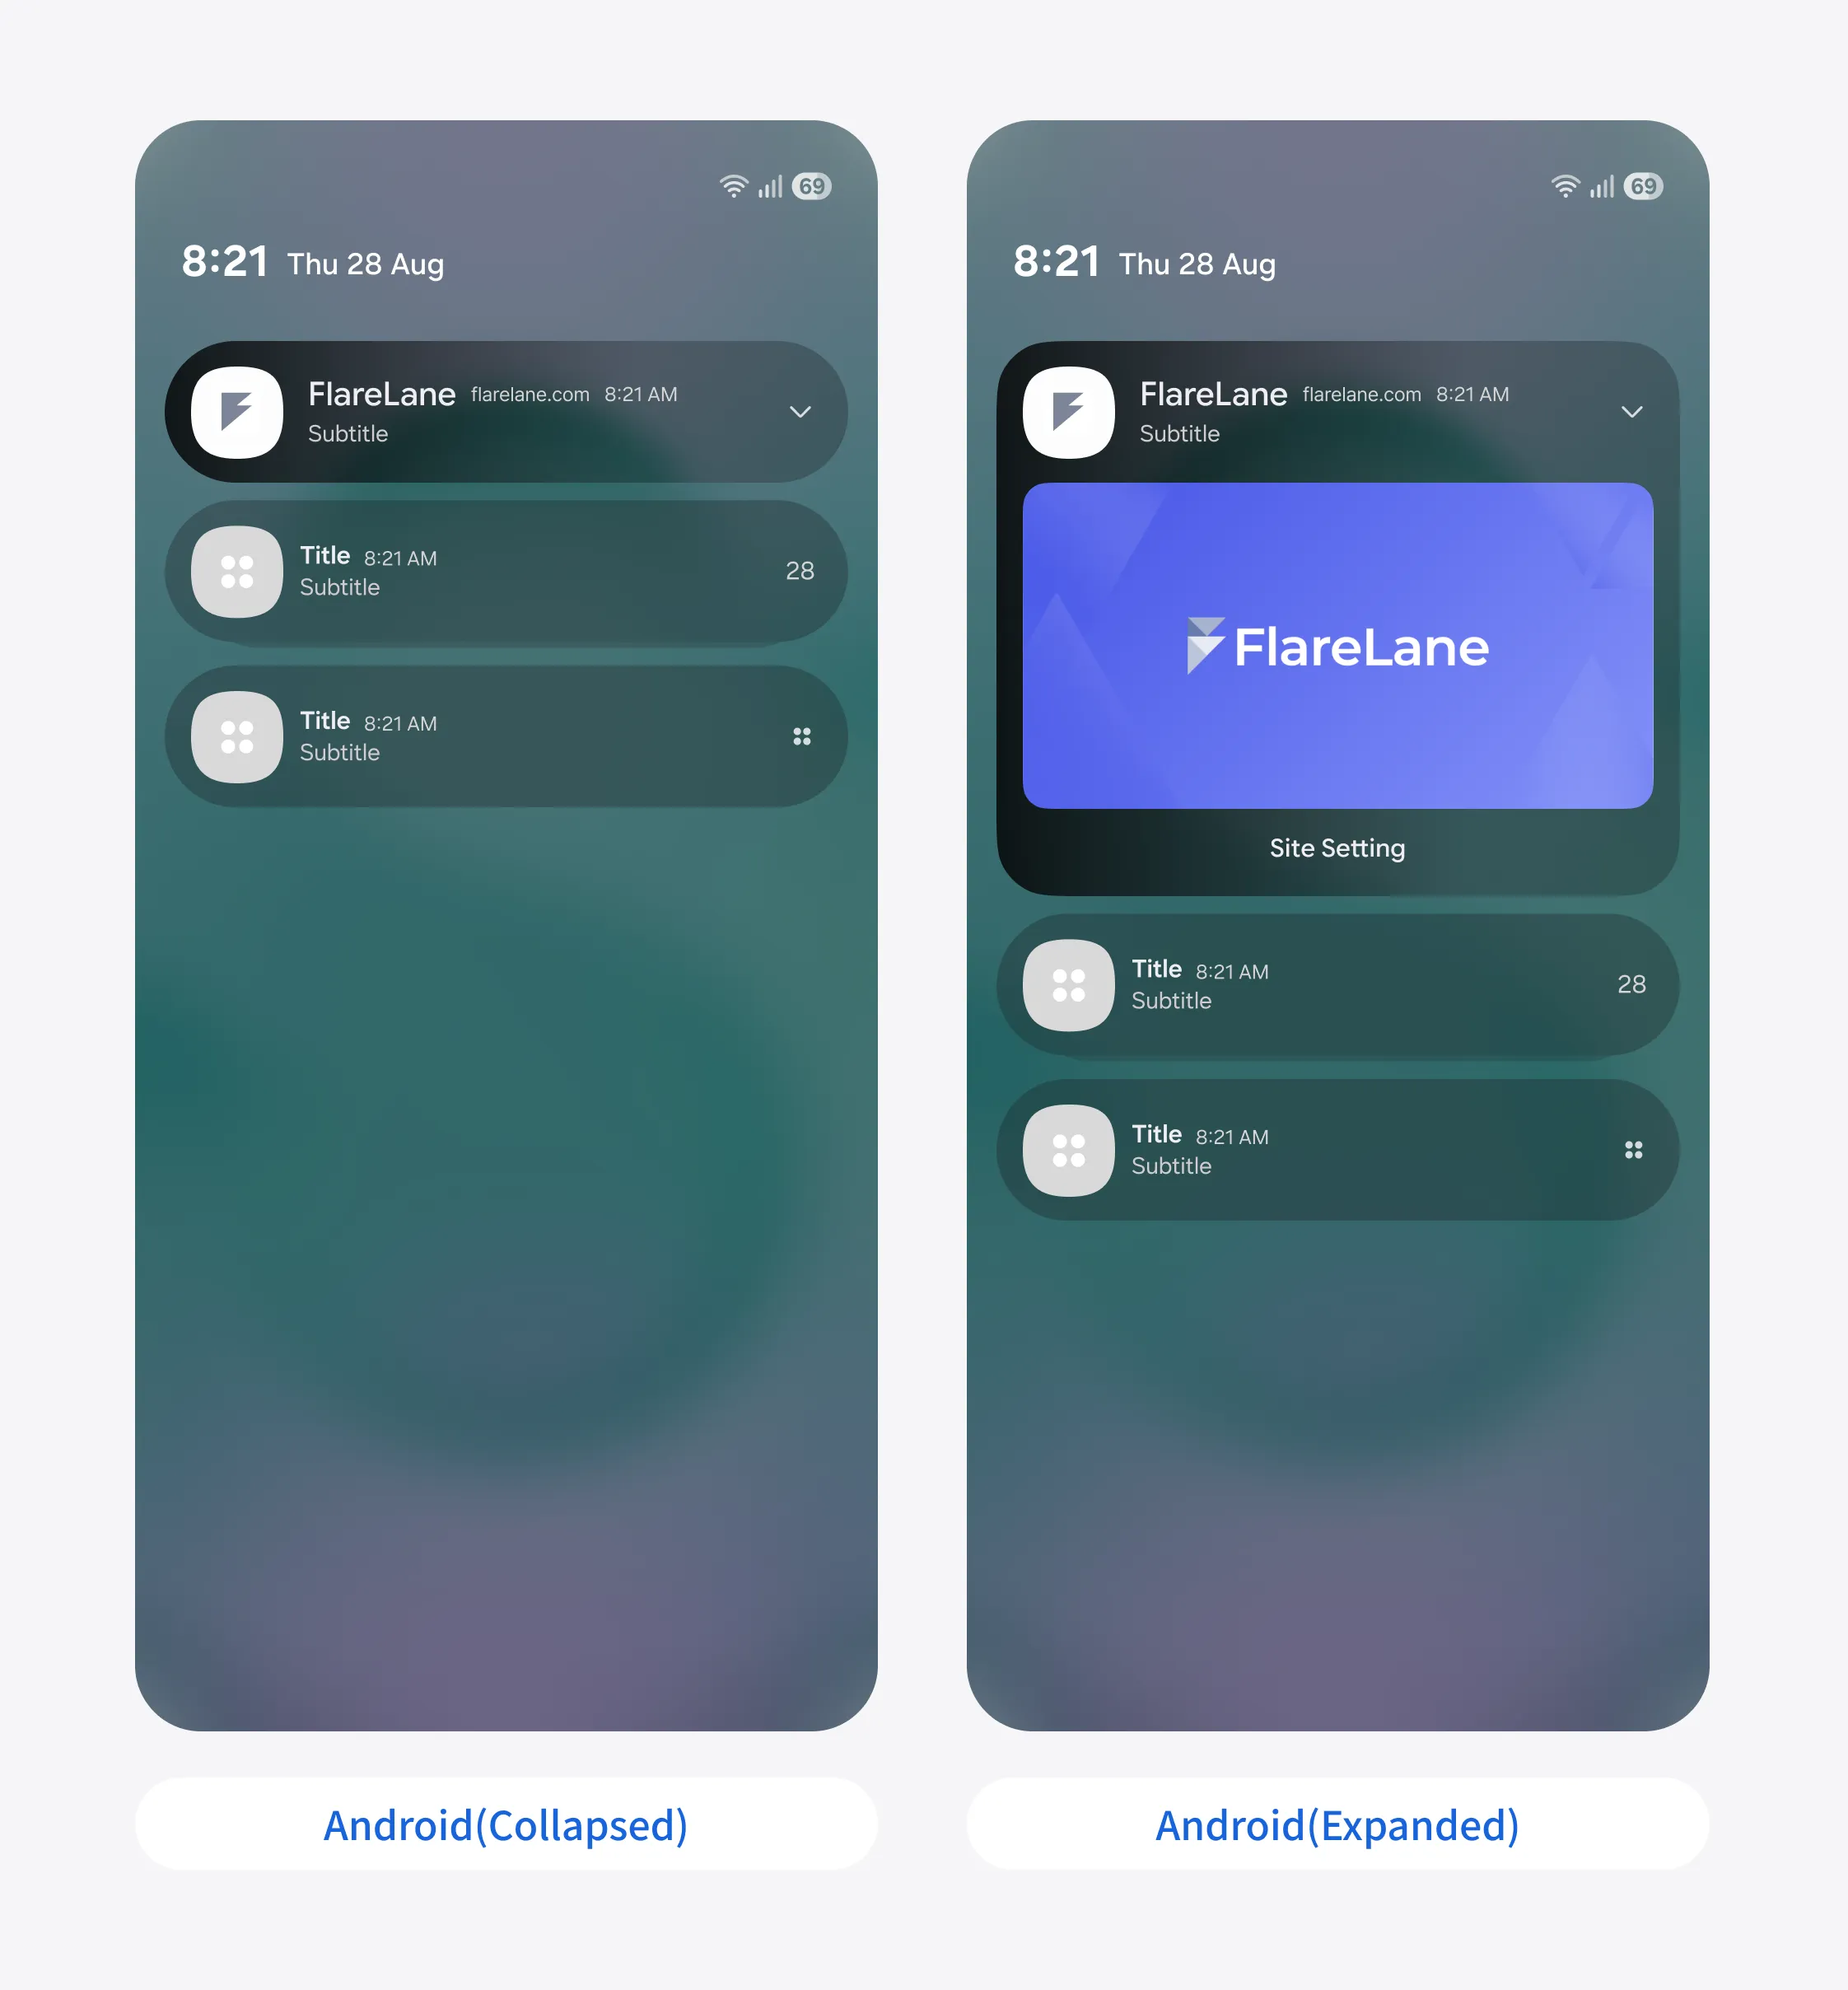
Mobile OS (iOS)
Section titled “Mobile OS (iOS)”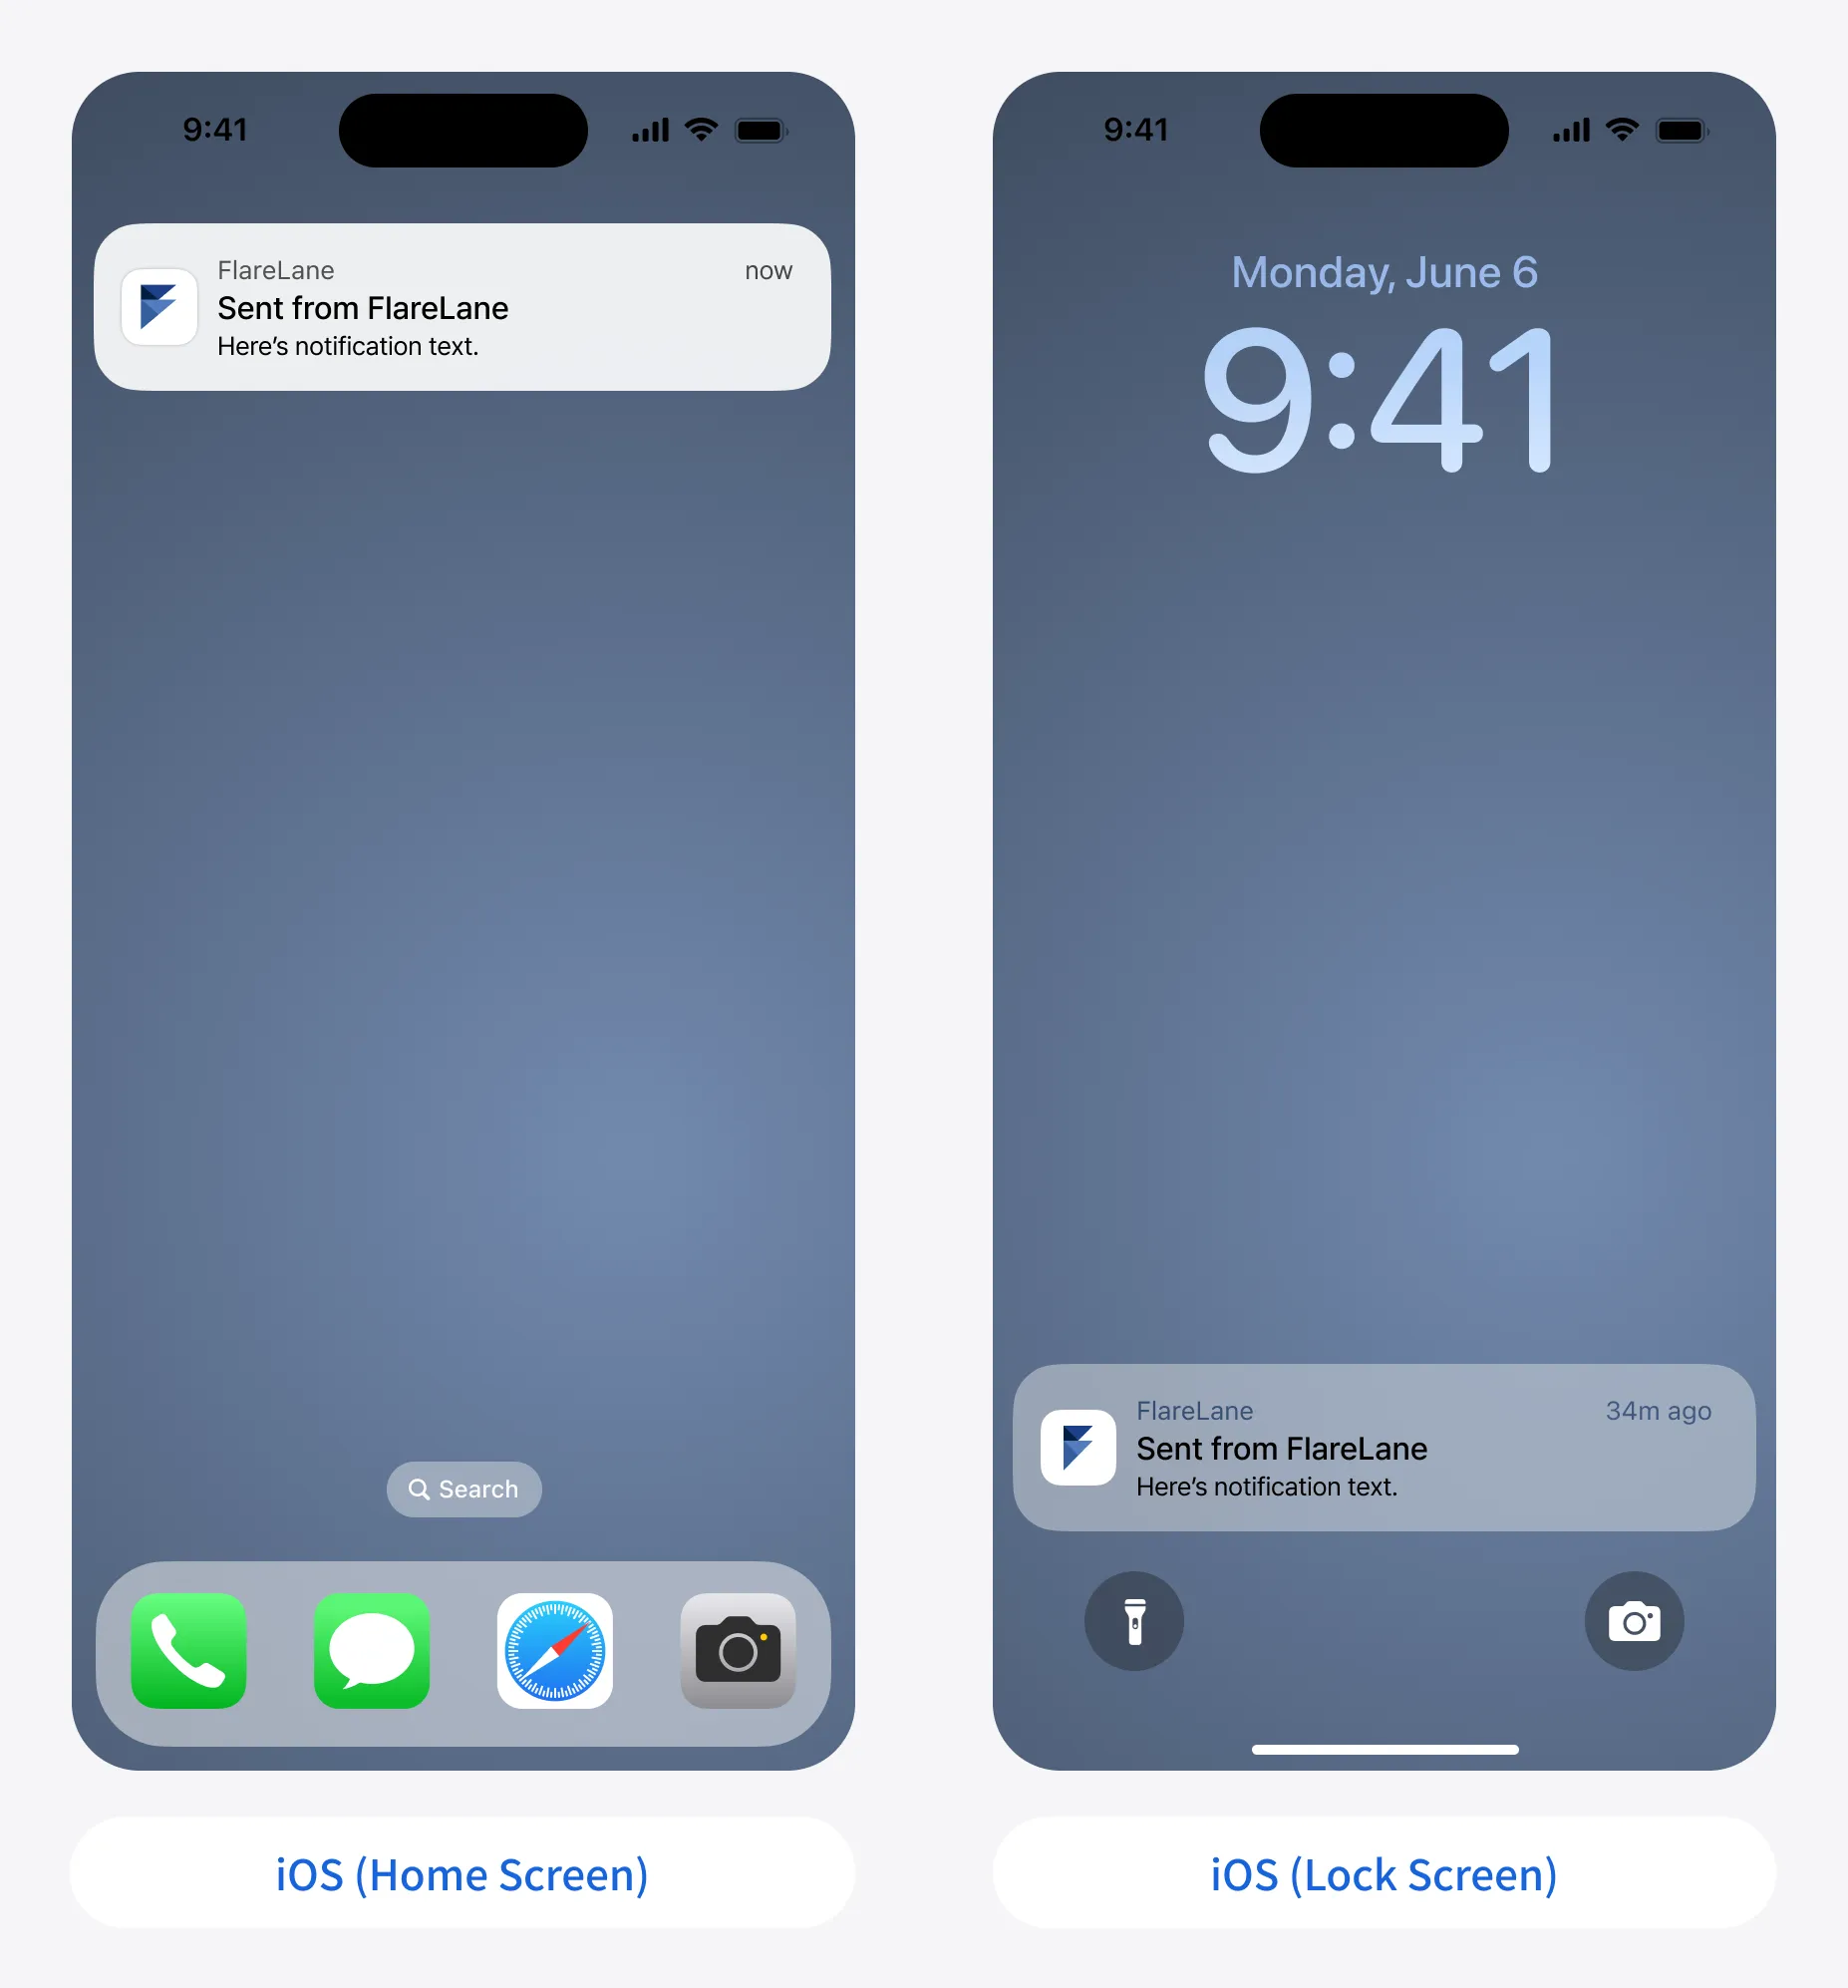
Desktop OS (Windows, macOS)
Section titled “Desktop OS (Windows, macOS)”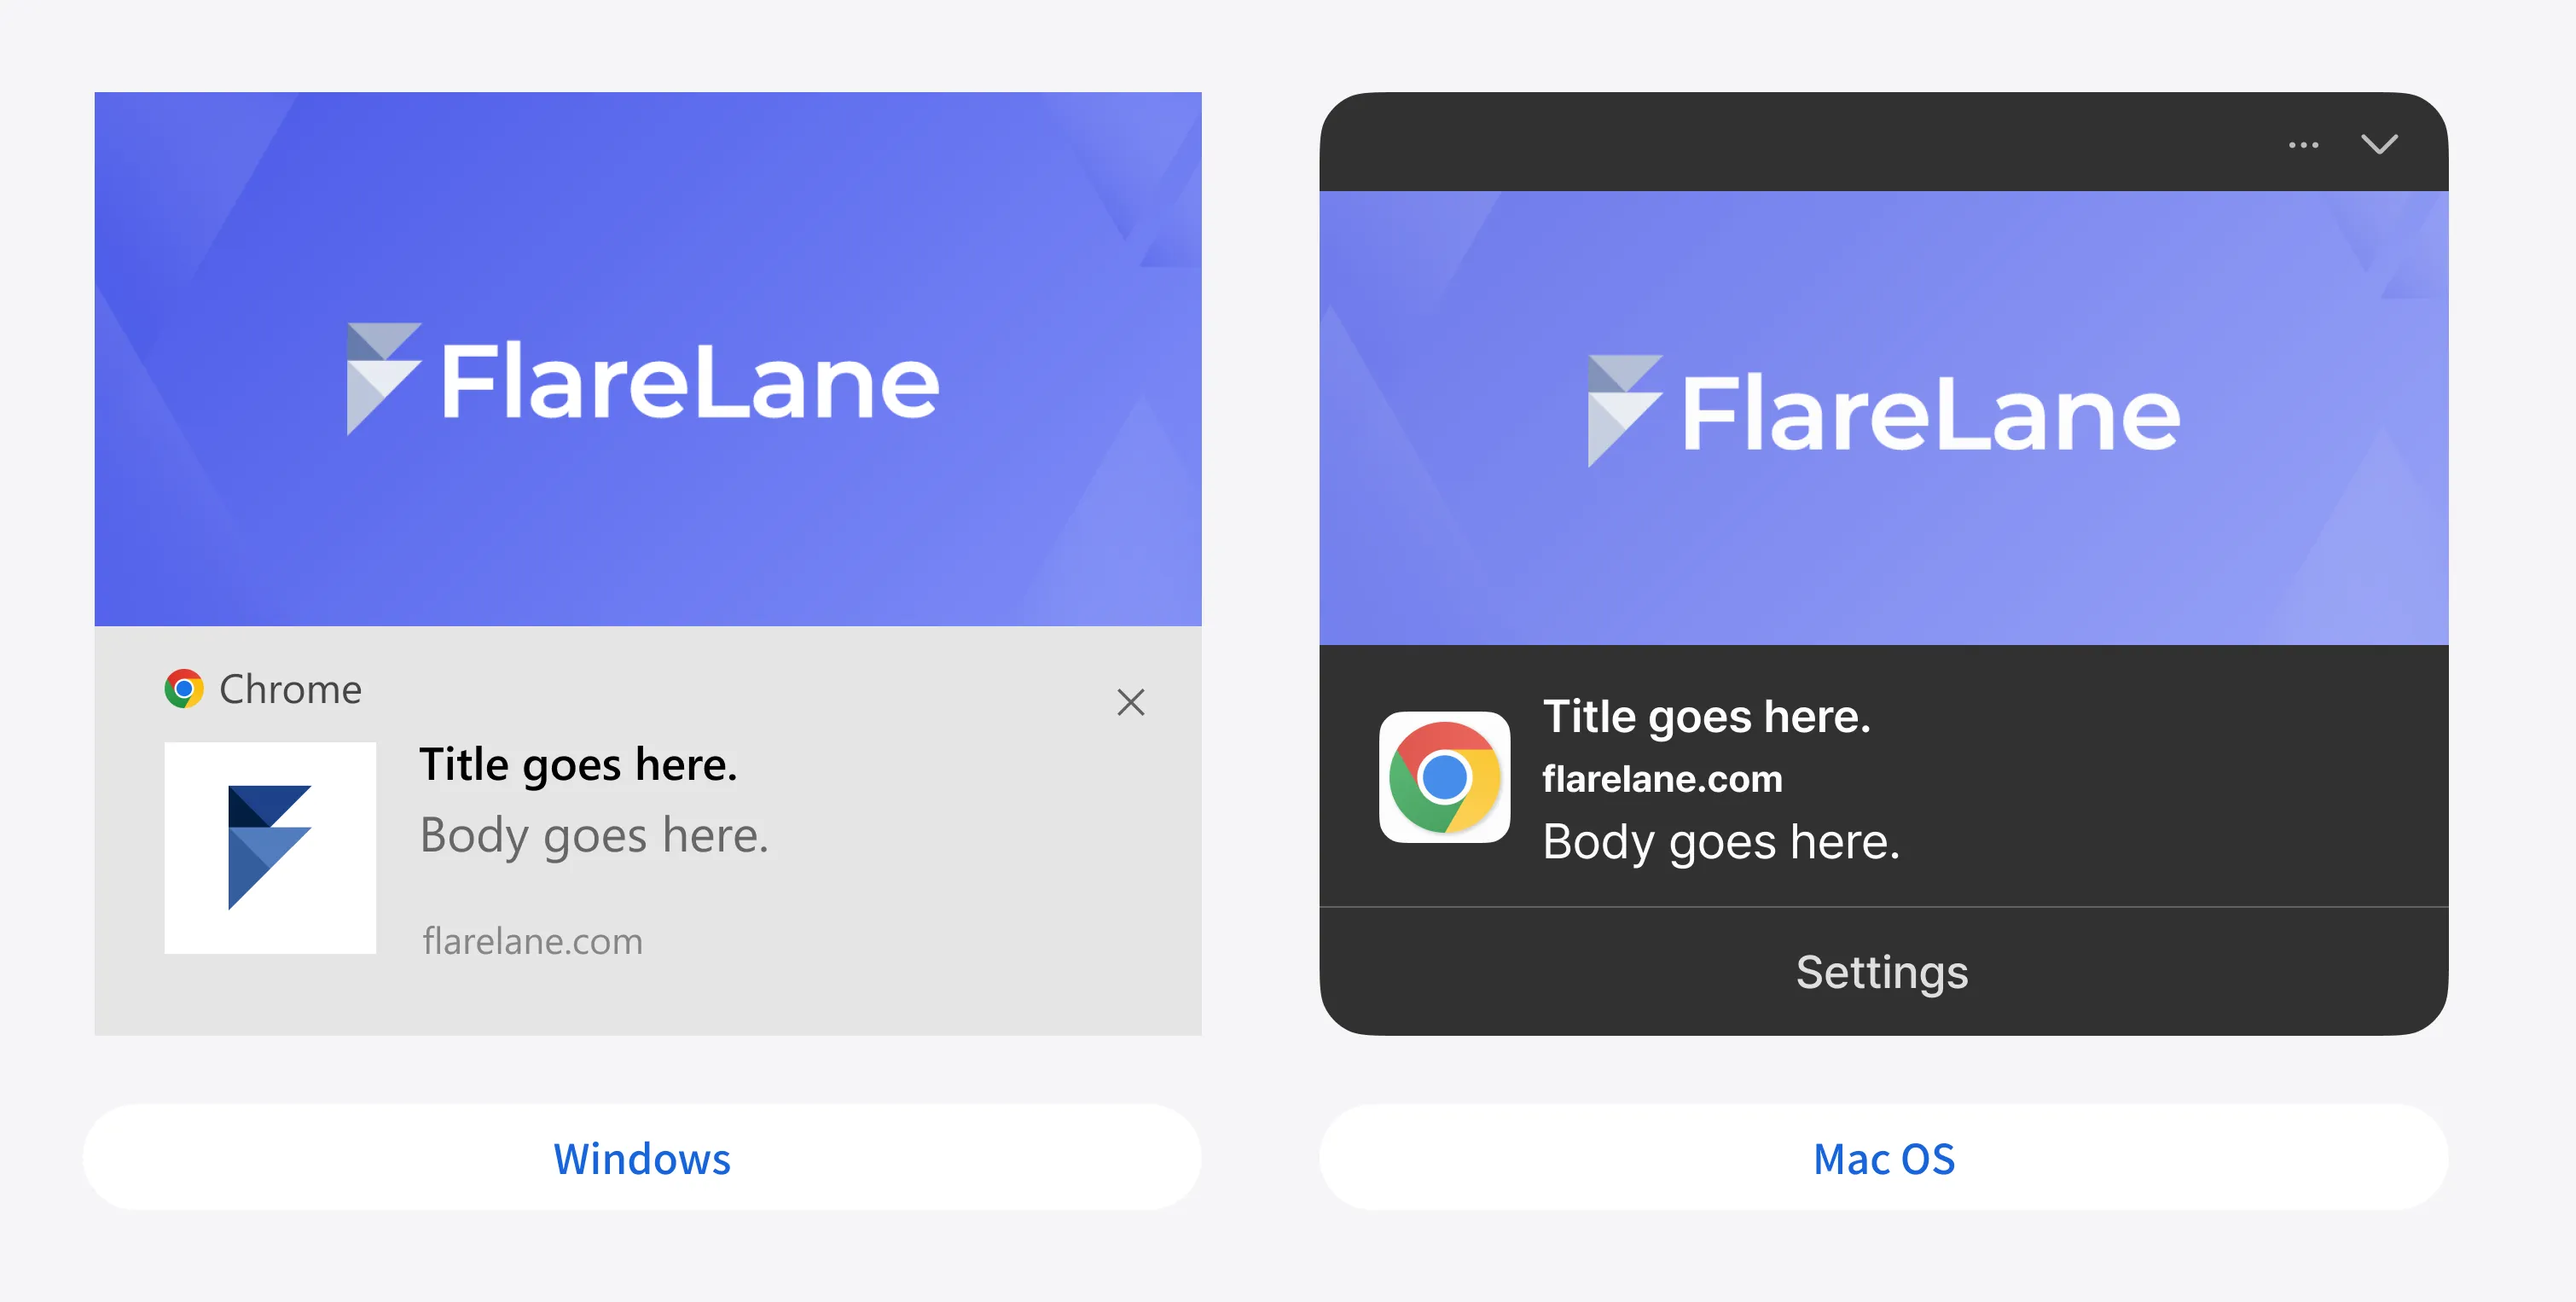
Web Push Specifications
Section titled “Web Push Specifications”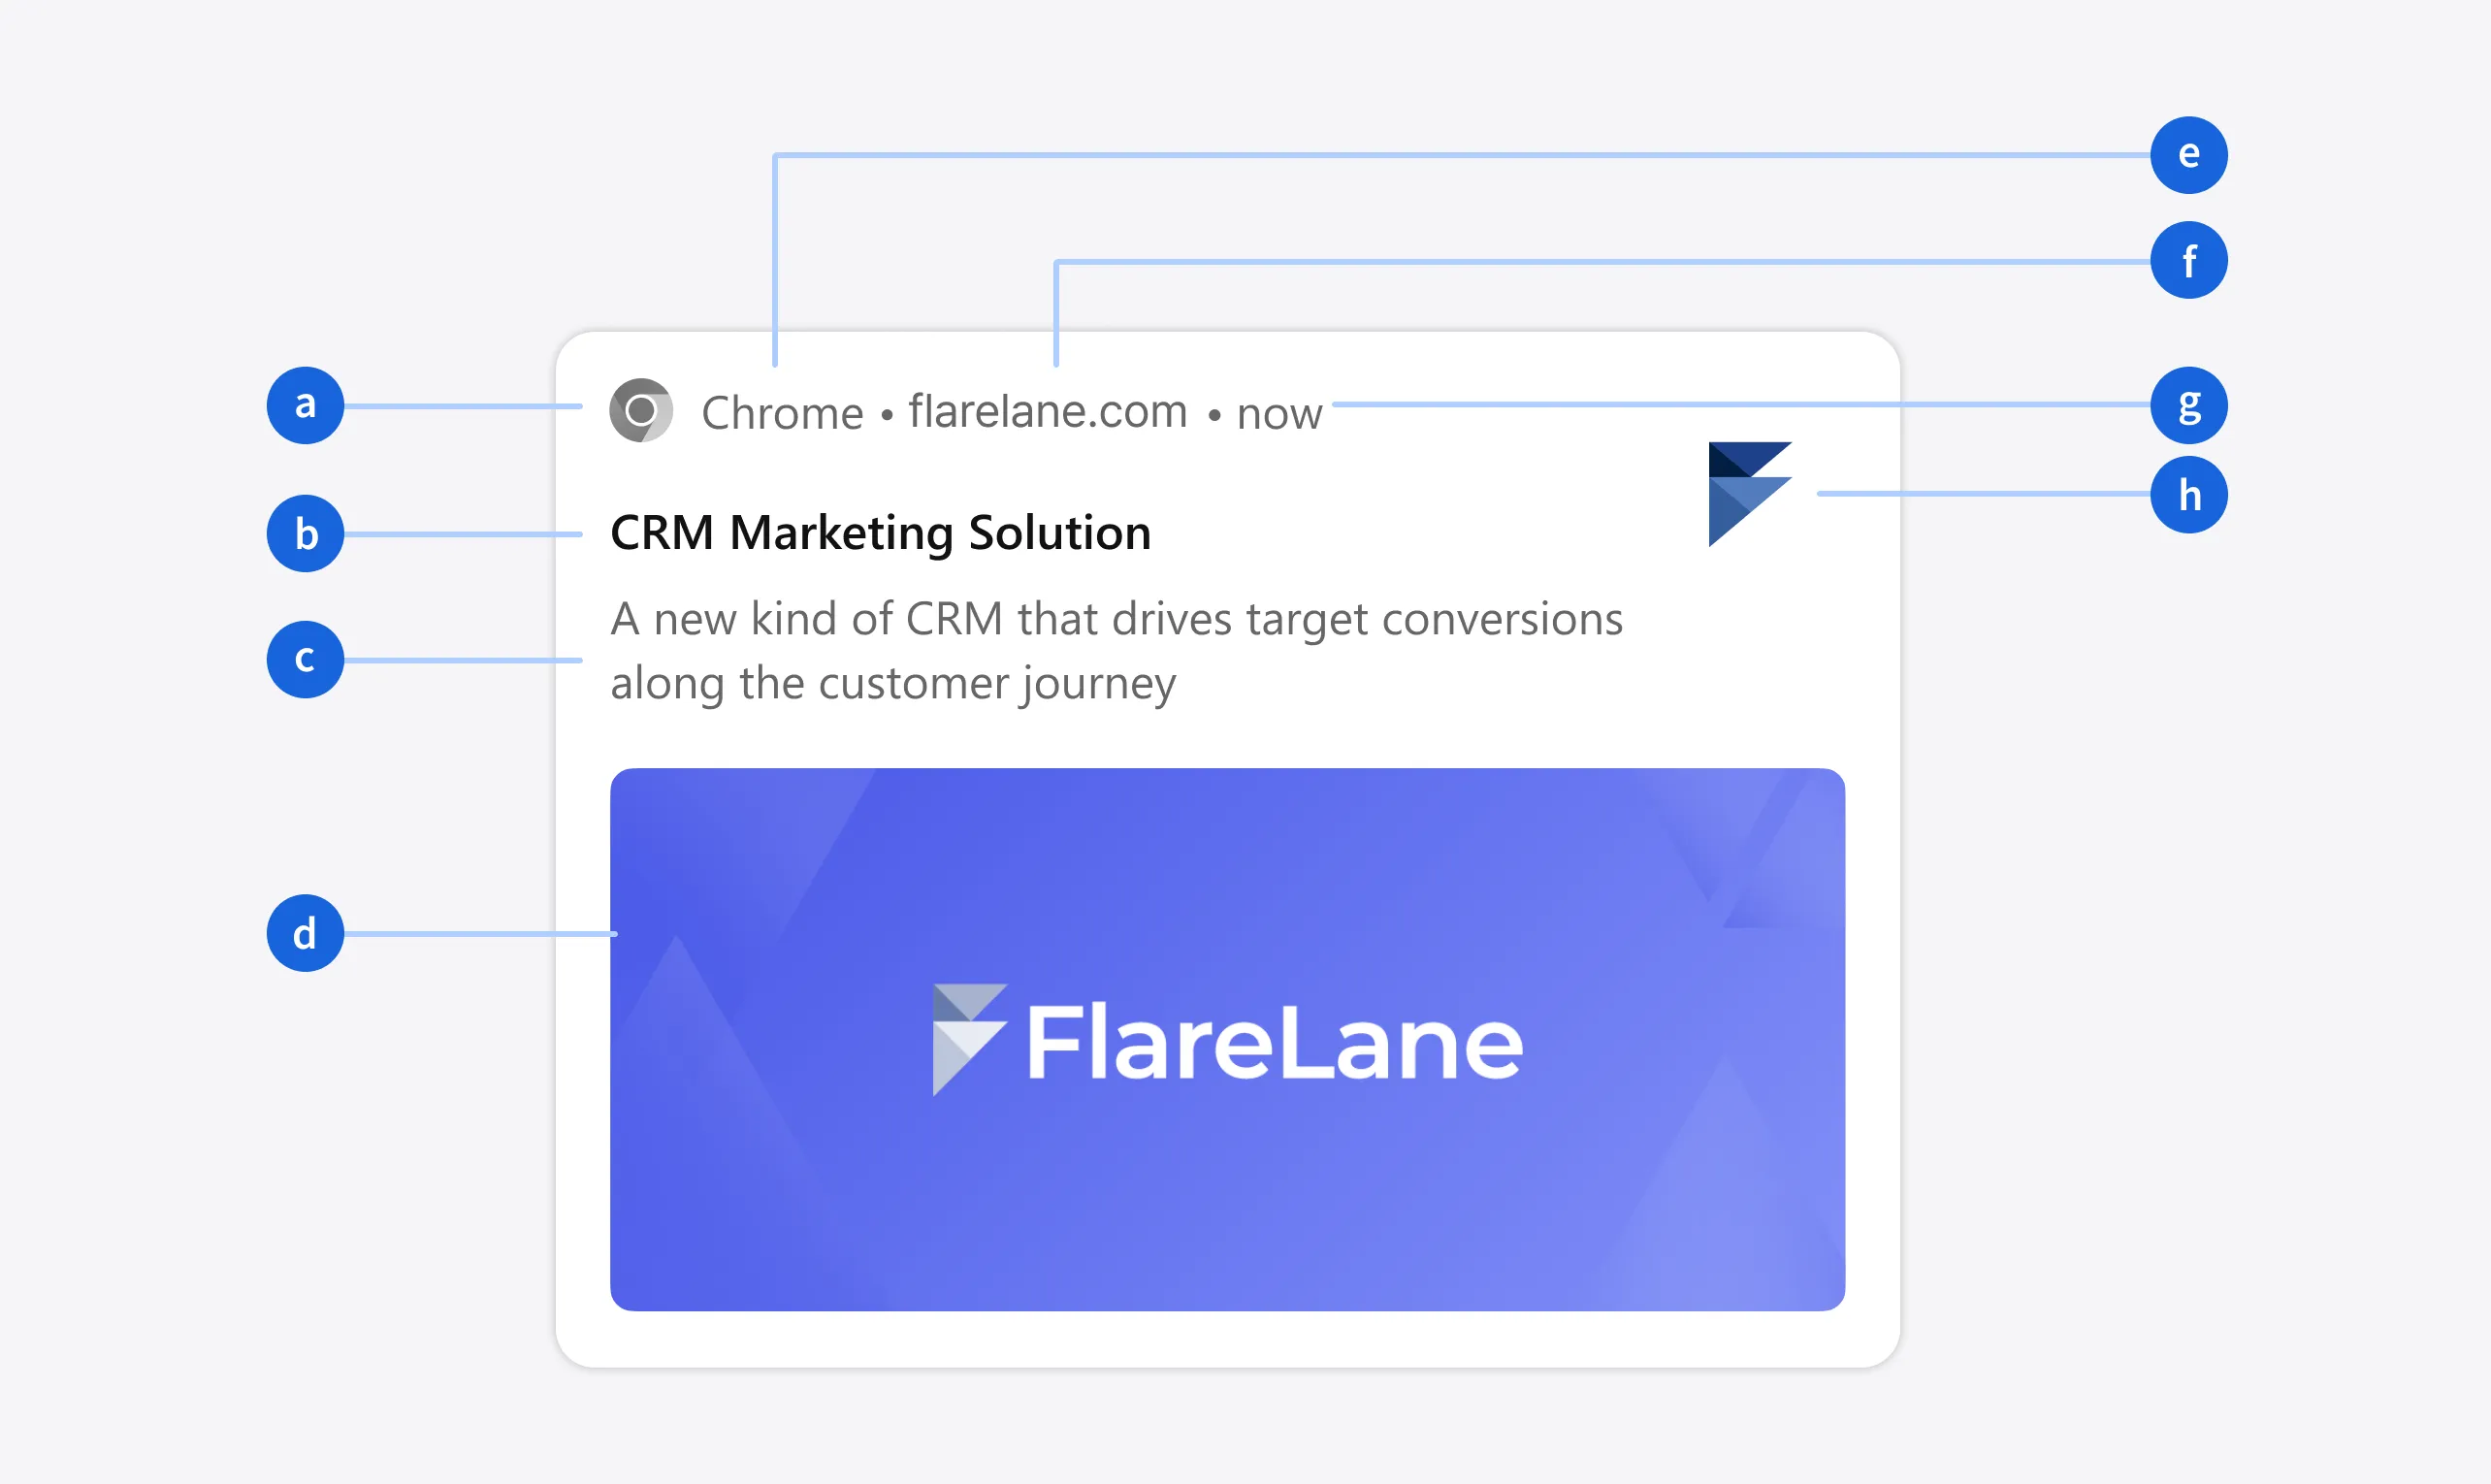
| Item | Description |
|---|---|
| a (badge) | Square image of at least 72x72, a "black" icon on a transparent background (configured separately) |
| b (title) | Limited to 60 characters |
| c (body) | Limited to 150 characters |
| d (image) | Landscape image of at least 1440x720 with a 2:1 ratio (GIF not supported) |
| e (browser) | The subscribed browser; cannot be changed |
| f (domain) | The subscribed site; cannot be changed |
| g (time) | The time the notification was received; cannot be changed |
| h (icon) | Square image of at least 256x256 (configured separately) |